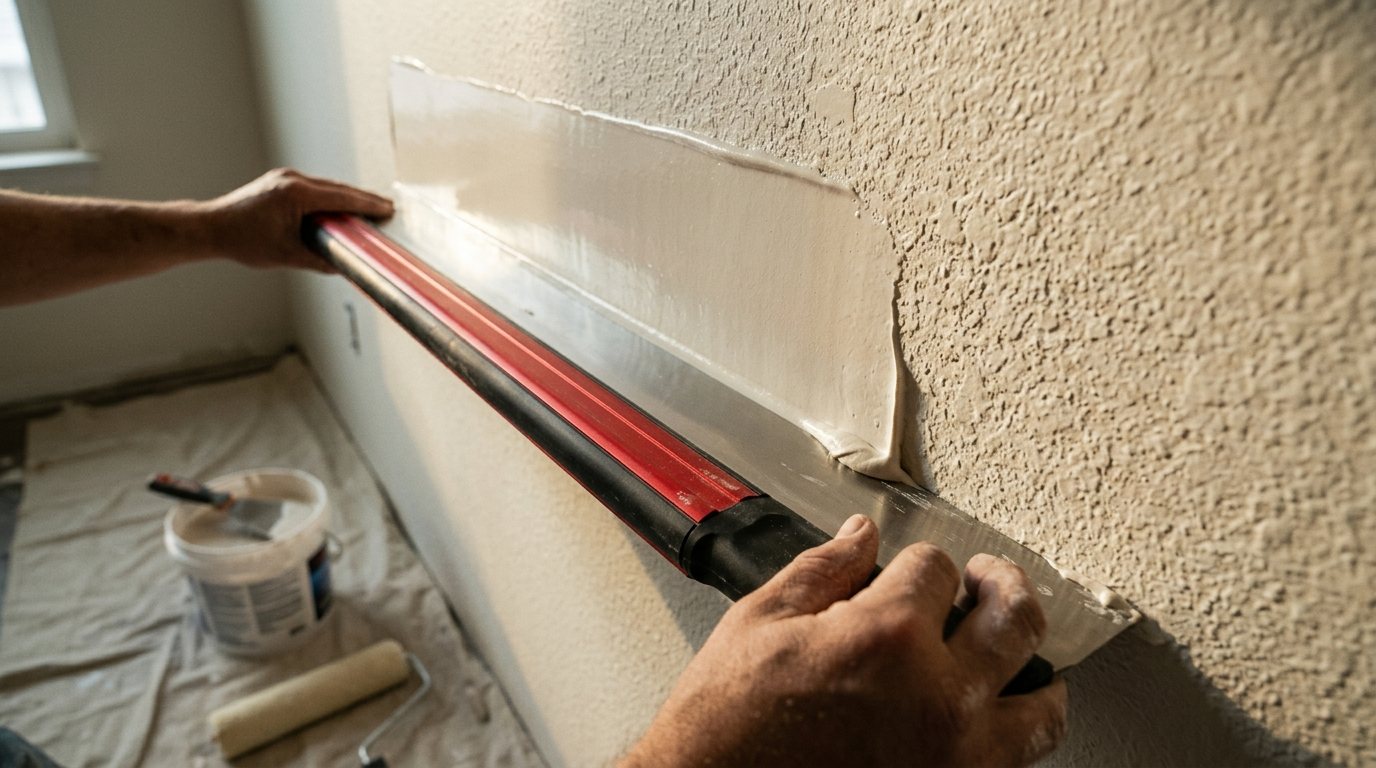
Some walls are beyond spot repairs. Maybe you peeled off wallpaper and tore the drywall paper, inherited a dated orange-peel texture, or have an old plaster wall covered in patches and fine cracks. Every coat of paint just highlights the problem, especially when sunlight rakes across the surface.
A skim coat fixes that by covering the whole wall with a thin, even layer of joint compound. This guide explains when skim coating is the right fix, the tools you need, how to mix and thin compound, the beginner-friendly roller-and-knife method, and how to sand, prime and control dust so the rest of your home stays clean.
Quick answer: Clean the wall, fix loose or damaged areas, and seal any torn drywall paper. Thin premixed joint compound with a little water to a thick yogurt consistency, roll it onto a 3 to 4 foot section with a 1/2 inch nap roller, then pull it smooth with a wide skimming blade. Let it dry, scrape off ridges, apply a second coat in the opposite direction, sand lightly, prime and paint.
When to skim coat a wall
Skim coating takes time and makes a mess, so it is worth confirming it is the right repair. It makes sense when the problem covers most of the wall rather than a few spots:
- Textured walls you want smooth, such as orange peel or knockdown
- Wallpaper removal damage, including torn drywall paper and glue residue (see our guide on how to remove wallpaper)
- Old plaster with spiderweb cracks that is still firmly attached
- Patchy walls with many old repairs, anchors or uneven seams
- Walls that will get a higher-sheen paint or strong side lighting, which shows every flaw
Skim coating is not the fix for loose or sagging plaster, water-damaged drywall, or walls with active moisture problems. Repair those first; our guide on how to repair plaster walls covers reattaching loose plaster. For one or two holes, a spot repair like patching a drywall hole is faster.
Tools and materials
- Premixed all-purpose joint compound (a 4.5 gallon bucket covers a lot of wall)
- Optional lightweight or topping compound for easier-sanding final coats
- Drill with a mixing paddle and a clean 5 gallon bucket
- Paint roller frame, 1/2 inch nap covers and a paint tray or bucket grid
- Wide skimming blade (14 to 24 inch) or a 12 inch taping knife, plus a 6 inch knife and mud pan
- Pole sander or sanding sponges, 120 grit and finer
- Drop cloths, plastic sheeting, painter’s tape and a shop vacuum, ideally with a HEPA filter
- Safety glasses and an N95 or better respirator for sanding
- Primer suited to new joint compound, then your paint
Prep the wall and the room
- Protect the room. Remove outlet and switch covers, mask trim, and cover floors with drop cloths taped at the edges. Close off doorways with plastic sheeting to contain sanding dust.
- Clean the surface. Wash off grease, dust and wallpaper paste with warm water and a mild cleaner. Compound will not stick well to a dirty or glossy wall, so scuff any satin or semi-gloss paint with sandpaper.
- Fix the problems underneath. Scrape loose paint, fill deep holes ahead of time, and secure any loose plaster. A skim coat only bridges a sound surface.
- Seal torn drywall paper. Exposed brown paper soaks up moisture from the compound and bubbles. Brush on a shellac- or oil-based primer over any torn areas and let it dry before skimming.
Safety note: In homes built before 1978, old paint may contain lead, and some older wall and ceiling textures contain asbestos. Have the surface tested before you scrape or sand, and follow lead-safe practices from the EPA’s Renovation, Repair and Painting program if lead is found.
How to mix and thin joint compound
Thinned compound spreads farther, rolls on evenly and leaves fewer tool marks. Too thin, though, and it shrinks, sags and grips poorly, so add water slowly.
- Scoop several gallons of premixed compound into a clean bucket.
- Add a small amount of clean water, about a cup at a time.
- Mix with a paddle on a low drill speed to avoid whipping in air bubbles.
- Stop when it looks like thick yogurt or pancake batter: it should roll on without dripping off the roller and hold a ridge briefly when you lift the knife.
Keep the bucket covered between batches so the surface does not skin over. If you use powdered setting compound, mix only what you can apply within its working time, since it hardens chemically and cannot be thinned once it starts to set.
The roller-and-knife skim coat method
1. Roll on a section
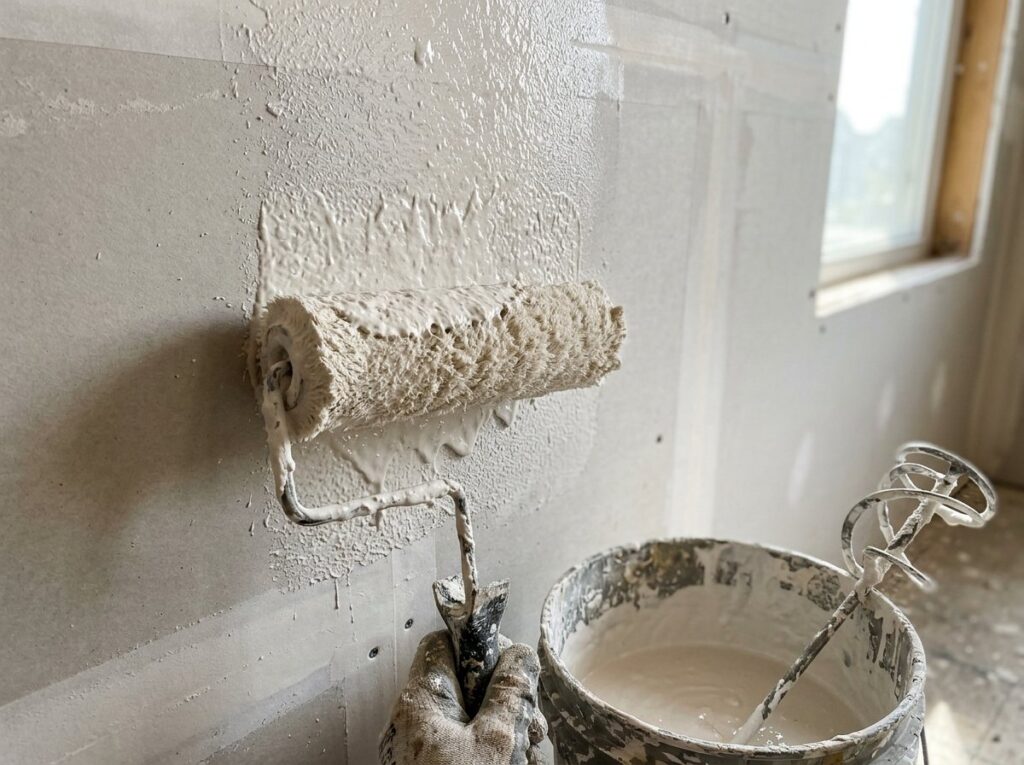
Load the roller with compound and roll it onto a section about 3 to 4 feet wide, from ceiling to floor or in two halves on tall walls. Aim for an even layer roughly as thick as a heavy coat of paint. Do not try to fill deep low spots in one pass.
2. Pull it smooth with the blade
Hold the skimming blade at a low angle and pull it across the section in long, steady strokes, top to bottom, with slightly more pressure on the leading edge. The blade removes most of the compound and leaves a thin film that fills texture and small dips. Scrape the excess off the blade into a mud pan, not back into your clean bucket.
3. Overlap and keep moving
Roll the next section, overlapping the last one by a few inches, and knock it down the same way, feathering lightly into the previous section. Work at a steady pace so the edges do not dry between sections. Do not go back over compound that has started to stiffen, as you will drag it off the wall.
4. Let it dry and knock off ridges
Let the first coat dry completely. It turns an even, lighter color when dry; Angi notes drying can take 24 hours in humid rooms. Before the second coat, run a 6 inch knife over the wall to shave off ridges and crumbs, which saves sanding later.
5. Apply the second coat in the opposite direction
Repeat the process, pulling the blade horizontally if the first coat went vertically. Changing direction fills the low spots the first coat missed. Most walls need two coats, and heavy texture or damaged walls may need a third.
Pro tip: Hold a bright work light flat against the wall after each coat. Low-angle light shows ridges, pinholes and dips that look invisible under ceiling lights, so you can fix them before the next coat instead of after painting.
Sanding, priming and painting
Sanding with less dust
If your knife work was clean, the final coat needs only a light sanding. Use a pole sander or sanding sponge with 120 grit, then a finer grit for a smoother finish, and keep a work light at a low angle as you go. Our sandpaper grit guide explains which grits to choose. Do not sand through to the old surface; if you do, add a little compound and blend it again.
Joint compound dust is fine and gets everywhere. According to NIOSH, joint compound can contain talc, calcite, mica, gypsum and silica, and the dust can irritate the eyes, nose, throat and airways. A damp sanding sponge or a sander connected to a shop vacuum with a HEPA filter cuts airborne dust sharply. Wear a respirator, keep the room sealed with plastic, and clean up with a HEPA vacuum and damp cloth rather than a broom.
Priming and painting
Fresh joint compound is very absorbent. Without primer, it soaks up paint unevenly and can show dull, blotchy patches called flashing. Roll on a primer made for new drywall and joint compound, let it dry, then apply two coats of paint. Use our free paint calculator to work out how much primer and paint you need.
Common skim coat problems and fixes
| Problem | Likely cause | Fix |
|---|---|---|
| Bubbles in the compound | Torn drywall paper or air whipped into the mix | Seal paper with shellac or oil-based primer; mix at low speed |
| Ridges and tool lines | Too much compound or uneven blade pressure | Knock off ridges with a knife when dry; next coat in the opposite direction |
| Cracks as it dries | Compound applied too thick or thinned too much | Apply thinner layers; fill cracks with the next coat |
| Compound peeling off | Dirty or glossy wall | Scrape off, clean, scuff-sand and prime before re-skimming |
| Visible section lines | Edges dried before the next section | Work faster in smaller sections; sand lines flat |
| Blotchy paint | Compound not primed | Prime the whole wall, then repaint |
When to call a pro
Skim coating is learnable, but it takes practice to get a flat, invisible finish on a large area. Consider a drywall finisher or plasterer if:
- You need several rooms or ceilings done, where fatigue and uneven results are likely
- The wall has loose plaster, water damage or mold that needs repair first
- Old paint or texture tests positive for lead or asbestos
- You want a flawless finish for high-sheen paint or dramatic lighting
According to Angi’s skim coat guide, hiring a pro typically costs $300 to $1,200, while DIY supplies run about $50, plus tools like a skimming blade ($20 to $75), a mixing paddle ($10 to $30) and a roller and mud pan ($10 to $20). Angi’s plaster repair cost guide puts professional skim coating at about $1 to $3 per square foot.
Frequently asked questions
Can I skim coat over paint?
Yes, if the paint is sound and clean. Wash the wall, scuff glossy finishes with sandpaper so the compound can grip, and scrape any peeling areas first.
How thick should a skim coat be?
Very thin, often just enough to fill texture and small dips. Two or three thin coats work far better than one thick one, which tends to crack, sag and take much longer to dry.
What is the best joint compound for skim coating?
Premixed all-purpose compound is the easiest choice for beginners because it bonds well and stays workable. Some people switch to a lightweight or topping compound for the final coat because it sands more easily.
How long should a skim coat dry before sanding or painting?
It depends on thickness, temperature and humidity. Wait until the compound is an even, lighter color with no dark damp spots, which can take up to a day in humid conditions, then sand and prime.
Do you have to prime after skim coating?
Yes. Joint compound absorbs paint differently from the rest of the wall, so skipping primer often leads to dull patches and uneven sheen.
The bottom line
A skim coat turns a textured, patched or damaged wall into a smooth surface ready for paint. Repair loose or damaged areas first, thin the compound just enough to roll, apply thin coats with a roller and wide blade, change direction on each coat, and sand lightly with good dust control. Prime before painting and the wall will look new.