You are standing in the paint aisle looking at packs labeled 60, 120, 220 and P400, and you just want to know which one will smooth your table, scuff your cabinets or finish your drywall patch. Pick too coarse and you leave deep scratches; pick too fine and you sand for an hour without getting anywhere.
This sandpaper grit guide explains what the numbers mean, which grit to use for stripping, smoothing, sanding between coats and drywall, how aluminum oxide, silicon carbide and garnet papers differ, when sponges and discs make more sense than sheets, and the grit sequence that gives a smooth finish without wasted effort.
Quick answer: Lower numbers are coarser. Use 40 to 60 grit to strip paint or level rough wood, 80 to 120 to smooth and remove scratches, 150 to 220 for final sanding before finishing and for light sanding between coats, and 120 to 220 for drywall joint compound. Work through the grits in steps, and never jump from very coarse straight to very fine.
What sandpaper grit numbers mean
The grit number describes the size of the abrasive particles. A low number means fewer, larger particles that cut fast and leave deep scratches. A high number means smaller particles that cut slowly and leave a smoother surface. So 220 grit is finer than 80 grit, and 400 is finer still.
CAMI vs P-grades
In the US, most sandpaper uses the CAMI scale from the Coated Abrasive Manufacturers Institute, as Bob Vila’s grit guide explains. Many products, especially imported or online ones, use the European FEPA scale, marked with a “P” before the number, such as P120. The two scales are close in the coarse and medium range but drift apart at finer grits, so a P400 sheet is not the same as a CAMI 400. For most home projects, treat them as roughly equal up to about 220, and stick with one system on a single project when you can.
| Grade | Typical grits | What it does |
|---|---|---|
| Extra coarse | 24 to 36 | Removes stubborn paint and varnish, heavy shaping |
| Coarse | 40 to 50 | Levels rough, uneven or weathered surfaces |
| Medium | 60 to 80 | Smooths and shapes wood, removes coarse-grit scratches |
| Fine | 100 to 120 | Final smoothing for most painted DIY work |
| Very fine | 150 to 220 | Final sanding before stain or clear finish, between coats, drywall |
| Extra fine and up | 240 and higher | Smoothing finish coats, polishing, wet sanding |
Which grit to use for each job
This is the table to bookmark. Start at the coarsest grit the job needs, not the coarsest you own; starting too coarse just adds scratches you have to sand out later.
| Task | Start | Finish | Notes |
|---|---|---|---|
| Stripping old paint or varnish from wood | 40 to 60 | 120 | Chemical stripping first can save hours |
| Leveling rough lumber or a weathered deck board | 60 | 100 to 120 | Sand with the grain |
| Smoothing bare wood before paint | 80 to 100 | 150 | Paint hides more than stain |
| Smoothing bare wood before stain or clear finish | 100 to 120 | 180 to 220 | Going too fine can reduce stain absorption |
| Scuffing glossy paint or cabinets before repainting | 120 to 150 | 180 to 220 | You only need to dull the sheen |
| Sanding between coats of paint, primer or polyurethane | 220 | 220 to 320 | Light pressure; just knock down dust nibs |
| Drywall joint compound and patches | 120 | 150 to 220 | Avoid going coarser than 100 |
| Removing light rust from metal | 80 to 120 | 180 to 220 | Aluminum oxide or silicon carbide |
If you are prepping cabinet doors, our guide to painting kitchen cabinets covers degreasing and priming around the sanding step.
Sandpaper types: aluminum oxide, silicon carbide and garnet
The abrasive mineral matters almost as much as the grit, because it decides how fast the paper cuts and how long it lasts.
Aluminum oxide
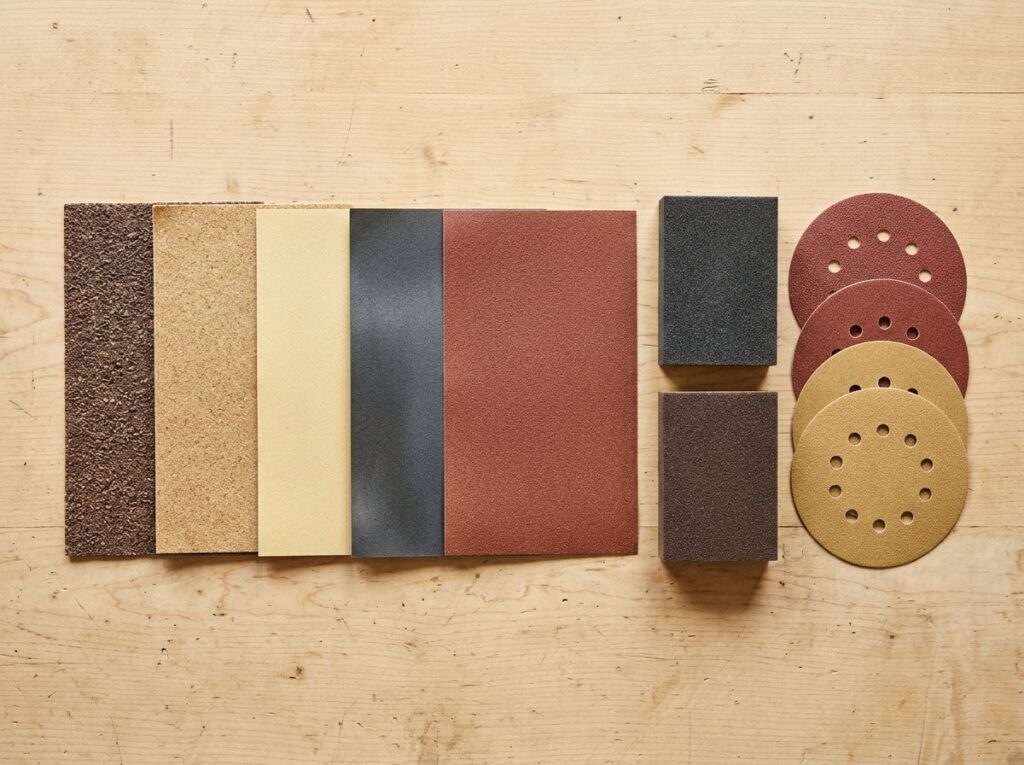
The everyday choice for home projects. It is durable, affordable and works on hardwood, softwood, painted surfaces and metal. Most sheets, sponges and power sander discs at hardware stores are aluminum oxide, often tan, red or white.
Silicon carbide
Very sharp and fast cutting, but more brittle, so it wears down sooner. It is usually dark gray or black, is often waterproof, and comes in grits up to 3,000, which makes it the standard for wet sanding finishes, plastic, fiberglass and metal. Some drywall sanding screens and sheets also use it.
Garnet
A natural mineral that is softer and wears quickly but leaves a very smooth, even scratch pattern on bare wood. Woodworkers like it for hand sanding before stain. It is not a good choice for paint, metal or power sanders.
Ceramic and other premium abrasives
Ceramic papers cut aggressively and last a long time under heavy pressure, which suits floor sanding and fast stock removal in coarse grits. They cost more and are overkill for most small jobs.
| Abrasive | Best for | Durability | Wet use |
|---|---|---|---|
| Aluminum oxide | General wood, paint, metal, power sanders | High | Only if labeled waterproof |
| Silicon carbide | Wet sanding, finishes, plastic, metal, fine grits | Medium (sharp but brittle) | Yes, on waterproof backing |
| Garnet | Hand sanding bare wood before stain | Low | No |
| Ceramic | Heavy removal, floors, coarse grits | Very high | Usually no |
Pro tip: For paint and finishes, look for sandpaper labeled anti-clog, stearated or open coat. These papers have more space between grains or a dry lubricant coating, so they do not gum up as fast on soft paint, and one sheet lasts far longer.
Tools and materials
- Sandpaper in three or more grits for your job
- Sanding block or sanding sponges
- Random orbital sander and matching hook-and-loop discs (optional)
- Pole sander or drywall sanding sponge for walls
- Shop vacuum, tack cloth or damp microfiber cloth
- Respirator or fine-particle dust mask and safety glasses
- Drop cloths and plastic sheeting
- Lead test kit for old painted surfaces
Sheets, sponges, discs and blocks
Sheets
Standard 9 by 11 inch sheets are the most flexible option. Fold or tear them into thirds or quarters for hand sanding, or cut them to fit a sheet sander. Always wrap sheets around a sanding block on flat surfaces, because your fingertips create uneven pressure and dips.
Sanding sponges
Foam blocks coated with abrasive conform to curves, moldings, spindles and inside corners, and many can be rinsed and reused. They are excellent for drywall patches, scuffing trim and cabinet profiles, and sanding between coats. Sponge grits are often labeled fine, medium or coarse rather than by number, so check the package for the equivalent.
Discs for random orbital sanders
Hook-and-loop discs attach to the sander pad and should have holes that line up with the pad’s dust extraction holes. Random orbital sanders leave fewer swirl marks than sheet sanders, which makes them the best all-round power sander for furniture and doors.
Belts, screens and detail pads
Belt sanders remove material fast and are best for leveling rough boards. Drywall screens are open mesh that resists clogging with joint compound. Triangular detail pads, including those for an oscillating tool, reach corners other sanders cannot.
The right sanding sequence
Each grit’s job is to remove the scratches left by the one before. Skipping too far ahead leaves deep scratches that only show up once stain or paint goes on.
- Pick a starting grit based on the surface: coarse only if there is old finish or real damage, medium if the wood is already fairly smooth.
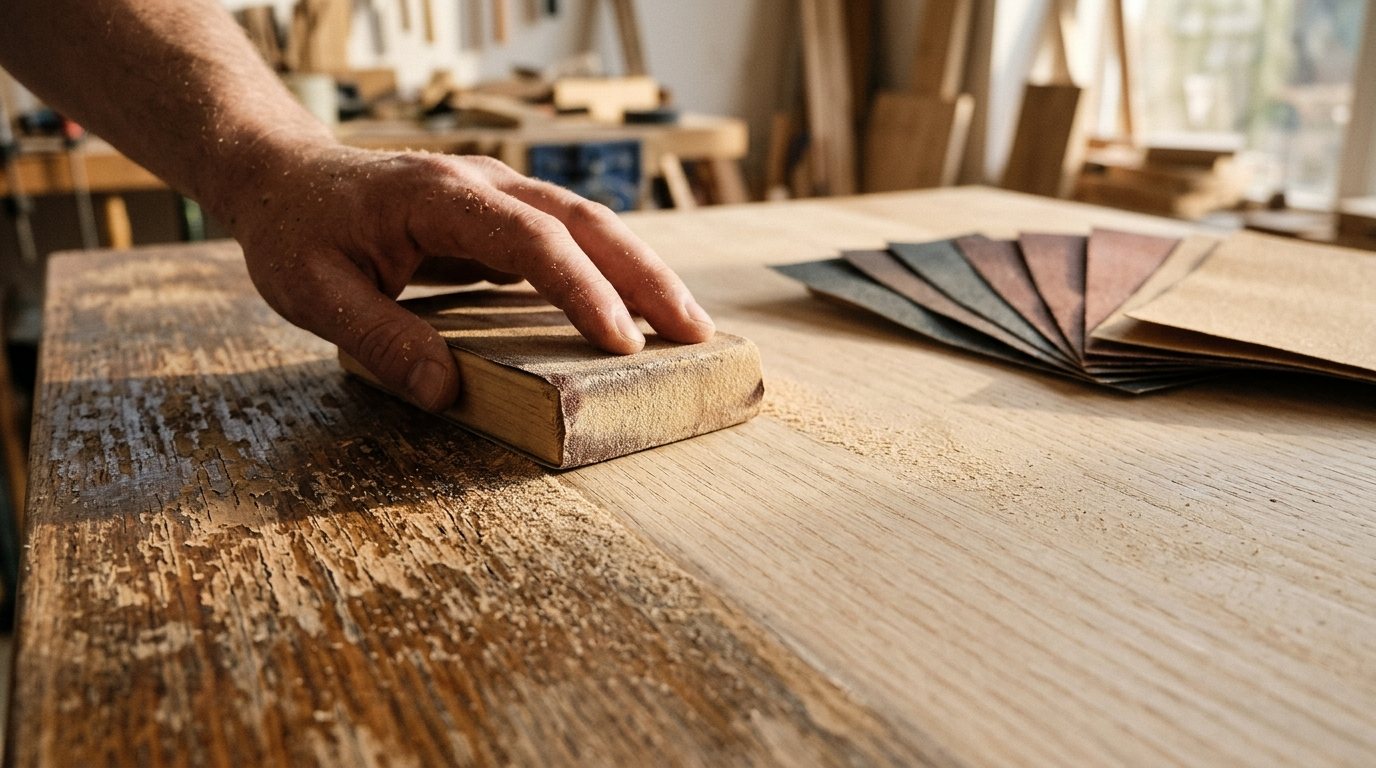
- Sand evenly with the grain on wood, using light, steady pressure. Let the abrasive do the work.
- Check your progress. Wipe off dust and look at the surface under a low, raking light. When all the old scratches and marks are gone and the scratch pattern is uniform, move on.
- Step up one grade at a time. A common sequence for bare wood is 80, then 120, then 180 or 220. Many projects need three grits.
- Clean between grits. Vacuum or wipe the surface so loose coarse grit does not scratch it under the finer paper.
- Stop at the right grit. For paint, 150 is usually enough. For stain, stop around 180 to 220, since very fine sanding can make some woods absorb stain unevenly.
- Remove all dust with a vacuum and a damp or tack cloth before applying finish.
For drywall, the sequence is shorter. The Home Depot drywall sanding guide recommends starting around 100 to 120 grit on dried compound, moving to 150, and finishing edges and corners with 220, and warns against anything coarser than 100, which can damage the drywall paper. Our guide to patching a drywall hole shows where sanding fits between coats.
Sanding safety
Sanding dust is fine enough to stay in the air and get deep into your lungs. Protect yourself every time, even for small jobs.
- Wear a well-fitting respirator or dust mask rated for fine particles, plus safety glasses.
- Use a vacuum-connected sander or a shop vacuum, and hang plastic over doorways when sanding drywall indoors.
- Sand pressure-treated or unknown wood outdoors or with dust collection.
- Keep fingers clear of power sander pads and unplug the tool before changing paper.
Safety note: If your home was built before 1978, painted surfaces may contain lead. Do not dry sand old paint until you have tested it with a lead test kit. If it tests positive, use wet methods and lead-safe practices, or hire a certified lead-safe contractor, because lead dust is especially dangerous to children and pregnant women.
When to call a pro
Hand and power sanding are well within DIY reach, but consider a pro when:
- You are refinishing an entire hardwood floor, which takes a drum or large orbital sander and practice to avoid gouges. Our guide to refinishing hardwood floors explains what is involved.
- Old paint tests positive for lead.
- Large drywall areas need finishing and you want a seamless, flat wall.
- Valuable antique furniture needs refinishing, where oversanding can destroy veneer and value.
Taskrabbit’s handyman cost guide puts typical handyman rates at about $50 to $125 per hour in the US, with drywall repair jobs averaging around $250 and single-room painting around $500. Floor refinishing and lead abatement are specialist trades priced by the job.
Frequently asked questions
What grit sandpaper should I use to remove paint?
Start with 40 to 60 grit for thick or peeling paint on wood, then move to 80 and 120 to smooth the scratches. For a light scuff before repainting, 120 to 150 is enough. Test old paint for lead before sanding it in a home built before 1978.
What grit do you use between coats of paint or polyurethane?
Use 220 grit or finer with very light pressure, just enough to knock down dust nibs and dull the surface. A fine sanding sponge works well on edges and profiles. Remove all dust before the next coat.
Is higher or lower grit sandpaper smoother?
Higher grit is smoother. A 220 grit sheet has much smaller particles than 60 grit, so it removes less material and leaves finer scratches. Lower grits cut faster but leave a rougher surface.
Can I skip grits when sanding?
You can skip a little, such as 80 to 120 to 180, but avoid big jumps like 60 straight to 220. The fine paper cannot remove deep coarse scratches efficiently, and they will show through stain or gloss paint.
What grit sandpaper is best for drywall?
Most drywall sanding uses 120 to 150 grit, with 220 for final feathering at edges and corners. Avoid grits coarser than 100, which can scuff the drywall paper face. A sanding sponge or pole sander with screens keeps the surface flat.
The bottom line
Choose the coarsest grit the job truly needs, then step up through the grades until the scratches disappear: 40 to 60 for stripping, 80 to 120 for smoothing, 150 to 220 for final prep and between coats, and 120 to 220 for drywall. Use aluminum oxide for most work, silicon carbide for wet sanding and finishes, and garnet for fine hand sanding of bare wood. Keep dust under control, wear a respirator, and test old paint for lead before you start.