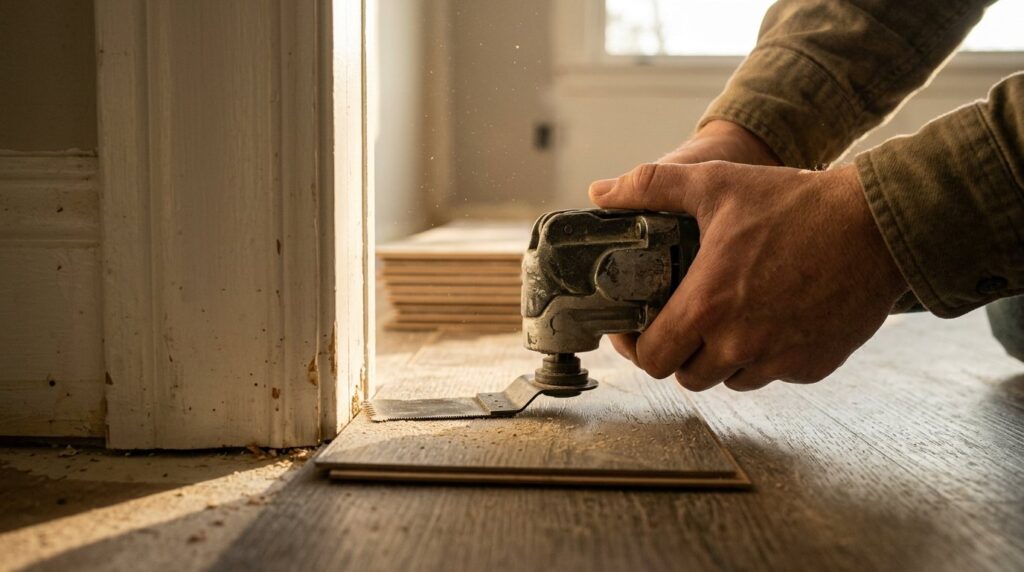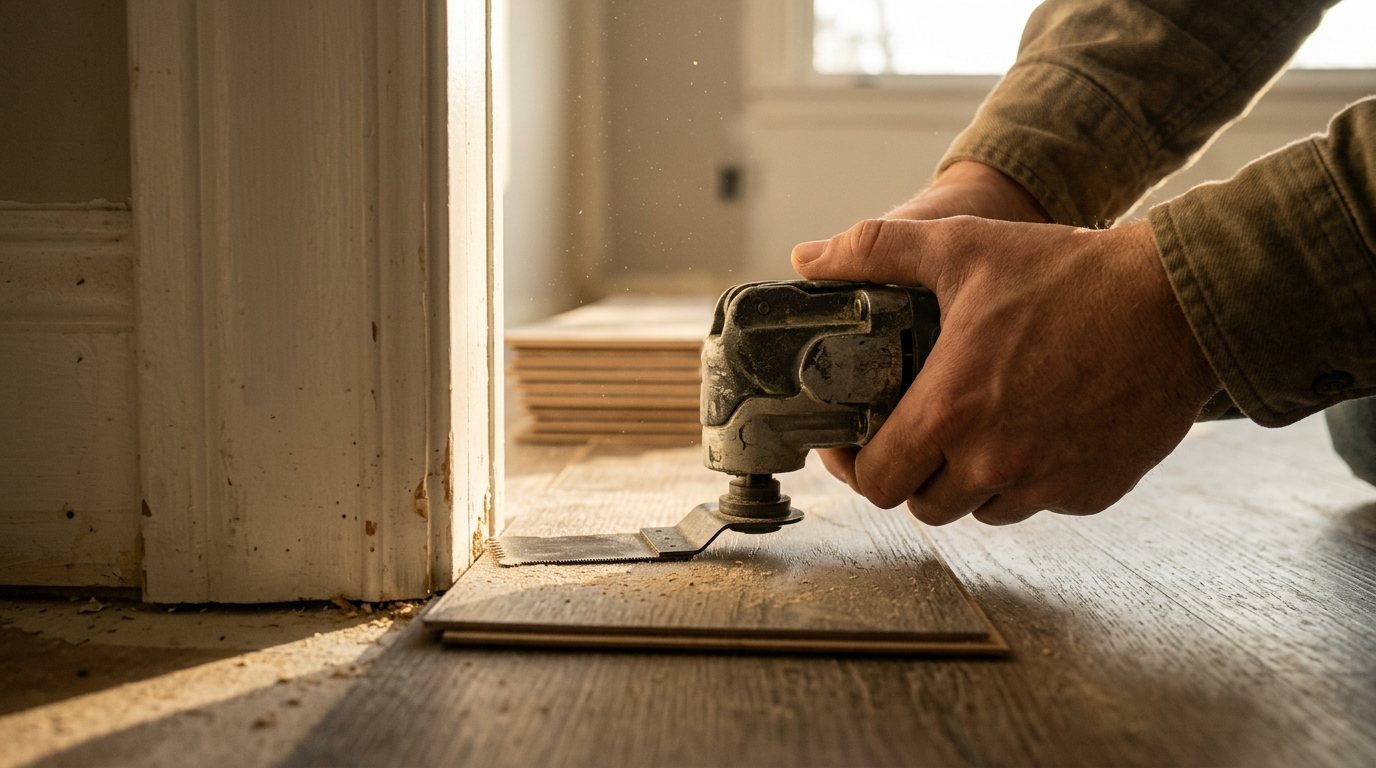
You need to trim a door jamb so new flooring slides underneath, cut off a shim flush with the wall, or dig out cracked grout, and none of your saws can reach. That is exactly the kind of awkward, close-quarters job an oscillating tool was made for, but the blade choice and technique are not obvious the first time you pick one up.
This guide explains what an oscillating tool does, which blade to use for wood, metal, grout, scraping and sanding, how to make plunge and flush cuts with control, and the safety steps that matter most, including dust, hidden wiring and hot blades.
Quick answer: Fit the right blade for the material (a bi-metal blade if there could be nails, a carbide or diamond blade for grout), clamp or brace the work, and wear eye, hearing and dust protection. Start the cut at a lower speed to form a groove, then increase speed, rock the blade slightly and let the tool do the work with light, steady pressure. Unplug it or remove the battery before every blade change.
What an oscillating tool does (and what it does not)
Instead of spinning, an oscillating tool swings its blade side to side through a tiny arc, typically just 2 to 5 degrees, at up to about 20,000 oscillations per minute according to This Old House. That short, fast motion lets the blade cut straight down into a surface (a plunge cut) or lie flat against one (a flush cut), places where circular saws, jigsaws and reciprocating saws cannot go.
It is a detail and finishing tool, not a demolition saw. It cuts slowly compared with a circular or reciprocating saw, so use those for long or rough cuts and save the oscillating tool for precise trimming, small openings, grout, scraping and sanding in corners.
Oscillating tool blade types
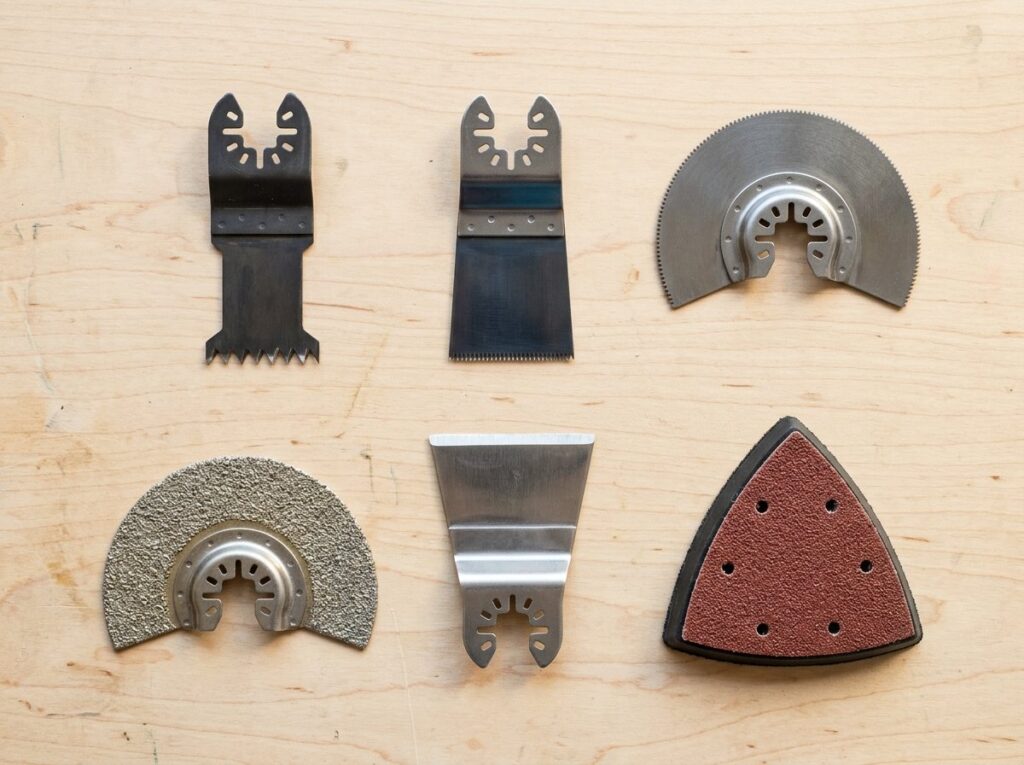
The blade, not the tool, determines what you can cut. Using a wood blade on a hidden nail or a toothed blade on grout ruins it in seconds. Also check that the blade’s mounting pattern fits your tool, because several different arbor interfaces exist and not every blade fits every brand.
| Blade or accessory | Best for | Avoid | Tips |
|---|---|---|---|
| Wood plunge blade (high-carbon steel) | Clean wood: door jambs, trim, flooring, shims, drywall | Nails, screws, metal | Fastest in wood; dulls instantly on metal |
| Bi-metal plunge blade | Wood with possible nails, drywall, PVC, thin metal | Masonry, tile | Best all-round choice for remodeling |
| Carbide-tooth or titanium blade | Hardened screws, bolts, nail-embedded wood, fiber cement | Tile and grout (unless rated) | Costs more but lasts much longer |
| Round or semicircular segment blade | Long straight cuts, flooring, sheet material | Tight inside corners | Steadier on materials that vibrate |
| Carbide-grit or diamond grout blade | Removing grout and thinset in tile joints | Wood (cuts poorly) | Diamond lasts longer on large jobs |
| Rigid or flexible scraper | Old caulk, adhesive, vinyl, paint, carpet pad glue | Delicate finished surfaces at a steep angle | Use a shallow angle and low speed |
| Triangular sanding pad | Corners, spindles, window muntins, small patches | Large flat areas | Hook-and-loop paper; work coarse to fine |
For grout, carbide-grit blades are fine for a few joints, while diamond-coated blades cost more but can last two to three times longer, which pays off on a whole shower or floor.
Safety first
An oscillating tool feels gentler than a saw, which is exactly why people get careless with it. The teeth are sharp, the blade gets hot, and the dust it makes can be harmful.
- Eyes and ears: wear ANSI Z87.1 safety glasses and hearing protection; the tool is louder than it seems over a long job.
- Dust: wear a well-fitting respirator or dust mask rated for fine particles, especially for grout, drywall, treated lumber and old paint. Use a shop vacuum as you work.
- Hidden wiring and pipes: when plunging into a wall, floor or cabinet back, check what is behind it first, turn off the circuit if wiring could be there, and hold the tool by its insulated grip.
- Secure the work: clamp small pieces. Never hold a workpiece in your hand or against your body while cutting.
- Hot blades: blades and sanding pads heat up quickly. Let them cool before touching them.
- Blade changes: unplug the tool or remove the battery every time.
Safety note: Cement-based grout, mortar and thinset contain sand, and cutting or grinding them releases fine crystalline silica dust. OSHA’s crystalline silica page links breathing that dust to silicosis, lung cancer and kidney disease. Wear a properly fitted respirator, use a vacuum at the blade, and keep others out of the room. If your home was built before 1978, test painted surfaces for lead before scraping or sanding them.
Tools and materials
- Oscillating multi-tool (variable speed is worth having)
- Blades for your job: bi-metal plunge blade, grout blade, scraper or sanding pad and paper
- Safety glasses, hearing protection and a fine-particle respirator
- Clamps and a straight scrap board to use as a guide
- Painter’s tape and a pencil for marking lines and depth
- Shop vacuum
- A scrap of your new flooring and underlayment (for door jamb undercuts)
Basic technique
Pick the right speed
Use low speed for sanding, scraping and starting cuts, medium for general wood cutting, and high for metal, tile work and tough adhesives. Running too fast while sanding or scraping can melt finishes or overheat the blade.
Start slow, then rock
Touch the blade to your line at low speed to form a shallow groove so it does not skate. Once it is seated, increase the speed and rock the tool very slightly side to side, which engages more teeth and clears dust from the cut. Keep pressure light; forcing it slows the blade, creates heat and burns wood.
Plunge cuts
Mark your cut, and if depth matters, wrap a strip of painter’s tape on the blade as a depth gauge. Start with the blade angled slightly, rock it into the material, then straighten it as it goes deeper. Clamp a straight board alongside the line as a fence for straight cuts.
Flush cuts
Lay the blade flat against the surface you want to keep, with the teeth against the item you are removing. Some blades are offset so the tool body clears the surface. A piece of painter’s tape on the finished surface helps protect it from scratches.
Common home uses, step by step
Undercutting a door jamb for new flooring
Undercutting lets flooring slide neatly under the jamb and casing instead of scribing around the profile. It is a standard step when you install vinyl plank flooring or tile.
- Lay a scrap of the new flooring on top of its underlayment, tight against the jamb.
- Fit a wood or bi-metal blade. Bi-metal is safer here in case there are finish nails in the jamb.
- Rest the blade flat on top of the scrap so it acts as a height guide.
- Start at low speed and cut into the casing and jamb, keeping the blade flat on the scrap. Work from the thinnest part of the trim to the thickest.
- Pry out the cut pieces, vacuum the dust and test-fit the flooring.
Removing grout
An oscillating tool is far faster than a hand grout saw for cracked or stained joints, and it is the usual first step when you regrout a shower.
- Fit a carbide-grit or diamond grout blade narrower than the joint.
- Put on your respirator and set up a vacuum next to the work.
- Score a light line down the center of the joint at low speed.
- Increase speed and work along the joint, keeping the blade straight in line with the joint and square to the tile, never tilted toward a tile edge, to avoid chipping.
- Remove grout to an even depth, as deep as you can go without touching the backer board, rotating the blade on its mount occasionally to spread wear.
- Vacuum thoroughly before regrouting.
Flush-cutting shims, dowels and nails
After installing a door or window, shims stick out past the jamb. Lay a wood blade flat against the wall and cut them off cleanly. Use a bi-metal blade to cut nails or screws that cannot be pulled, such as fasteners holding a board you want to remove.
Cutting openings in drywall
For a new outlet box or a repair patch, trace the outline, confirm there is no wiring or plumbing behind, and plunge-cut each side with a bi-metal blade. Keep the plunge shallow, just through the board.
Scraping caulk, adhesive and paint
With a rigid scraper at low speed and a shallow angle, the tool removes old caulk and stuck-on adhesive faster than a putty knife. On a tub or acrylic shower, go gently to avoid gouging; our guide to recaulking a bathtub covers the finishing steps.
Detail sanding
The triangular pad reaches corners a palm sander cannot. Keep the pad flat, move it constantly, and step through grits from coarse to fine.
Troubleshooting common problems
| Problem | Likely cause | Fix |
|---|---|---|
| Blade smokes or burns the wood | Too much pressure or dust packed in the kerf | Ease off, rock the blade and lift out to clear dust |
| Teeth dull or strip right away | Hit a nail or screw with a wood blade | Switch to bi-metal or carbide-tooth |
| Blade skates off the line | Starting at high speed | Start slow to form a groove first |
| Blade slips or tool rattles | Loose or worn mount, wrong blade fitting | Reseat and tighten; confirm the blade fits your arbor |
| Chipped tile edges | Blade tilted toward the tile | Keep the blade square to the tile and centered in the joint |
When to call a pro
Most oscillating tool jobs are small and DIY-friendly, but call a pro when:
- You need to cut into a wall or floor and cannot confirm whether wiring, plumbing or gas lines are behind it.
- Grout removal reveals soft, crumbling backer board, loose tiles or water damage, which point to a leak rather than a grout problem.
- Painted trim or walls in an older home test positive for lead.
- The job is large, such as regrouting an entire bathroom, and you do not want the hours of silica dust exposure.
Taskrabbit’s handyman cost guide puts typical US handyman rates at about $50 to $125 per hour nationally, with average job costs around $250 for drywall repair and $150 for sealing and caulking. Tile work is often handled by a tile setter, and pricing depends on the size of the job.
Frequently asked questions
What is an oscillating tool best used for?
It excels at plunge cuts, flush cuts and work in tight spaces: undercutting door jambs, trimming shims and trim in place, cutting small drywall openings, removing grout and scraping caulk or adhesive. It is slow for long or rough cuts, where a circular or reciprocating saw is the better choice.
Can an oscillating tool cut metal?
Yes, with the right blade. Use a bi-metal or carbide-tooth blade for nails, screws, thin sheet metal and small pipes, and run the tool at a higher speed with light pressure. A standard wood blade will dull almost immediately on metal.
Can I use an oscillating tool to remove grout?
Yes. Fit a carbide-grit or diamond grout blade, keep it centered and square in the joint, and remove the grout to an even depth without scraping tile edges. Wear a respirator and use a vacuum, since cement-based grout releases silica dust.
Oscillating tool vs reciprocating saw: which do I need?
A reciprocating saw is a demolition tool built for fast, rough cuts through framing, pipe and nail-filled lumber. An oscillating tool is for precise, controlled work in small spaces. Many homeowners own both, but if you mostly do repairs and trim work, the oscillating tool sees more use.
Why does my oscillating tool blade keep getting hot or smoking?
You are probably pushing too hard or the cut is packed with dust. Let the tool do the work, rock the blade slightly and pull it out regularly to clear debris. A dull blade also generates heat, so replace it when cutting slows noticeably.
The bottom line
An oscillating tool turns awkward jobs like jamb undercuts, flush cuts and grout removal into quick, controlled tasks, as long as you match the blade to the material. Start slow, rock gently, keep pressure light, and protect your eyes, ears and lungs. Unplug it before blade changes, check for hidden wiring before plunging into walls, and save long or rough cuts for a saw built for them.