
Category: Pest Control

Ants, mice, roaches, termites and more: safe DIY removal and prevention.

  • How to Get Rid of Ants in the Kitchen (Fast and for Good)

    How to Get Rid of Ants in the Kitchen (Fast and for Good)

    It starts with a single scout on the counter. A day later there’s a neat line of ants marching from a crack by the window straight to a drop of juice or a crumb under the toaster. Ants in the kitchen are one of the most common household pest problems, and spraying the ones you can see rarely makes them go away for long.

    The key to getting rid of kitchen ants is understanding that the ants on your counter are only a small part of the colony. To stop them, you need to break their scent trail, remove what they came for, get bait back to the nest, and close the door they used. This guide shows you how to do all four, with natural and store-bought options.

    Quick answer: Wipe away ant trails with soapy water or a vinegar solution, store food in sealed containers and clean up crumbs and spills, then place ant bait stations along the trail and let the ants carry the bait back to the colony. Don’t spray near the bait. Seal the cracks where they come in. Most kitchen ant problems clear up within one to two weeks.

    Why ants come into your kitchen

    Worker ants are constantly scouting for food and water. When a scout finds something good, it lays down a chemical scent trail on the way back to the nest, and other workers follow it. That’s why one ant quickly becomes hundreds. Ants are especially drawn to sweets, grease, crumbs, pet food and moisture, and they often move indoors after heavy rain, during dry spells, or when the seasons change.

    Identify your ants

    Knowing which ant you have helps you choose the right approach.

    Ant typeHow to recognize itNotes
    Odorous house antSmall, dark brown or black; smells like rotten coconut when crushedVery common in kitchens; loves sweets; baits work well
    Pavement antSmall, dark brown to black; often comes up from cracks in slabs and patiosEats almost anything, including grease and crumbs
    Argentine antSmall, light to dark brown; forms long, busy trailsLarge colonies; baits plus perimeter control
    Pharaoh antTiny, yellowish to light brownSprays can make colonies split and spread; use baits only
    Carpenter antLarge, usually black or reddish-black; may leave sawdust-like debrisCan damage wood; often signals moisture problems; consider a pro

    Step 1: Follow the trail

    Before you wipe anything up, take a few minutes to watch the ants. Follow the trail in both directions: where they’re going (the food source) and where they’re coming from (the entry point). Common entry points include gaps around windows, cracks along baseboards and backsplashes, openings around pipes under the sink, and gaps where countertops meet walls. Note these spots for later.

    Step 2: Erase the scent trail

    Ants follow pheromone trails, so wiping up the ants alone isn’t enough. Clean the entire trail with warm soapy water or a solution of equal parts white vinegar and water. This removes the chemical signal and confuses the ants that follow. Wipe the counters, the backsplash and the floor along walls.

    Step 3: Remove what they came for

    • Seal food. Store sugar, cereal, honey, syrups, snacks and pet food in airtight containers. Wipe sticky jars before putting them away.
    • Clean crumbs and spills right away, including under the toaster, microwave and appliances.
    • Empty the trash often and use a bin with a tight lid. Rinse recyclables.
    • Don’t leave pet food out for long periods. Place pet bowls in a shallow dish of water, which forms a moat ants can’t easily cross.
    • Fix leaks under the sink and dry wet sponges and dish racks, since ants also need water.
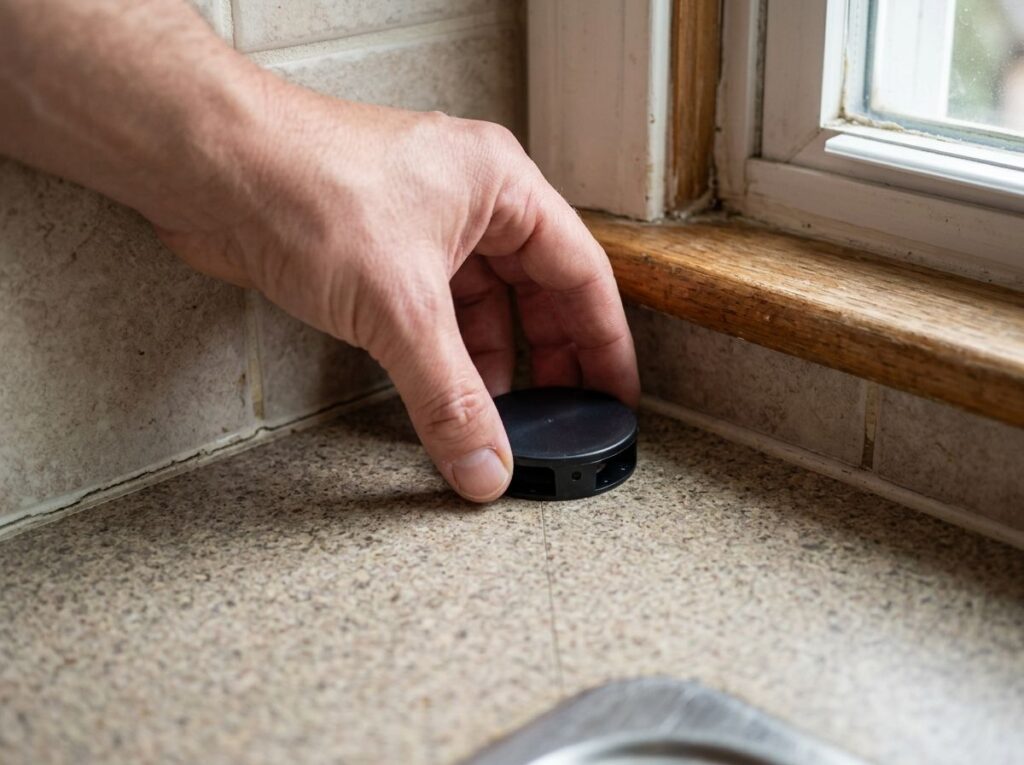
    Hand placing an ant bait station on a kitchen counter

    Step 4: Use bait to reach the colony

    This is the step that actually solves the problem. Ant baits combine a food ants like with a slow-acting insecticide. Worker ants eat the bait and carry it back to the nest, where they share it with other ants and the queen. Because it works slowly, the bait spreads through the colony before the workers die.

    • Place baits right on or next to the trail, near where ants are entering or feeding, but out of reach of children and pets.
    • Expect more ants at first. Seeing ants swarm the bait is a good sign. Leave them alone so they can carry it home.
    • Don’t spray or clean around the bait. Sprays kill the workers before they share the bait and can contaminate it.
    • Match the bait to the ant. Some ants prefer sweet baits, while others want protein or grease, and preferences can change with the season. If ants ignore one bait, try another type.
    • Be patient. It often takes several days to two weeks for a colony to collapse. Replace baits when they’re empty.

    Safety note: Use bait stations according to the label, keep them where kids and pets can’t reach them, and never place baits on surfaces where food is prepared. If you make a homemade borax or boric acid bait, remember these substances are toxic if swallowed, so keep them well out of reach.

    Step 5: Seal the entry points

    Once activity slows down, seal the gaps you found in Step 1. Use clear or paintable caulk along baseboards, backsplashes, window frames and around pipes. Replace worn weatherstripping around doors and windows. Even tiny gaps can let ants in, so be thorough.

    Step 6: Treat the outside

    Many kitchen ants nest outdoors and travel inside. Reduce their access from outside:

    • Trim shrubs and tree branches so they don’t touch the house.
    • Keep mulch, firewood and debris pulled back from the foundation.
    • Fix outdoor drainage problems and leaky hose bibs that create moist areas ants love.
    • Place outdoor bait stations near trails along the foundation or where you see ant mounds.

    Natural options: what works and what doesn’t

    Vinegar and soapy water

    Great for erasing scent trails and cleaning, but they don’t eliminate the colony. Use them alongside baits.

    Diatomaceous earth

    Food-grade diatomaceous earth is a fine powder that damages ants’ outer coating and dries them out. Dust it lightly into cracks and along entry points where it won’t be disturbed. It works only while dry and kills ants that walk through it, so it won’t reach the nest the way bait does. Avoid breathing in the dust.

    Cinnamon, peppermint and other scents

    Strong scents may temporarily discourage ants from crossing a spot, but they’re not a reliable long-term solution.

    Boiling water on outdoor mounds

    Pouring boiling water on an outdoor anthill can kill some of the ants, but it often misses the queen and can harm nearby plants. Handle boiling water with great care.

    Common mistakes that make ant problems worse

    • Spraying every ant you see. Repellent sprays kill the foragers but leave the nest untouched, and some species respond by splitting into new colonies in different spots.
    • Removing bait too soon. When ants crowd a bait station, it’s working. Taking it away or wiping the ants up undoes your progress.
    • Mixing sprays and baits. Spraying near bait contaminates it, and ants avoid it.
    • Cleaning only where ants are visible. Wipe the whole trail, including along baseboards and behind appliances, to remove the scent path.
    • Ignoring moisture. A slow drip under the sink or a damp cabinet can keep ants coming back no matter how clean the counters are.
    • Stopping too early. If activity slows but doesn’t stop, keep baits in place for another week to finish off the colony.

    A simple two-week ant plan

    For most kitchen ant problems, this timeline works well. On day one, follow the trail, clean it thoroughly, seal your food and place two or three bait stations along the route. During days two to seven, leave the baits alone, keep the kitchen clean and refill baits if they’re emptied. By days eight to fourteen, activity should drop sharply. Once you’ve gone several days without seeing ants, seal the entry points with caulk, remove the baits and keep one on standby for the next season.

    When to call a professional

    • You see large black ants and sawdust-like debris, which can point to carpenter ants damaging wood.
    • Ants keep coming back after several weeks of baiting and sealing.
    • You find ants in multiple rooms or inside walls.
    • You suspect pharaoh ants or another species that’s hard to control.

    Carpenter ants in particular often signal a moisture problem, such as a leak or damp wood, that should be fixed at the same time.

    How to prevent ants from coming back

    • Wipe counters and sweep the kitchen floor daily.
    • Keep food sealed and pet bowls clean.
    • Run the dishwasher or wash dishes promptly instead of leaving them in the sink.
    • Check under sinks for leaks regularly.
    • Re-caulk gaps each spring and fall.
    • Keep a bait station on hand to deploy at the first sign of scouts.

    Frequently asked questions

    Why do I suddenly have ants in my kitchen?

    Weather changes such as heavy rain or dry spells often push ants indoors in search of food and water. A single spill or crumb trail can attract scouts, and the colony follows.

    Should I kill the ants I see?

    If you’re using bait, let them feed. Killing the workers stops them from carrying bait back to the colony. Clean up trails in areas away from the bait instead.

    How long does ant bait take to work?

    Usually a few days to about two weeks, depending on the size of the colony and the type of ant.

    Does vinegar kill ants?

    Vinegar can kill ants on contact and removes their scent trail, but it won’t reach the nest. Use it for cleaning and combine it with bait.

    Are ants in the kitchen harmful?

    Most common kitchen ants are nuisance pests that can contaminate food. Carpenter ants can damage wood, and some species can sting, so identify your ant if the problem persists.

    The bottom line

    To get rid of ants in your kitchen for good, think colony, not individual ants. Erase the scent trail, take away food and water, let bait do its work without spraying, and seal the gaps they use. Keep the kitchen clean and dry, and you’ll stop the next invasion before it starts.
  • How to Get Rid of Mice in the House (and Keep Them Out)

    How to Get Rid of Mice in the House (and Keep Them Out)

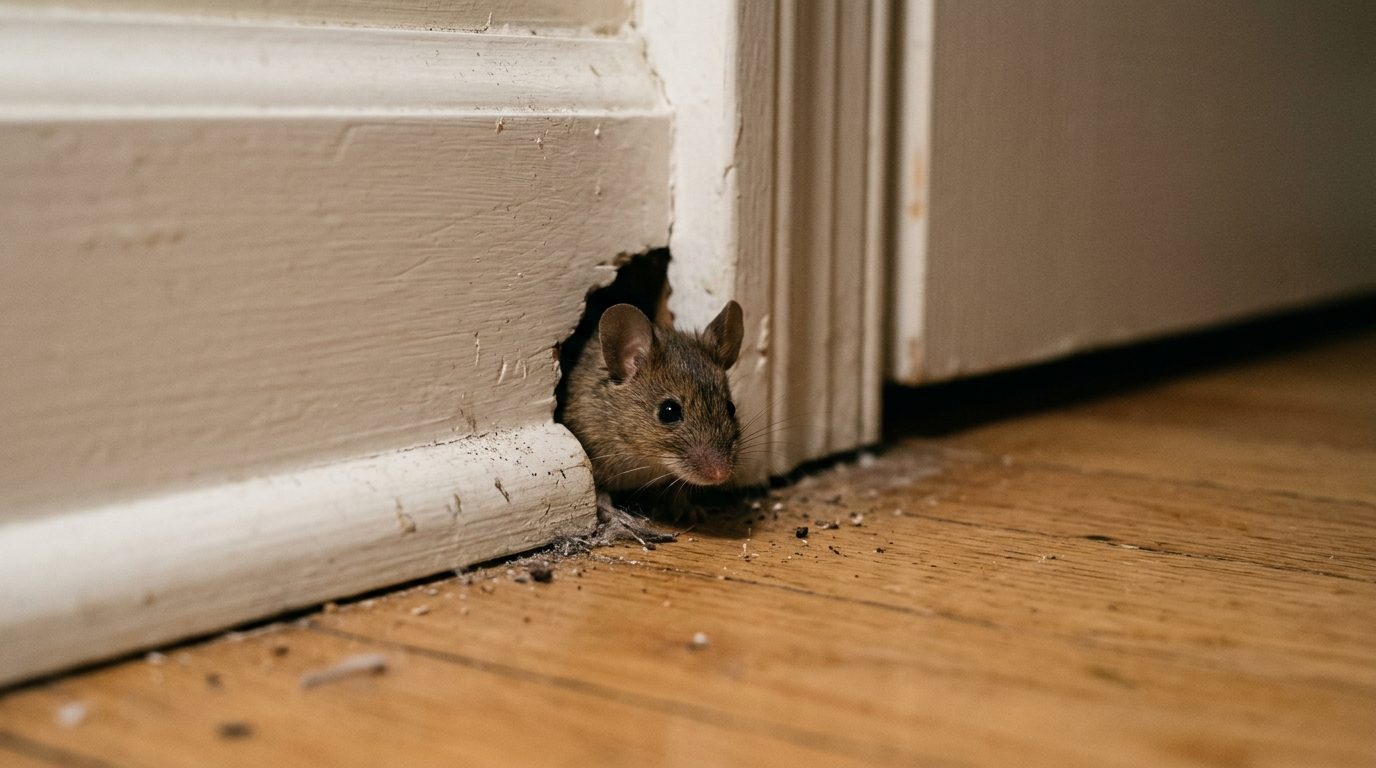
    As the weather cools in fall, mice start looking for a warm, sheltered place with food and water nearby. Your home checks every box. One day you notice a few tiny droppings in the pantry or hear scratching in the walls at night, and suddenly you’re wondering how many there are and how to get them out for good.

    Getting rid of mice takes two parts: removing the ones already inside and closing the doors they used to get in. Skip the second part, and new mice will simply replace the old ones. This guide walks you through recognizing the signs, the most effective traps and where to put them, how to clean up safely, and how to mouse-proof your home.

    Quick answer: Set several snap traps baited with a small amount of peanut butter along walls where you’ve seen droppings, with the trigger end facing the wall. At the same time, seal every gap larger than about a quarter inch with steel wool and caulk or hardware cloth, store food in sealed containers, and clean up droppings safely with a disinfectant, never by sweeping or vacuuming dry.

    Signs you have mice

    • Droppings: small, dark pellets about the size of a grain of rice, often in drawers, pantries, under sinks and along walls.
    • Gnaw marks on food packaging, cardboard, wood or wires.
    • Nests made of shredded paper, fabric or insulation in hidden corners, behind appliances or in storage boxes.
    • Noises like scratching or scurrying in walls, ceilings or cabinets, especially at night.
    • Rub marks: greasy smudges along baseboards and around holes where mice travel.
    • A musty, ammonia-like odor in enclosed spaces with heavy activity.

    How mice get inside

    Mice are remarkable squeezers. A young mouse can fit through a gap about the width of a pencil, often described as roughly a quarter inch or the size of a dime. Common entry points include:

    • Gaps around pipes, cables and wires where they enter the house
    • Spaces under doors and garage doors with worn seals
    • Cracks in the foundation and gaps around the sill plate
    • Dryer vents, attic vents and crawl space vents without screens
    • Openings around air conditioner lines and outdoor faucets
    • Gaps where siding, trim and the roofline meet

    Step 1: Trap the mice already inside

    Choose your traps

    Trap typeProsCons
    Snap trapsInexpensive, effective, quick kill, easy to see resultsNeed careful placement away from kids and pets
    Electronic trapsQuick kill, enclosed design, easy disposalCost more, need batteries
    Live-catch trapsNo killMust be checked often; released mice may return or struggle to survive
    Glue trapsCheapWidely considered inhumane; can catch non-target animals. Best avoided.
    Poison baitCan reduce large populationsRisk to children, pets and wildlife; mice may die inside walls and smell. Best left to professionals.

    Bait and placement

    Placement matters more than the brand of trap. Mice are cautious and tend to run along walls rather than across open floors.

    • Use a pea-sized amount of bait. Peanut butter, hazelnut spread or a bit of oatmeal works well. Too much bait lets a mouse lick it off without triggering the trap.
    • Place traps along walls, perpendicular to the wall, with the trigger end facing the wall, so mice run right into it.
    • Set many traps. Put them every few feet in areas with droppings or activity, behind appliances, under sinks and in the back of cabinets. More traps catch mice faster.
    • Wear gloves when setting traps, so your scent doesn’t make mice wary.
    • Check traps daily and keep going until you’ve gone a week or two with no catches and no fresh droppings.

    Safety note: Keep traps and any bait stations out of reach of children and pets, for example inside cabinets, behind appliances or inside tamper-resistant enclosures.

    Step 2: Seal the entry points

    This is the step that solves the problem for good. Inspect your home inside and out, paying special attention to where utilities enter, the foundation, the garage and under sinks.

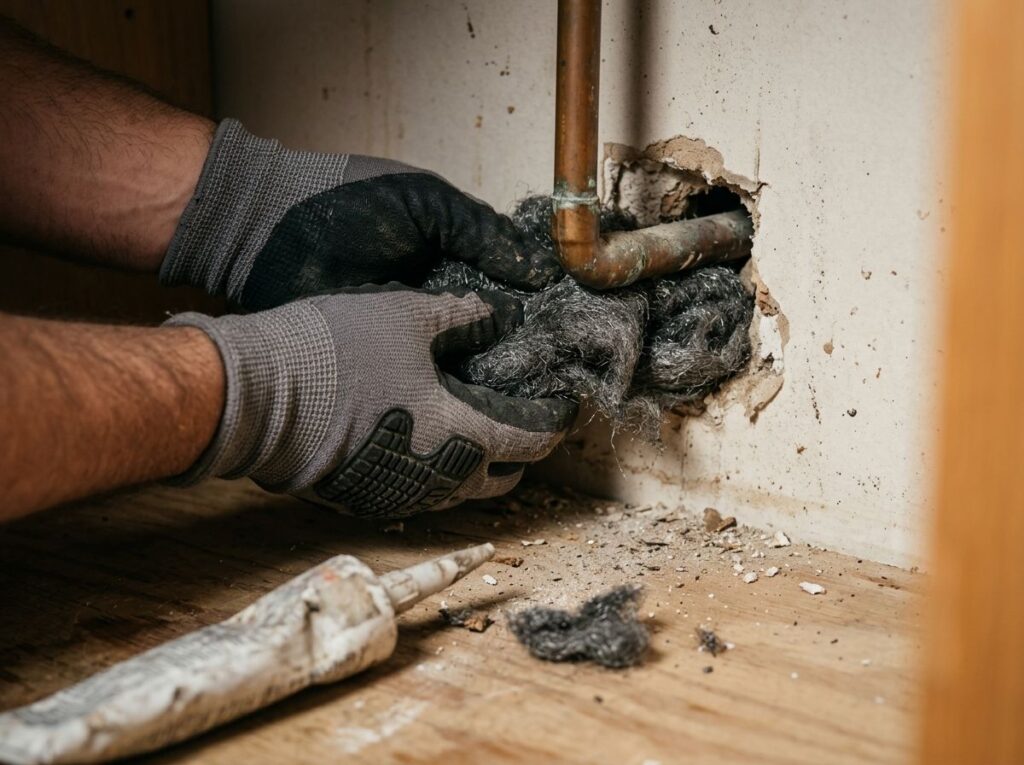
    • Steel wool plus caulk: stuff small holes tightly with coarse steel wool or copper mesh, then seal over it with caulk. Mice can chew through caulk or foam alone, but not metal.
    • Hardware cloth: cover larger openings and vents with 1/4-inch galvanized hardware cloth secured with screws.
    • Door sweeps and garage seals: replace worn weatherstripping and install sweeps on exterior doors. Check the rubber seal at the bottom of the garage door.
    • Foundation and siding gaps: seal with exterior caulk, mortar or concrete patch as appropriate.
    • Vent covers: make sure dryer vents have working flaps and that attic and crawl space vents are screened.

    Gloved hands sealing a gap around a pipe with steel wool

    Step 3: Remove food, water and shelter

    • Store dry food, cereal, grains, pet food and birdseed in glass, metal or thick plastic containers with tight lids.
    • Don’t leave pet food out overnight, and clean up crumbs and spills promptly.
    • Keep the trash in bins with tight-fitting lids, inside and out.
    • Fix leaky faucets and pipes that provide water.
    • Reduce clutter in basements, garages and closets, and use plastic bins instead of cardboard boxes for storage.
    • Stack firewood off the ground and away from the house, and trim shrubs that touch the walls.

    How to clean up after mice safely

    Mouse droppings, urine and nesting material can carry germs. The CDC recommends a careful cleanup method that avoids stirring up dust:

    1. Ventilate. Open doors and windows and let the area air out for at least 30 minutes before cleaning.
    2. Protect yourself. Wear rubber, latex or vinyl gloves.
    3. Don’t sweep or vacuum dry droppings or nests, which can send particles into the air.
    4. Soak it. Spray droppings and nesting material with a disinfectant or a bleach solution (about 1 part bleach to 10 parts water) until thoroughly wet, and let it soak for about 5 minutes.
    5. Wipe up with paper towels and put everything in a plastic bag. Seal it and throw it in the trash.
    6. Disinfect the surrounding surfaces, then remove gloves and wash your hands thoroughly with soap and water.

    For a heavy infestation or droppings in an attic, crawl space or other enclosed area, consider hiring a professional cleanup service.

    A room-by-room mouse-proofing checklist

    Use this walk-through once in early fall and again in spring to keep mice out year after year.

    • Kitchen: look behind the stove, refrigerator and dishwasher for gaps where pipes and cords enter the wall. Seal them, and check under the sink where plumbing comes through the cabinet floor or back wall.
    • Pantry: move dry goods into sealed containers and wipe shelves. Check the bottom corners for droppings.
    • Laundry room: inspect the dryer vent hose and the outside vent flap, and the gaps around washer supply lines.
    • Bathrooms: check where pipes enter the wall behind the toilet and under the vanity.
    • Basement and crawl space: inspect the top of the foundation wall and the rim joist, where gaps are common, and look at window wells and crawl space vents.
    • Garage: replace a worn bottom seal on the garage door, seal gaps at the corners of the door frame, and keep pet food, birdseed and grass seed in metal bins.
    • Attic: look for nesting material, droppings in insulation, and openings at the eaves, soffits and roof vents.
    • Exterior: walk the perimeter looking at utility penetrations, AC line sets, outdoor faucets, cable lines and any cracks in siding or foundation.

    What to do after the mice are gone

    Once a week or two passes with no new catches or droppings, remove the traps and clean the areas where mice were active using the safe method above. Replace insulation that’s heavily soiled with droppings, since it can hold odors and attract new mice. Keep a couple of baited traps in the garage or basement as early warning, and check them every few weeks through the cold season. If you suddenly catch a mouse again, it’s a sign that a new gap has opened somewhere, and it’s time to inspect again.

    Do natural repellents work?

    Peppermint oil, mothballs, dryer sheets and ultrasonic plug-in devices are popular, but there’s little strong evidence that they keep mice away for long. Mothballs also contain chemicals that are hazardous indoors. At best, scents may be a minor deterrent. Trapping, sealing and removing food sources are what actually work.

    When to call a pest control professional

    • You keep catching mice for weeks despite sealing and trapping.
    • You see signs in multiple areas of the house, or nests in walls and the attic.
    • Mice have chewed wiring, which can be a fire hazard.
    • You suspect rats, which need a different approach.
    • You can’t find or reach the entry points.

    A good pest control company will focus on finding and sealing entry points, not just setting bait.

    Frequently asked questions

    If I see one mouse, are there more?

    Often, yes. Mice reproduce quickly, and seeing one, especially during the day, can mean there are several. Start trapping and sealing right away.

    What is the best bait for mouse traps?

    Peanut butter is a classic because it’s sticky and aromatic. Use only a small dab so the mouse has to work at it and trigger the trap.

    How long does it take to get rid of mice?

    A small problem can often be solved in one to two weeks with enough traps and good sealing. Larger infestations take longer.

    Why do mice come inside in the fall?

    Cooler temperatures and fewer food sources outdoors send mice looking for warmth and shelter. That’s why fall is the best time to seal your home.

    Can mice climb walls?

    Yes. Mice are good climbers and can travel up rough walls, pipes and wires, which is why gaps high on a wall or near the roofline matter too.

    The bottom line

    Getting rid of mice is a combination of quick action and long-term prevention: plenty of well-placed snap traps, careful cleanup, sealed food, and above all, sealed entry points. Do it in the fall before mice settle in, and you’ll keep your home rodent-free all winter.