
Category: Cleaning & Maintenance

Stain removal, deep cleaning and seasonal upkeep that prevents costly repairs.

  • Fall Home Maintenance Checklist: 25 Tasks to Do Before Winter

    Fall Home Maintenance Checklist: 25 Tasks to Do Before Winter

    Fall is the most important maintenance season of the year. The jobs you do in September, October and November decide whether your home sails through winter or spends it battling ice dams, frozen pipes, drafts and a furnace that quits on the coldest night. And because the weather is still mild, fall is also the most comfortable time to work outside.

    This fall home maintenance checklist covers 25 tasks, grouped by area, with tips on how to do each one and when. You don’t have to do everything in one weekend. Spread them over a few weeks, starting with the outdoor jobs while it’s still warm.

    Quick answer: The most important fall tasks are cleaning gutters, shutting off and draining outdoor faucets, scheduling a furnace or heat pump tune-up, replacing the HVAC filter, sealing drafts around windows and doors, testing smoke and carbon monoxide alarms, and having your chimney inspected if you use a fireplace.

    Outside the house

    1. Clean the gutters and downspouts

    Clogged gutters overflow, soak your foundation and can lead to ice dams in winter. Clean them after most of the leaves have fallen, and again later if you have many trees. Make sure downspouts carry water at least several feet away from the house. Use a sturdy ladder and have someone nearby, or hire a pro for tall or steep roofs.

    2. Inspect the roof

    From the ground with binoculars, or from a ladder if it’s safe, look for missing, curled or cracked shingles, damaged flashing around chimneys and vents, and sagging areas. Small repairs now are far cheaper than leaks in January.

    3. Shut off and drain outdoor faucets

    Disconnect, drain and store garden hoses. If you have interior shut-off valves for outdoor spigots, close them and open the outdoor faucet to drain any remaining water. This simple step prevents one of the most common causes of burst pipes.

    4. Winterize the sprinkler system

    Turn off the irrigation system and blow out the lines with compressed air, or hire a lawn care company, before the ground freezes.

    5. Seal exterior gaps and cracks

    Walk around the house and look for gaps around windows, doors, pipes, dryer vents and where siding meets trim. Seal them with exterior caulk. Besides stopping drafts and water, this keeps mice and insects out, and fall is exactly when they look for a warm place to spend the winter.

    6. Check the foundation and grading

    Look for new cracks in the foundation and make sure the soil slopes away from the house so water drains away. Fill low spots near the foundation with soil.

    7. Trim trees and shrubs

    Cut back branches that hang over the roof or touch siding. Heavy snow and ice can bring weak limbs down onto your house, power lines or car. For large trees or branches near power lines, call a professional arborist.

    8. Clean and protect the deck and patio

    Sweep away leaves, which can stain and trap moisture. Check for loose boards and protruding nails. If water soaks into the wood instead of beading up, plan to reseal it, ideally on a dry, mild day before temperatures drop too low for the product.

    9. Store outdoor furniture and equipment

    Clean and store patio furniture, cushions and grills, or cover them. Drain fuel or add stabilizer to gas-powered lawn equipment according to the manufacturer’s instructions, and get your snow blower ready.

    10. Give the lawn some fall care

    Rake or mulch fallen leaves so they don’t smother the grass. In many regions, fall is an ideal time to aerate, overseed and fertilize cool-season lawns. Keep mowing until the grass stops growing.

    Hands applying foam weatherstripping to a door frame

    Heating and comfort

    11. Schedule a furnace or heat pump tune-up

    Book a professional inspection before the first cold snap, when HVAC companies are busiest. A technician can clean components, check safety controls and spot problems before they leave you without heat.

    12. Replace the HVAC filter

    Start the heating season with a fresh filter, and check it monthly. Most homes need a new filter every 1 to 3 months.

    13. Test the heating system early

    Turn on the heat on a cool day before you really need it. A burning dust smell for the first few minutes is normal. Strange noises, short cycling or no heat are worth investigating while it’s still mild.

    14. Have the chimney inspected

    If you use a fireplace or wood stove, the National Fire Protection Association recommends that chimneys, fireplaces and vents be inspected at least once a year. Creosote buildup can cause chimney fires. Check that the damper opens and closes and that the chimney cap is intact.

    15. Reverse ceiling fans

    Switch ceiling fans to run clockwise on a low speed in winter. This gently pushes warm air that collects near the ceiling back down into the room.

    16. Clear vents and radiators

    Make sure furniture, rugs and curtains aren’t blocking supply vents, return vents or radiators, so heat can circulate freely.

    Inside the house

    17. Test smoke and carbon monoxide alarms

    Press the test button on every alarm, replace batteries as needed, and check the manufacture date. Smoke alarms should generally be replaced every 10 years, and carbon monoxide alarms according to the manufacturer’s guidance. Heating season is when CO risk rises, so make sure you have CO alarms near sleeping areas and on every level.

    18. Seal drafts around windows and doors

    On a windy day, hold a lit incense stick or a strip of tissue near window frames, door frames and outlets on exterior walls. If the smoke or tissue moves, you’ve found a draft. Add or replace weatherstripping, install door sweeps, and caulk gaps around trim.

    19. Insulate exposed pipes

    Wrap pipes in crawl spaces, attics, garages and along exterior walls with foam insulation sleeves to help prevent freezing.

    20. Flush the water heater

    Draining a few gallons, or doing a full flush, removes sediment that makes the heater less efficient and noisier. Many manufacturers recommend doing it once a year.

    21. Clean the dryer vent

    Lint buildup in the dryer duct is a fire hazard and makes drying take longer. Clean the lint trap every load, and clean the duct and exterior vent at least once a year.

    22. Check attic insulation and ventilation

    Look for thin or uneven insulation, damp spots or signs of pests. Good insulation keeps heat in your living space, and proper ventilation helps prevent ice dams and moisture problems.

    23. Test the sump pump

    If you have a sump pump, pour a bucket of water into the pit and make sure the pump turns on and drains it. Check that the discharge line outside is clear and won’t freeze.

    24. Prepare an emergency kit

    Winter storms can knock out power. Stock flashlights, batteries, a first-aid kit, water, nonperishable food, blankets and phone chargers. If you own a generator, test it and review safe use: never run one indoors, in a garage or near windows.

    25. Deep clean before the house closes up

    Once windows stay shut for the season, indoor air gets stale fast. Vacuum vents, wash bedding and curtains, clean the range hood filter, and vacuum refrigerator coils so your home starts winter fresh.

    Fall maintenance timeline

    WhenFocusKey tasks
    Early fall (September)Outdoor repairs while it’s warmRoof check, exterior caulking, deck sealing, tree trimming, furnace tune-up booking
    Mid fall (October)Heating and safetyHVAC filter, test heat, chimney inspection, smoke and CO alarm tests, draft sealing
    Late fall (November)Freeze protectionFinal gutter cleaning, drain outdoor faucets and hoses, sprinkler blowout, pipe insulation

    Tools and supplies to have on hand

    Gathering supplies before you start saves repeated trips to the hardware store. For most of this checklist you’ll want a sturdy extension ladder and a step ladder, work gloves, a gutter scoop, exterior and interior caulk with a caulk gun, weatherstripping and door sweeps, foam pipe insulation, replacement HVAC filters in the right size, batteries for smoke and CO alarms, a garden hose for flushing gutters and the water heater, and a flashlight. A simple notebook or phone note to record filter sizes, alarm dates and anything that needs a pro makes next year’s checklist even faster.

    DIY or hire a pro?

    Most of this list is easy DIY work. Consider hiring help for roof repairs, steep or high gutters, large tree work, chimney sweeping and inspection, HVAC tune-ups and anything involving gas or electrical systems. Spending a little on professional checks in the fall is far cheaper than an emergency call in the middle of a winter storm.

    Safety note: Ladder falls are a leading cause of home injuries. Set your ladder on firm, level ground, keep three points of contact, never stand on the top rungs, and don’t work on a ladder in wind, rain or ice.

    Frequently asked questions

    When should I start fall home maintenance?

    Start in early fall, while the weather is mild, with outdoor tasks like roof checks and caulking. Save freeze-protection jobs like draining outdoor faucets for just before the first hard freeze.

    How often should gutters be cleaned?

    At least twice a year, typically in late spring and late fall. Homes with many trees may need more frequent cleaning.

    Do I really need a furnace tune-up every year?

    Most manufacturers and HVAC pros recommend annual maintenance. It helps efficiency, safety and reliability, and some warranties require it.

    What’s the single most important fall task?

    For many homes, it’s protecting against water damage: clean gutters, drain outdoor faucets and insulate vulnerable pipes. Water causes some of the costliest winter repairs.

    How do I find drafts in my house?

    On a windy day, move a lit incense stick or a strip of tissue around window and door frames. If it flickers or moves, there’s a draft to seal.

    The bottom line

    A few weekends of fall maintenance protect your home from the biggest winter threats: water damage, frozen pipes, heating failures and drafts. Work outside first while it’s warm, then shift to heating, safety and freeze protection as the season cools. Print this list, check off each task, and you’ll head into winter ready for whatever the weather brings.
  • How to Get Rid of Mold in the Bathroom (and Keep It Away)

    How to Get Rid of Mold in the Bathroom (and Keep It Away)

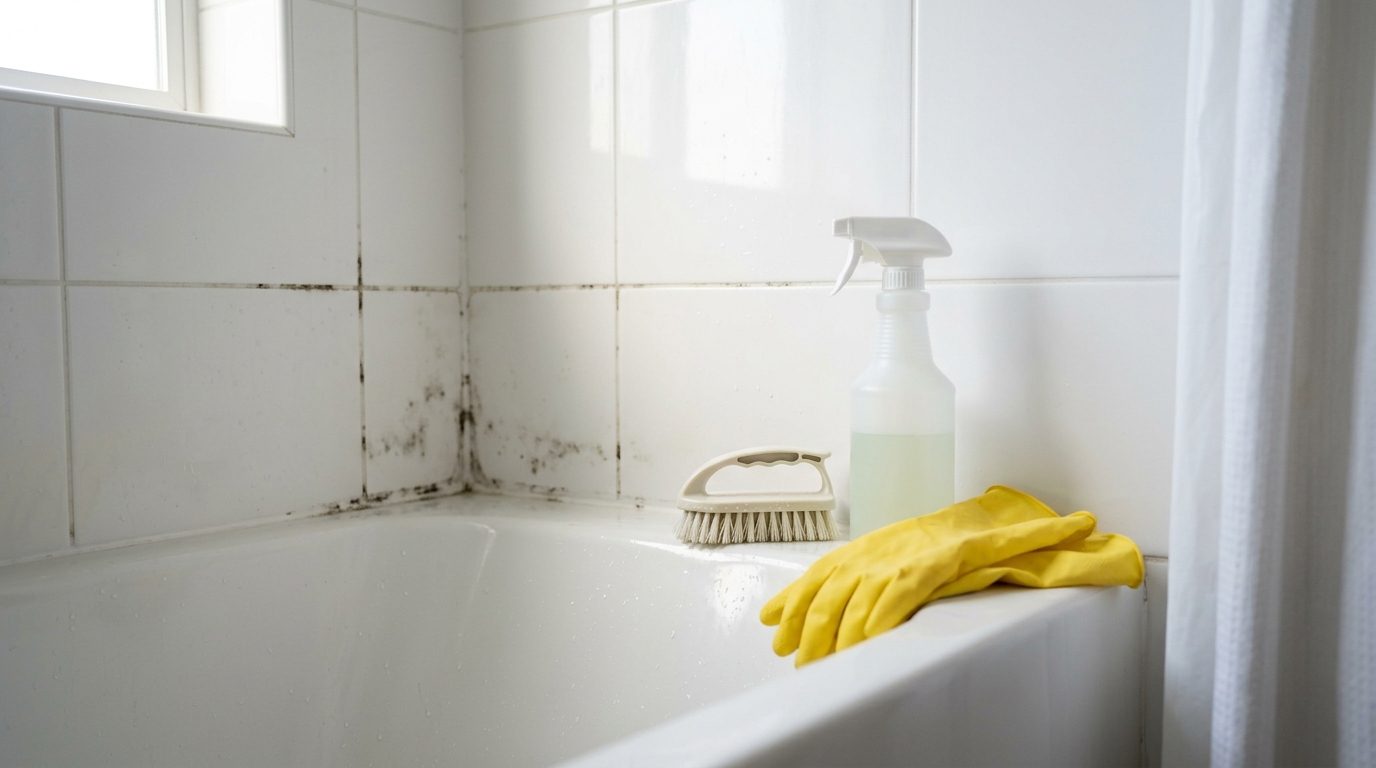
    Bathrooms are the perfect home for mold: warm, humid, and wet several times a day. Those black spots in the grout, the gray film along the caulk, the speckles creeping across the ceiling above the shower are some of the most common household cleaning problems. Left alone, mold stains surfaces, smells musty, damages caulk and paint, and can aggravate allergies and asthma.

    The good news is that most bathroom mold is surface growth you can remove yourself, and with a few habits, you can keep it from coming back. This guide covers how to identify what you’re dealing with, how to clean mold safely from tile, grout, caulk, ceilings and fabrics, and how to stop the moisture that feeds it.

    Quick answer: Ventilate the room, wear gloves and eye protection, and scrub hard surfaces with detergent and water or a dedicated mold and mildew cleaner, using a stiff brush on grout. Replace caulk that has mold growing underneath it. Then dry the area completely and control humidity by running the exhaust fan during and for at least 20 minutes after every shower. For mold covering more than about 10 square feet, the EPA suggests considering professional help.

    Mold vs. mildew: what’s on your tile?

    People use the words interchangeably, and both are types of fungi that grow in damp places. Mildew usually refers to surface growth that looks powdery or flat and is gray, white or black. It’s common on shower tile, grout and caulk, and it wipes or scrubs off fairly easily. Mold is a broader term and can grow into porous materials like drywall, wood, caulk and grout, where it’s harder to remove and can come back from below the surface.

    You may also see pink or orange slime around drains and on the shower floor. That’s usually a type of airborne bacteria rather than mold, but it thrives in the same damp conditions and cleans up the same way.

    When to call a professional

    Most bathroom mold is a DIY job, but not all of it. The U.S. Environmental Protection Agency suggests that if the moldy area is larger than about 10 square feet (roughly a 3-by-3-foot patch), you should consult its mold cleanup guidance and consider hiring a professional. You should also call a pro if:

    • The mold keeps coming back from inside a wall or ceiling.
    • Drywall or ceiling material is soft, stained or crumbling.
    • There’s a musty smell but no visible source, which can mean hidden mold.
    • The mold followed a leak, flood or sewage backup.
    • Someone in the home has asthma, serious allergies or a weakened immune system.

    Safety before you start

    Safety note: Protect yourself while cleaning mold. Wear long rubber or nitrile gloves, eye protection without vents, and ideally an N95 respirator, as the EPA recommends for mold cleanup. Open a window and run the exhaust fan. Never mix bleach with ammonia, vinegar or other cleaners, since dangerous gases can form. Keep children and pets out of the room.

    What to clean mold with

    CleanerGood forNotes
    Detergent and waterTile, tubs, sinks, painted surfacesThe EPA’s basic recommendation for hard surfaces; scrub, then dry
    Mold and mildew spray cleanerTile, grout, shower wallsFollow label directions and dwell times
    White vinegarLight mildew on hard surfacesSpray, wait about an hour, scrub and rinse; never mix with bleach
    3% hydrogen peroxideGrout and hard surfacesSpray, let it sit, scrub; test colored grout first
    Diluted bleachWhitening stained grout and nonporous surfacesUse only as the label directs, with ventilation; not a fix for porous materials
    Baking soda pasteGentle scrubbing on grout and caulk linesMild abrasive; pairs well with a stiff brush

    How to remove mold from bathroom surfaces

    Tile and tubs

    1. Spray the surface with your chosen cleaner and let it sit for the time on the label, or about 10 to 15 minutes for detergent solutions.
    2. Scrub with a non-scratch sponge or brush.
    3. Rinse with clean water.
    4. Dry thoroughly with a towel or squeegee and leave the fan running.

    Grout

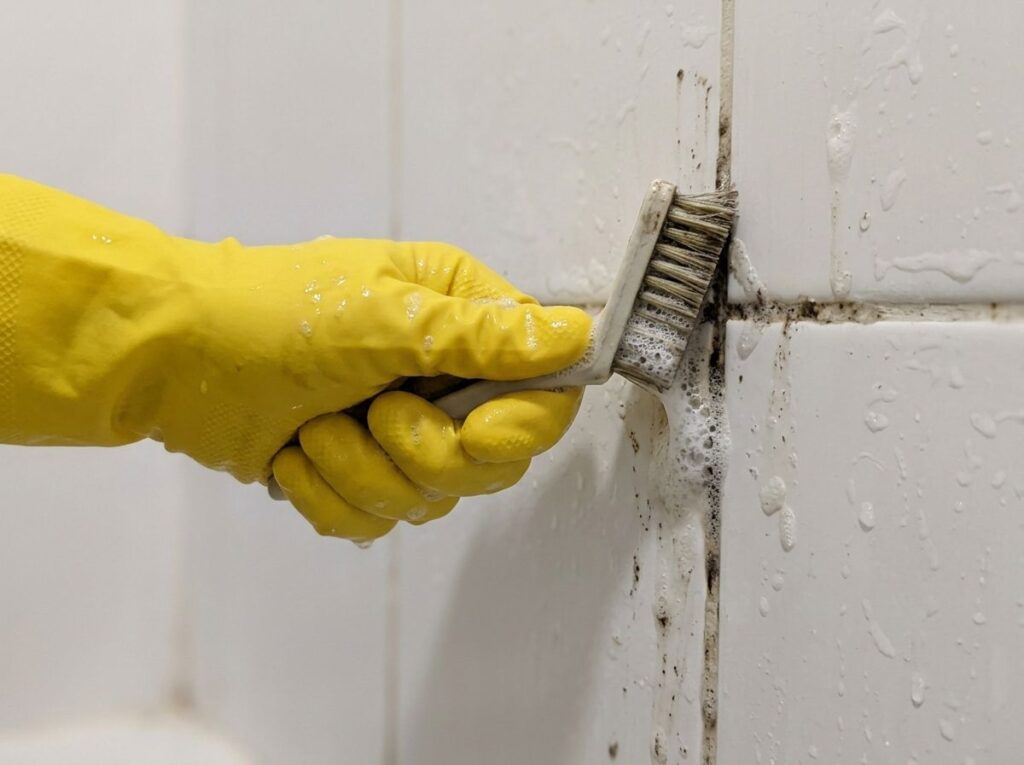
    Grout is porous, so mold can settle into it. Apply cleaner or a baking soda paste along the grout lines, let it sit, then scrub with a stiff, narrow grout brush or an old toothbrush. Rinse and dry. For stubborn stains, repeat with hydrogen peroxide or a grout-safe mildew cleaner. Once the grout is clean and fully dry, applying a penetrating grout sealer can make future cleaning easier.

    Gloved hand scrubbing mildew from shower grout with a brush

    Caulk

    If mold is only on the surface of the caulk, a cleaner and brush may remove it. But black spots that stay after scrubbing usually mean mold is growing inside or behind the caulk. Cleaning won’t fix that. Remove the caulk completely, clean and dry the joint thoroughly, and apply fresh mildew-resistant caulk.

    Ceilings and painted walls

    Mold on bathroom ceilings usually means moisture isn’t leaving the room fast enough. Wipe the area gently with a detergent solution or a cleaner safe for painted surfaces, being careful not to soak the drywall. Dry it well. If stains remain after cleaning, prime with a stain-blocking primer and repaint with a bathroom paint containing mildew-resistant additives. If the ceiling material is soft or the mold keeps returning quickly, have it inspected.

    Shower curtains, liners and bath mats

    Many plastic liners and fabric curtains can go in the washing machine with detergent and a couple of towels to help scrub them. Check the care label first. Hang them back up to dry fully. Replace liners that remain stained or smell musty, since they’re inexpensive.

    Porous materials

    Moldy drywall, ceiling tiles, wood and carpet can be hard or impossible to clean completely. In many cases, the affected material should be cut out and replaced after fixing the moisture problem. For larger areas, this is a job for a professional.

    Why mold keeps coming back

    Cleaning removes the mold you can see, but it will return if the moisture stays. Common reasons include:

    • An exhaust fan that’s too small, too noisy to use, not vented outside, or turned off right after showering.
    • Water left standing on tile, ledges and shower floors.
    • Slow leaks from a faucet, shower valve, toilet or tub drain.
    • Damaged caulk or grout that lets water behind the tile.
    • High household humidity overall.

    How to prevent bathroom mold

    • Run the exhaust fan during every shower and for at least 20 minutes afterward. A fan timer switch makes this automatic.
    • Make sure the fan vents outdoors, not into the attic, and that it’s sized for the room. A common rule of thumb for bathrooms up to 100 square feet is about 1 CFM of airflow per square foot of floor area.
    • Squeegee or towel off shower walls and doors after use.
    • Keep humidity in check. The EPA recommends keeping indoor humidity below 60%, ideally between 30 and 50%. A small hygrometer is an inexpensive way to monitor it.
    • Fix leaks quickly. The EPA advises drying wet materials within 24 to 48 hours to prevent mold growth.
    • Wash bath mats, towels and liners regularly and let them dry completely between uses.
    • Clean weekly with a bathroom cleaner before mildew gets established.
    • Maintain grout and caulk, sealing grout periodically and recaulking when it cracks or peels.

    A simple weekly routine to stay mold-free

    Prevention works best as a habit. This short routine takes about 15 minutes a week and keeps most bathrooms from ever developing a serious mold problem.

    1. After every shower: squeegee the walls and glass, hang towels and the bath mat to dry, and leave the fan running for 20 minutes.
    2. Once a week: spray tile, grout and the tub with a bathroom or mildew cleaner, let it sit, scrub the grout lines briefly and rinse. Wipe the sink and the base of the toilet.
    3. Once a week: check under the sink and around the toilet for drips or damp spots, and clean the drain area where pink slime likes to grow.
    4. Every month: wash the shower liner and bath mats, dust the exhaust fan grille so it moves air efficiently, and check your humidity reading.
    5. Every year: inspect caulk and grout, recaulk any cracked joints, and reseal grout if water no longer beads on it.

    Signs of hidden mold

    Sometimes the problem isn’t on the surface. Watch for a musty smell that lingers after cleaning, paint that bubbles or peels, discolored or soft spots on walls and ceilings, loose tiles, and allergy-like symptoms that improve when you leave the house. These can point to mold growing behind tile or inside a wall from a slow leak. Don’t open walls yourself if you suspect a large hidden problem; a professional can inspect and contain it safely.

    Frequently asked questions

    Is black mold in the shower dangerous?

    Many molds are black, and the color alone doesn’t tell you the species. Any mold can trigger allergy or asthma symptoms in sensitive people. Clean small areas promptly and safely, and seek professional help for large areas or if someone in the home has health concerns.

    Does bleach kill mold?

    Bleach can remove mold stains on hard, nonporous surfaces, but it isn’t effective at fixing mold in porous materials, and the EPA does not generally recommend it for routine mold cleanup. Detergent and water, or a dedicated mold cleaner, plus controlling moisture, is the usual approach.

    Is vinegar better than bleach for mold?

    Vinegar is a gentler option that works on light mildew on many hard surfaces. It’s not a magic fix for heavy growth. Never combine vinegar with bleach.

    How often should I clean my shower to prevent mold?

    A quick wipe or squeegee after each shower and a thorough cleaning once a week keeps most bathrooms mildew-free.

    Why is there mold on my bathroom ceiling?

    Warm, moist air rises and condenses on the ceiling. It’s a sign the room needs better ventilation: run the fan longer, make sure it vents outside, and consider a more powerful fan.

    The bottom line

    Bathroom mold is common, and small patches are easy to handle with the right protection, cleaner and a stiff brush. The real fix, though, is moisture control: a properly vented fan that you actually run, quick drying after showers, healthy humidity levels and prompt leak repairs. Replace moldy caulk instead of scrubbing it, call a professional for large or recurring growth, and your bathroom will stay fresh and clean.