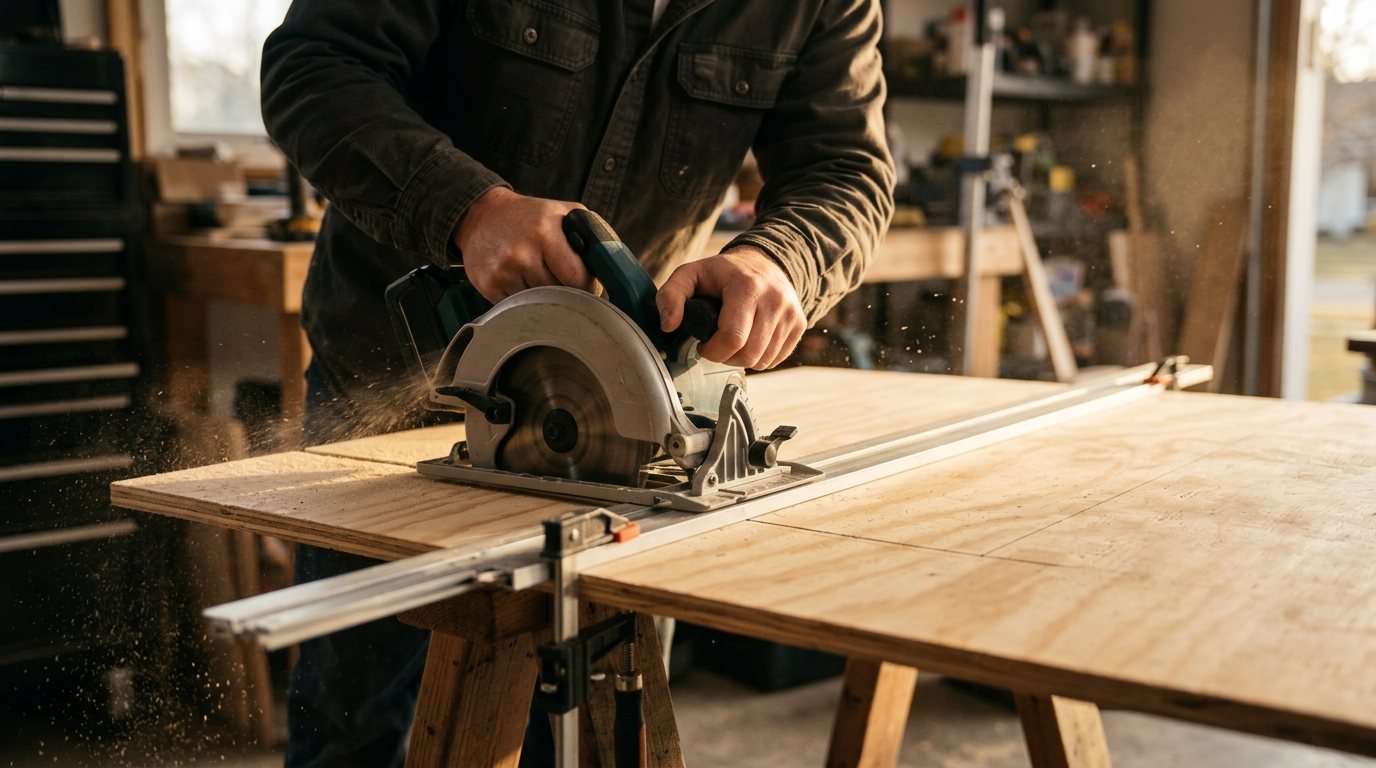
A circular saw is one of the most useful tools a homeowner can own, and also one of the most intimidating. The blade spins fast, the saw is loud, and if you have ever felt one jump or bind halfway through a board, you know why people treat it with respect.
This guide shows you how to use a circular saw safely from start to finish: the parts that matter, how to pick a blade and set its depth, the gear to wear, how to support your workpiece so the blade never gets pinched, what causes kickback, and how to make clean, straight cuts in plywood and lumber.
Quick answer: Clamp or fully support the workpiece so neither side can sag into the blade, set the blade depth so less than one full tooth shows below the board, and wear safety glasses and hearing protection. Start the saw before the blade touches the wood, guide it along a clamped straightedge or speed square with both hands, stand to the side of the blade, and let the blade stop completely before lifting the saw.
Know the parts of a circular saw
Knowing what each part does makes the safety steps below make sense. Most homeowner saws use a 7-1/4 inch blade, and the layout is similar on corded and cordless models.
- Shoe (base plate): the flat plate that rides on the workpiece, with a notch at the front showing where the blade cuts.
- Upper guard: the fixed cover over the top of the blade.
- Lower guard: the spring-loaded cover that swings up as you push into the wood and should snap back over the teeth when the saw leaves the cut.
- Depth and bevel levers: control how far the blade sticks out below the material and tilt the shoe for angled cuts.
- Trigger and lock-off button: many saws need the safety button pressed before the trigger works.
- Arbor, washer, bolt and spindle lock: hold the blade on the motor shaft. Use only the washers and bolt designed for your saw.
Choose the right blade
A sharp blade matched to the job does more for safety than almost anything else. A dull or wrong blade needs more force, burns the wood and is a common trigger for binding and kickback.
Tooth count
Fewer teeth cut fast but rough; more teeth cut slower but cleaner.
| Blade type (7-1/4 inch) | Typical teeth | Best for | Trade-off |
|---|---|---|---|
| Framing / construction | 18 to 24 | 2x4s, 2x6s, rough crosscuts and rips | Fast but splinters plywood |
| General purpose | 36 to 40 | Mixed lumber and plywood, shelving | Good all-rounder |
| Fine finish / plywood | 60 or more | Plywood, veneered panels, trim | Clean edges, slow in thick stock |
| Specialty (metal, masonry, fiber cement) | Varies | Only the material printed on the blade | Use only if your saw’s manual allows it |
Size, arbor and speed rating
The blade’s diameter and arbor hole must match your saw. The maximum speed printed on the blade must be at least the saw’s no-load RPM. Never use a blade that is bent, cracked, missing teeth or gummed up with pitch.
To change a blade, unplug the saw or remove the battery, press the spindle lock and loosen the bolt. Fit the new blade so its rotation arrow matches the arrow on the guard, then tighten the bolt firmly without overtightening.
Safety gear and a safe work area
Gear up every time, even for one cut.
- Safety glasses marked ANSI Z87.1, or a face shield over glasses.
- Hearing protection: earplugs or earmuffs.
- Dust mask or respirator, especially for plywood, MDF and pressure-treated lumber.
- Snug clothing, no dangling jewelry, long hair tied back, and sturdy shoes on a clear, dry floor.
Skip loose gloves near the blade, since spinning parts can grab them. Outdoors, plug corded saws into a GFCI-protected outlet and route the cord behind you, away from the cut line.
Safety note: Before each session, push the lower guard up with the saw unplugged and let it go. It should snap back quickly and fully cover the blade. If it sticks, do not use the saw until it is cleaned or repaired, and never tie, tape or wedge the guard open. OSHA’s hand and power tool guide requires the lower guard to return to its covering position when the saw is withdrawn from the work.
Tools and materials
- Circular saw with a sharp blade suited to the material
- Two sturdy sawhorses, or a sheet of 2 inch rigid foam insulation for cutting on the floor
- Two or more clamps
- Speed square for crosscuts
- A straightedge guide: a factory-edge plywood strip, a level, or a clamp-on guide rail
- Tape measure, pencil, utility knife and painter’s tape
- Safety glasses, hearing protection and a dust mask
If you are still building your kit, our basic home tool kit guide covers the measuring and clamping tools that make saw work safer.
Set the blade depth and bevel
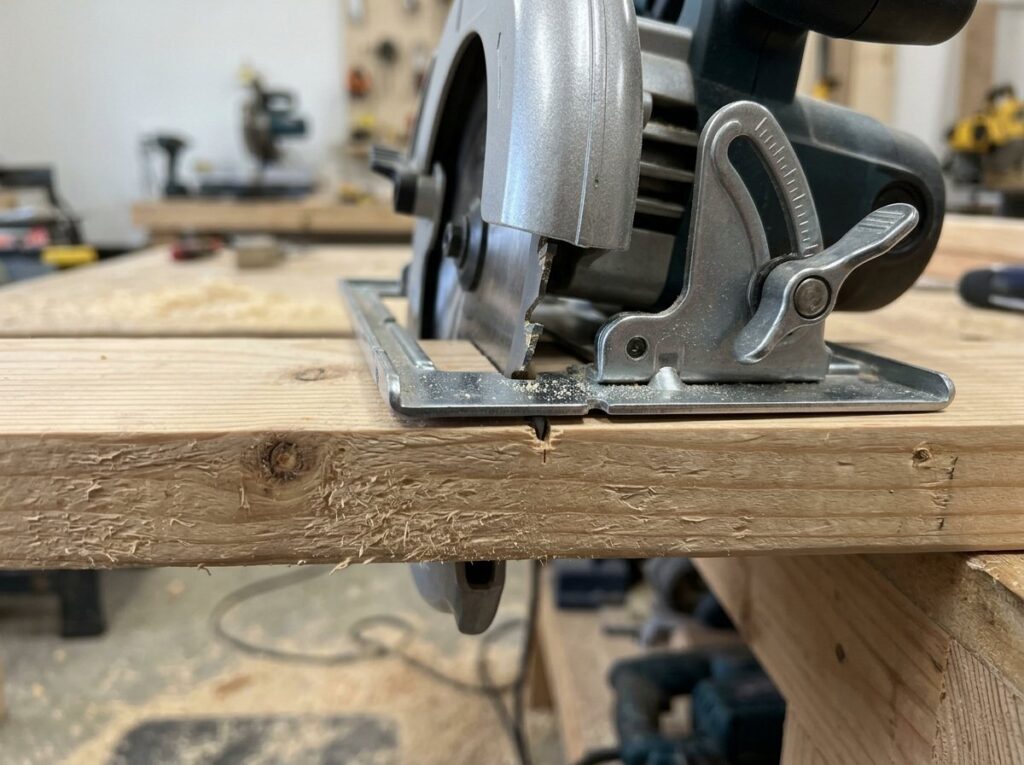
With the saw unplugged, rest it on the edge of the board and loosen the depth lever. Adjust the shoe until the blade extends 1/8 to 1/4 inch below the material, so less than one full tooth shows underneath, then lock it. Less exposed blade means less to grab, and less to contact if something goes wrong.
For bevel cuts, tilt the shoe to the angle you need and lock it, then make a test cut on scrap, since printed scales are often approximate. Check both levers are tight before each cut; a setting that shifts mid-cut can make the blade bind.
Support the work so the blade never gets pinched
Most kickback starts with the kerf (the slot the blade cuts) closing on the blade because the board sags or an offcut twists as it drops.
The classic mistake
Cutting a board in the middle, between two sawhorses, lets both halves sag toward the center as you cut. The kerf squeezes shut and the blade binds.
Better setups
- Short offcuts: clamp the board so the long, supported part is under the saw’s shoe and the short waste piece hangs off the end, free to fall away.
- Long boards: support both sides close to the cut line, using extra 2x4s across the sawhorses, so neither piece can drop or pinch.
- Full plywood sheets: lay the sheet on rigid foam insulation on the floor and set the depth to cut about 1/4 inch into the foam, so both pieces stay supported.
Never hold a board in your hand, across your knee or under your foot while cutting. If a piece is too small to clamp safely, cut it from a larger board instead.
Kickback: what causes it and how to prevent it
Kickback is a sudden reaction when the blade pinches, binds or twists in the cut, throwing the saw up and back toward you faster than you can react. It is largely preventable.
| Cause | What happens | Prevention |
|---|---|---|
| Kerf closing on the blade | Sagging or twisting pieces squeeze the blade | Support both sides near the cut; let small offcuts fall free |
| Twisting the saw to correct a wandering line | Back teeth dig in and climb out of the cut | Keep the saw straight; stop and restart rather than steering |
| Dull, dirty or wrong blade | Extra friction and heat cause binding | Use a sharp blade matched to the material |
| Blade set too deep | More blade in the wood, more grab | Set 1/8 to 1/4 inch below the board |
| Starting with teeth touching the wood | Blade catches on startup | Let the saw reach full speed, then feed in |
| Pulling the saw back while spinning | Blade climbs the kerf toward you | Release the trigger and wait for a full stop |
| Knots, warped or wet lumber | Uneven resistance and closing kerf | Slow the feed, use straight, dry stock |
Stand to the side of the blade’s path, not directly behind it, so a kickback goes past you rather than into you. Keep both hands on the handles and your feet planted, and never reach under the workpiece, where the guard cannot protect you.
If the blade binds, release the trigger and hold the saw still until the blade stops. Fix whatever is pinching, then restart with the blade centered in the kerf so the teeth are not touching the wood. The Power Tool Institute’s circular saw safety sheet covers these points in more detail.
How to make a straight cut, step by step
- Measure and mark. Draw a clear line with a square and mark an X on the waste side.
- Clamp and support. Set up as above, with the waste side free and the keeper side supported.
- Check the saw. Confirm blade depth, bevel at zero, levers tight, guard snapping back, and nothing under the cut line, including the cord.
- Line up. Rest the front of the shoe on the board and align the blade notch with your line, blade on the waste side. The blade removes about 1/8 inch, so cutting down the middle of the line leaves the piece slightly short.
- Start clear of the wood. With the teeth off the board, press the lock-off, squeeze the trigger and let the blade reach full speed.
- Feed steadily. Push forward at a pace where the motor does not bog down. Do not force, twist or steer.
- Finish through. Keep the shoe flat as you exit, release the trigger, and wait for the blade to stop and the guard to close before lifting the saw away.
Use a guide for truly straight cuts
Freehand cuts wander, and steering a wandering cut is what makes blades bind.
Crosscuts with a speed square
Hook the square’s lip over the far edge of the board, hold it firmly, and slide the saw’s shoe along its edge. Keep your holding hand well back from the blade path.
Long cuts with a clamped straightedge
For rips and plywood, measure the distance from the edge of the shoe to the blade, then clamp a straightedge that distance from your line. Keep the shoe lightly against the guide as you cut. On long rips in lumber, if the kerf starts to close, release the trigger, let the blade stop, slip a wooden shim into the kerf behind the saw, and restart with the blade centered in the kerf.
Plywood vs lumber: what changes
Cutting plywood
A circular saw blade cuts upward, so splintering happens on the top face. Put the good side of the plywood down. Use a 40 to 60 tooth or finer blade, and for visible edges, tape or score the cut line with a utility knife to keep the veneer from chipping. Support the whole sheet, because a 4 by 8 foot panel sags easily.
Cutting dimensional lumber
For 2x4s and other framing lumber, a 24 tooth framing blade is fine. Check boards for nails, screws and staples first, and be extra careful with warped or very wet boards, which are more likely to pinch. Afterward, smooth rough edges using the right paper from our sandpaper grit guide.
Pro tip: Cordless saws are strong enough for most home projects and remove the cord-in-the-cut hazard. If you are choosing a battery platform, our guide to 18V vs 20V batteries explains what those labels mean.
When to call a pro
Call a carpenter or handyman if:
- You need to cut into an existing wall, floor or ceiling where wiring, pipes or gas lines could be hidden.
- The cut involves structural framing, joists, beams or load-bearing walls.
- The guard sticks, the blade wobbles, or the saw smells hot or vibrates unusually.
- You need precise finish work, such as cabinetry or built-ins.
- You cannot comfortably control the saw with two hands, or you have already had a kickback scare.
According to Angi’s carpenter cost guide, carpenters typically charge about $40 to $100 per hour, with a national average around $50, and small repairs commonly run $40 to $360 in labor. If you only need a few panels cut, ask whether your lumberyard or home center will cut sheet goods when you buy them.
Frequently asked questions
Which side of plywood should face up when using a circular saw?
Put the good side down. A handheld circular saw’s teeth cut upward, so tear-out shows on the top face. Taping or scoring the line and using a fine-tooth blade reduces splintering further.
How deep should a circular saw blade be set?
Set it 1/8 to 1/4 inch below the bottom of the material, so less than a full tooth shows underneath. A shallow depth reduces exposed blade and lowers the chance of binding.
Why does my circular saw keep binding mid-cut?
The usual causes are a kerf closing because the board is sagging, a dull or pitch-covered blade, or twisting the saw to follow a line. Release the trigger, let the blade stop, fix the support or blade, and restart with the blade centered in the kerf.
Is it safe to use a circular saw with the guard pinned back?
No. The lower guard is your main protection from the exposed blade, and OSHA requires portable circular saws to have working guards. Lift it by its lever only for a plunge cut, and release it as soon as the blade enters the wood.
The bottom line
Using a circular saw safely comes down to a few habits: a sharp, correct blade set just below the board, gear on every time, the workpiece clamped and supported so the kerf cannot close, and a guide for straight cuts. Stand to the side, keep both hands on the saw, never pull back on a spinning blade, and let it stop before you lift. Do that consistently and the saw becomes a precise, predictable tool.