Your overhead lights are either blinding or off, and you want something in between. Or you already swapped in a dimmer, and now your LED bulbs flicker, buzz or refuse to dim below half brightness.
This guide explains which dimmer to buy (single-pole or 3-way, and which LED-compatible type), how to check wattage limits, how to install it with the power safely off and how to fix buzzing and flicker afterward.
Quick answer: Buy a dimmer that matches your circuit (single-pole if one switch controls the light, 3-way if two do) and your bulbs (a CL or ELV dimmer for dimmable LEDs), and keep the total bulb wattage under its LED rating. Turn off the breaker, verify the wires are dead with a tester, move the wires from the old switch to the dimmer and test. If LEDs flicker, adjust the dimmer’s low-end trim or use bulbs from the dimmer maker’s compatibility list.
Choose the right dimmer
Most dimmer problems start at the store. You need to match two things: the type of switch circuit you have and the type of bulbs or fixtures the dimmer will control.
Single-pole, 3-way or multi-location
If one switch controls the light, it’s single-pole: the switch has two terminal screws plus a green ground screw, and the toggle is usually marked ON and OFF. If two switches control the same light, they’re 3-way switches: each has three terminal screws plus ground, one of them darker than the others (the “common”), and no ON/OFF markings.
For a 3-way circuit, buy a 3-way dimmer and install it at one location only; the other location stays a standard 3-way switch unless the dimmer’s instructions call for a matching companion switch. Two ordinary 3-way dimmers on the same circuit generally won’t work. Many smart dimmers handle multi-location control with companion switches or wireless remotes instead.
Match the dimmer to your bulbs
Start with bulbs that are actually dimmable. ENERGY STAR advises buying LEDs marked “dimmable” on the package and checking the bulb maker’s website for recommended dimmers, because not every bulb works well with every dimmer. Its guide to dimmable LED lighting also notes that certified dimmable bulbs should dim to at least 20% of their light output.
| Dimmer type | Best for | What to know |
|---|---|---|
| Incandescent/halogen (older style) | Incandescent and halogen bulbs | Often causes flicker, buzzing or a narrow dimming range with LEDs. Replace it when you switch to LED. |
| CL (CFL/LED) | Dimmable screw-in LED and CFL bulbs, plus incandescent and halogen | The usual choice for household LED bulbs. Most have a low-end trim adjustment. |
| ELV (electronic low voltage, trailing-edge) | Many integrated LED fixtures and electronic transformers | Often gives smoother LED dimming. Many models need a neutral wire in the box. |
| MLV (magnetic low voltage) | Fixtures with magnetic transformers, such as some track and under-cabinet lights | Use only when the fixture maker specifies it. |
| Smart dimmer | App, voice or schedule control | Check the bulb ratings and whether it needs a neutral wire before you buy. |
Understand wattage limits
Every dimmer has a maximum load, and exceeding it makes the dimmer run hot and fail early. Check these points before you buy.
- Add up the real wattage. Use the actual watts printed on each bulb (for example 9 watts), not the “60-watt equivalent” figure. Multiply by the number of bulbs on the switch.
- Use the LED rating. LED-compatible dimmers list separate ratings for LED/CFL loads and incandescent/halogen loads, and the LED rating is much lower. Stay under the LED number, ideally with some headroom.
- Derate in multi-gang boxes. When two or more dimmers sit side by side, you often have to snap off their side fins to fit, which lowers the maximum load. The instructions include a derating chart; follow it.
- Watch the minimum load. A single low-watt LED on some dimmers can flicker or glow when off. The dimmer’s instructions list any minimum.
- Lights only. Never use a light dimmer on an outlet, a ceiling fan motor or other motors. If you’re working on a fan, our guide to installing a ceiling fan covers the correct controls.
Tools and materials
- Dimmer switch matched to your circuit and bulbs
- Non-contact voltage tester (and a known live outlet to check it)
- Flat and Phillips screwdrivers
- Wire strippers and needle-nose pliers
- Wire connectors sized for your wire (usually included with the dimmer)
- Painter’s tape and a marker for labeling wires
- Flashlight or headlamp
Safety note: Turn off the circuit breaker, not just the switch, and confirm with a voltage tester that every wire in the box is dead. Test the tester on a known live outlet before and after. Multi-gang switch boxes can hold wires from more than one circuit, so check every wire, not just the ones on the switch you’re replacing.
How to install a single-pole dimmer step by step
- Kill the power. Turn off the breaker for the light, tape a note on the panel and confirm the light no longer comes on.
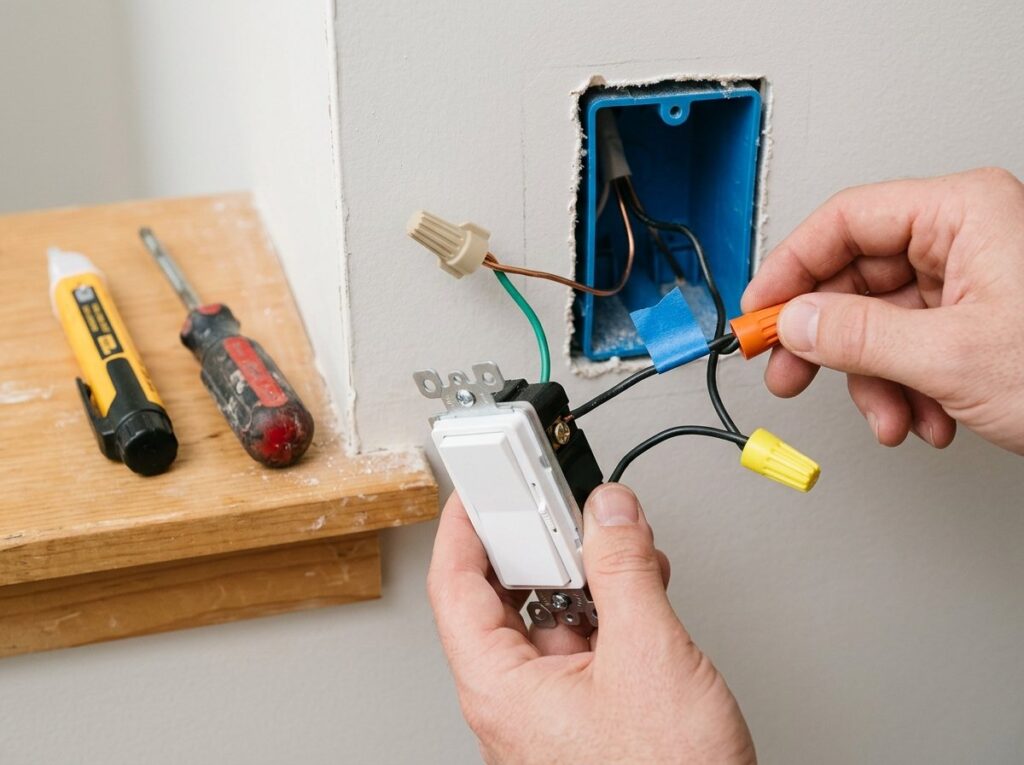
- Remove the old switch. Take off the cover plate, unscrew the switch from the box and gently pull it forward without touching any bare metal.
- Test every wire. Hold the non-contact tester to each wire and terminal. If anything reads live, find and turn off the right breaker before you go on.
- Inspect the wiring. Look for scorched or brittle insulation and dull silver aluminum wire. Most dimmers are not rated for aluminum wiring, so stop and call an electrician if you find it.
- Photograph and label. A single-pole switch usually has two hot wires (often black) on its screws and a bare copper ground. White neutral wires are typically bundled in the back of the box and stay there.
- Connect the ground. Join the dimmer’s green lead or screw to the bare copper ground wire.
- Connect the hot wires. On a standard single-pole dimmer the two leads are usually interchangeable, so each house wire goes to one dimmer lead. If the dimmer marks “line” and “load,” the line goes to the wire bringing power in; if you can’t tell which that is, have an electrician identify it rather than probing live wires.
- Connect the neutral if required. Smart and some ELV dimmers need a neutral. Connect the dimmer’s white lead to the neutral bundle with a short pigtail.
- Secure and mount. Twist connectors on firmly and tug each wire. Fold the wires neatly into the box, screw the dimmer in place and attach the plate.
- Restore power and test. Run the dimmer through its full range and set the low-end trim if it has one.
Wiring a 3-way dimmer
Before you disconnect the old 3-way switch, find the darker common screw and wrap that wire with tape. Connect the taped wire to the dimmer’s common lead or terminal, the two remaining traveler wires to the traveler terminals (usually interchangeable) and the ground to ground. If the light only works in some switch combinations afterward, the common wire is almost always on the wrong terminal. Our guide on how to replace a light switch walks through 3-way wiring in more detail.
Troubleshooting buzzing, flicker and other problems
Most issues after an install come from a mismatch between dimmer and bulbs, a load that’s too high or too low, or a loose connection. Always turn off the breaker before you open the box again.
| Problem | Likely cause | What to do |
|---|---|---|
| Lights flicker or pulse when dimmed | Bulbs not compatible with the dimmer, or low-end trim set too low | Raise the low-end trim. Try bulbs from the dimmer maker’s compatibility list. |
| Bulbs or fixture buzz | Old-style dimmer on LEDs, or a bulb and dimmer that don’t match | Switch to a CL or ELV dimmer and use a different brand of dimmable bulb. |
| Dimmer itself hums loudly | Overload or a loose connection | Check total wattage against the LED rating and derating. With the power off, retighten connections. |
| LEDs glow faintly when off | Small leakage current through a dimmer without a neutral | Use a neutral-wired dimmer or a bulb listed as compatible. Add load if under the minimum. |
| Light cuts out at low settings | Low-end trim set below what the bulbs can handle | Raise the low-end trim until the light stays on at the bottom of the range. |
| 3-way works only from one switch | Common wire on a traveler terminal | Power off, then move the taped common wire to the common terminal. |
| Dimmer feels hot | Overload, derating ignored or loose wire | Slightly warm is normal; hot to the touch is not. Turn off the breaker and investigate. |
If lights flicker on circuits without dimmers, or several rooms flicker at once, the cause is probably in the wiring or service, not your new dimmer. See our guide to lights flickering in the house to narrow it down.
Pro tip: The low-end trim is usually a small dial or a programming mode explained in the instructions. Set the dimmer to its lowest level, then raise the trim just until every bulb glows steadily without flicker. This one adjustment fixes most LED dimming complaints.
When to call a pro
Replacing a single-pole switch with a dimmer is one of the more approachable electrical jobs, but stop and hire a licensed electrician if you notice any of these:
- Aluminum wiring, cloth-covered wire, or scorched, melted or crumbling insulation.
- A dimmer or switch that feels hot, smells of burning or shows discoloration (see our guide to a warm outlet or light switch).
- A breaker that trips when you restore power.
- Wires you can’t identify, more than one circuit in the box, or no neutral where your smart dimmer needs one.
- A box too crowded to fit the bulkier dimmer safely, or a need for new wiring between switch locations.
Rules on permits vary by city and state, so check with your local building department if you’re unsure. On cost, Fixr’s switch installation cost guide puts a standard dimmer at about $75 to $100 installed, with the dimmer itself typically $10 to $25, and electrician rates around $40 to $120 per hour. HomeServe lists typical labor for a dimmer install at $65 to $150.
Frequently asked questions
Do I need a special dimmer for LED lights?
Yes, in most cases. Older incandescent dimmers often cause LEDs to flicker, buzz or dim poorly. Use a dimmer labeled for LED (CL or ELV) together with bulbs marked “dimmable,” ideally a combination listed on the dimmer maker’s compatibility list.
Why is my dimmer switch buzzing?
A faint hum can be normal for some dimmers, but a loud buzz usually means the bulbs and dimmer aren’t compatible or the dimmer is overloaded. Check the total wattage against the LED rating, try a different dimmable bulb, and if the dimmer is hot, turn off the breaker and call an electrician.
How many LED bulbs can I put on one dimmer?
Add up the actual wattage of all the bulbs and keep it under the dimmer’s LED rating, lowered further if the dimmer is derated in a multi-gang box. Very small loads can cause problems too, so check the minimum load in the instructions.
Does a dimmer switch need a neutral wire?
Basic single-pole dimmers usually don’t. Many smart dimmers and some ELV models do, and older homes often lack a neutral in switch boxes. Open the box with the power off and look for bundled white wires before you buy.
Can I put a dimmer on a 3-way switch?
Yes. Replace one of the two 3-way switches with a 3-way dimmer and leave the other as a standard 3-way switch, or use a smart dimmer with its matching companion switch. Mark the common wire before you disconnect anything.
The bottom line
A dimmer install goes smoothly when the dimmer matches both your circuit and your bulbs. Choose single-pole or 3-way, use an LED-rated CL or ELV dimmer with dimmable bulbs, stay under the LED wattage rating and always turn off the breaker and verify with a tester. If something feels hot, smells burnt or doesn’t make sense in the box, call a licensed electrician.