Maybe your toilet is cracked, constantly running, rocking on the floor, or simply old and thirsty. Whatever the reason, replacing it is one of the more satisfying bathroom upgrades, and it is well within reach of a careful DIYer with a free afternoon and a helper for the heavy lifting.
This guide covers how to choose a toilet that actually fits, including the rough-in measurement, bowl shape and height. It then walks through removing the old toilet, checking the flange, choosing a wax ring or wax-free seal, setting and shimming the new one, connecting the water supply, and what a plumber typically charges if you would rather hand it off.
Quick answer: Measure the rough-in from the finished wall to the center of the floor bolts, then buy a toilet with the same rough-in. Shut off the water, drain and remove the old toilet, scrape off the old wax and check that the flange is solid and level with the floor. Set the new toilet straight down onto a new wax ring or wax-free seal, tighten the bolts evenly, shim any wobble, connect the supply line and test for leaks before caulking the base.
Choosing a new toilet that fits
Measure the rough-in
The rough-in is the distance from the finished wall behind the toilet to the center of the drain. Measure from the wall itself, not the baseboard, to the center of one of the bolts that hold the toilet to the floor. Twelve inches is by far the most common, but 10-inch and 14-inch rough-ins exist, especially in older homes. Buy a toilet labeled for your measurement, or it will either sit too far from the wall or not fit at all.
Pick a bowl shape
- Round front: shorter and better for small bathrooms or tight spaces near a door or vanity.
- Elongated: about 2 inches longer, which most adults find more comfortable. Check that the extra length will not block a door or crowd the walkway.
Choose a height
Standard-height toilets sit lower, which some families with young children prefer. Comfort-height or chair-height models raise the seat a couple of inches, which makes sitting and standing easier for taller people and anyone with knee or back problems. Also check the overall tank height if you have a cabinet or shelf above the toilet.
Look at the flush rating
New toilets sold in the US must use no more than 1.6 gallons per flush, and models with the EPA’s WaterSense label use 1.28 gallons or less. The EPA estimates that replacing older, inefficient toilets can save a household nearly 13,000 gallons of water and more than $170 a year in water costs. One-piece toilets are easier to clean, while two-piece models are lighter to carry and often cheaper.
Tools and materials
- New toilet with matching rough-in, plus seat
- Wax ring (standard or extra-thick) or wax-free seal
- New closet bolts, washers and nuts
- Braided stainless supply line
- Adjustable wrench and a mini hacksaw
- Putty knife or plastic scraper
- Sponge, bucket, old towels and rubber gloves
- Level and tape measure
- Plastic toilet shims
- Rag or drain plug to block the drain
- Caulk and a utility knife
How to remove the old toilet
- Shut off the water. Turn the supply valve behind the toilet clockwise until it stops. If it will not close or leaks, turn off the main; see our guide on how to shut off the water to your house.
- Drain the toilet. Flush and hold the handle down to empty the tank. Sponge out what is left in the tank and bowl into a bucket.
- Disconnect the supply line. Hold a towel under it and unscrew the coupling nut from the tank.
- Cut the caulk. Score any caulk around the base with a utility knife.
- Remove the floor nuts. Pry off the bolt caps and unscrew the nuts. If they are rusted solid, cut the bolts with a mini hacksaw.
- Lift the toilet. On a two-piece toilet, remove the tank first to reduce weight. Rock the bowl gently to break the wax seal, then lift it straight up and carry it to a towel or tarp.
- Block the drain. Stuff a rag into the drain opening right away to stop sewer gas and keep tools from falling in. Remember to remove it before setting the new toilet.
- Clean the flange. Scrape all the old wax off the flange and floor with a putty knife, and remove the old bolts.
Safety note: A toilet bowl is heavy and awkward, and porcelain edges can be sharp if it cracks. Get a helper, lift with your legs, wear gloves, and keep the bowl upright so remaining water does not spill. Wash your hands after handling the old wax and drain area.
Check the flange and subfloor
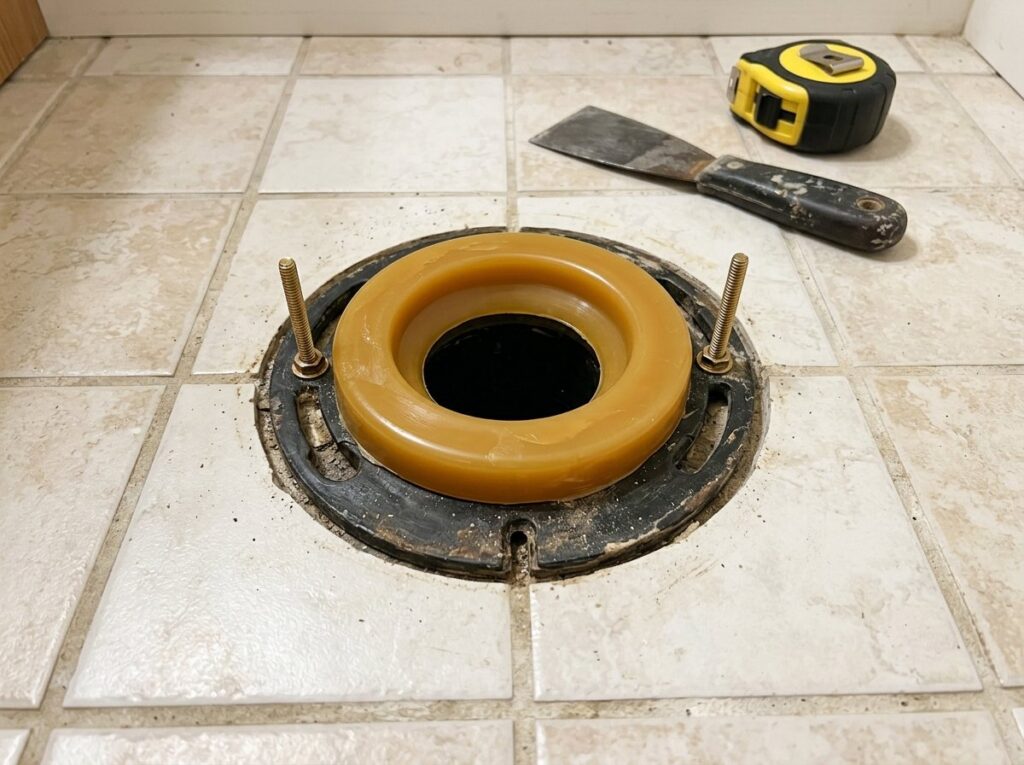
The flange is the round fitting on top of the drainpipe that the toilet bolts to. A bad flange is a common reason toilets rock and wax rings leak, so inspect it carefully now while you have access.
- Height: According to Oatey’s wax ring guide, the flange should be flush with or slightly above the finished floor. If new tile or flooring has left it below the surface, use an extra-thick wax ring or a flange extender. Never stack two wax rings.
- Cracks and breaks: a cracked or broken plastic flange, or a bolt slot that has snapped off, can often be fixed with a repair ring or repair flange that screws down over the old one.
- Rust: heavily corroded cast-iron or steel flanges may need a plumber, especially if the flange is leaded or glued to the pipe.
- Loose flange: if it moves, screw it down to the subfloor with corrosion-resistant screws.
- Soft floor: press around the drain. Spongy or dark, stained subfloor means a slow leak has caused rot that must be repaired before you set the new toilet.
Wax ring vs wax-free seal
Either type can give you a reliable, leak-free seal. The best choice depends on your flange and how confident you are about setting the bowl in one go.
| Feature | Wax ring | Wax-free seal |
|---|---|---|
| Material | Molded wax, sometimes with a plastic horn | Rubber or foam gasket |
| Cost | Least expensive | Costs more |
| Repositioning | One shot; lift the toilet and you need a new ring | Can usually be lifted and reset |
| Temperature | Stiff when cold, soft when hot | Not affected |
| Uneven or damaged flange | Molds to irregular surfaces | May not seal as well |
| Recessed flange | Use an extra-thick ring | Some include spacers or come in thicker versions |
Whichever you choose, never reuse an old wax ring, and follow the instructions that come with your seal and toilet.
How to install the new toilet
1. Fit the bolts and seal
Slide new closet bolts into the flange slots, heads down, and turn them so they sit parallel to the wall. Some kits include plastic retainers to hold them upright. Press the wax ring onto the outlet horn on the underside of the bowl, or center it on the flange, following the toilet instructions. Remove the rag from the drain.
2. Set the bowl
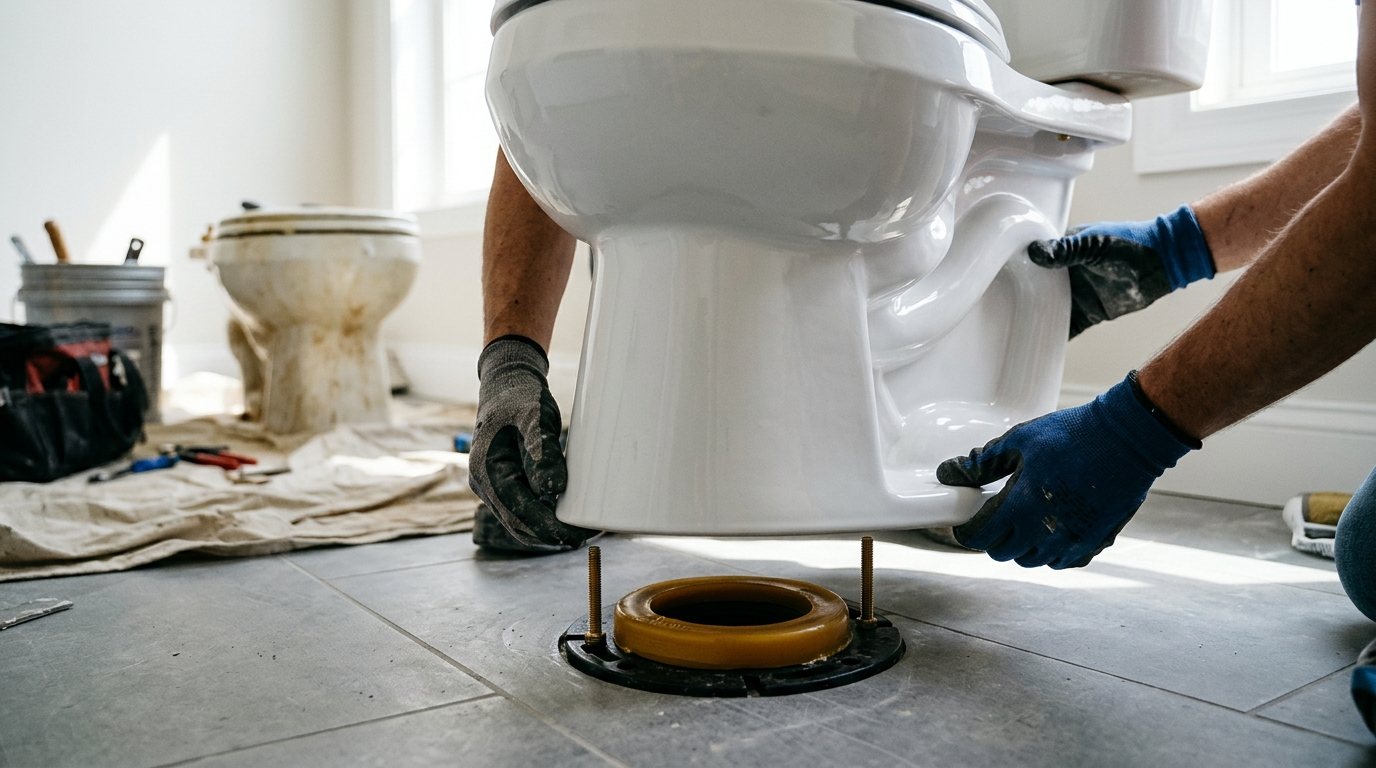
With a helper guiding, lower the bowl straight down so the bolts come up through the holes in the base. Do not slide or twist it once it touches the wax. Press down firmly and evenly with your weight, rocking very slightly, until the base sits on the floor.
3. Tighten the bolts
Add the washers and nuts and tighten them by hand. Then use a wrench to alternate between sides a little at a time, keeping the bowl level. Stop when it is snug and does not move. Overtightening is the most common way to crack a new toilet.
4. Shim any wobble
If the bowl rocks on an uneven floor, slide plastic shims under the low side until it sits solid, then tighten the nuts a little more. Trim the shims flush with a utility knife so the caulk will hide them. Cut the excess bolt length with a hacksaw and snap on the caps.
5. Attach the tank (two-piece toilets)
Set the rubber tank gasket on the bowl, lower the tank onto it and insert the tank bolts with their washers. Tighten the nuts alternately until the tank is level and firm against the gasket. Again, snug is enough.
6. Connect the supply line
Attach a new braided supply line from the shutoff valve to the tank fill valve. Oatey suggests hand-tightening the connection and then adding about a quarter turn with a wrench. Turn the water on slowly and let the tank fill.
7. Test and caulk
Flush several times and check the supply connections, the tank bolts and the base for any water. If water appears at the base, the seal has not formed and the toilet must be lifted and reset with a new wax ring. Once everything stays dry, attach the seat and run a neat bead of caulk around the base. Many plumbers leave a short gap at the back so that a future leak shows up instead of hiding under the toilet.
Common problems after installation
- Toilet rocks: add shims and retighten slightly, or check for a high or broken flange.
- Water at the base: the seal failed. Lift the toilet and replace the wax ring or seal.
- Drip at the supply line: tighten a little more, or replace the line if it is old.
- Constant running: adjust the fill valve and float. Our guide on fixing a toilet that keeps running walks through it.
- Weak or clogged flush: check that the rag is out of the drain, then see our guide on how to unclog a toilet.
When to call a pro
Call a plumber if the flange is cast iron and badly corroded, the drain is damaged, the subfloor is rotted, or the shutoff valve will not close or leaks. A pro is also worth it if you need to move the drain for a different rough-in, or if you cannot safely lift the toilet.
According to HomeAdvisor’s toilet installation cost guide, installing or replacing a toilet typically costs about $224 to $533, with an average around $374. Hauling away the old toilet can add about $50 to $200, and replacing a faulty shutoff valve typically costs about $50 to $150. Flange rebuilds and floor repairs push costs higher. Doing it yourself saves the labor, leaving the toilet, a wax ring, bolts and a supply line.
Frequently asked questions
Can I replace a toilet myself?
Yes, if you have a helper for the lifting and follow the steps carefully. Most DIYers finish in an afternoon. The main risks are a poor seal at the base and cracking porcelain by overtightening, both avoidable with care.
How do I know what rough-in my toilet is?
Measure from the finished wall behind the toilet to the center of one of the floor bolts. A reading near 12 inches means a standard 12-inch rough-in. If you get about 10 or 14 inches, shop for a toilet labeled for that size.
Should I use a wax ring or a wax-free seal?
A wax ring is inexpensive, proven and seals well on slightly uneven flanges. A wax-free seal is cleaner and lets you lift and reposition the toilet. Use an extra-thick ring or a seal with a spacer if the flange sits below the floor.
Should I caulk around the base of a toilet?
Caulking keeps mop water and debris from getting under the base and helps steady the toilet. Many plumbers leave a small gap at the back so a leak from the seal becomes visible quickly.
How long does it take to replace a toilet?
Plan on one to two hours for a straightforward swap, plus extra time if you need to repair the flange, cut rusted bolts or fix the floor.
The bottom line
Replacing a toilet comes down to buying the right rough-in, starting with a solid flange, and setting the new bowl straight down onto a fresh seal without overtightening. Take your time, test before you caulk, and call a plumber if you find rot, a broken cast-iron flange or a bad shutoff valve.