You notice a crack running across the driveway, a gap opening along the edge of the patio, or a thin line creeping down the basement wall. Some concrete cracks are harmless and just need sealing before water gets in. Others are a sign that the ground underneath is moving, and filling them only hides the problem.
This guide helps you tell the difference between hairline, settlement and structural cracks, then walks you through cleaning a crack, using backer rod, choosing between polyurethane sealant, epoxy and patching compound, and handling driveways, walls and foundations differently. It also covers the red flags that mean you should call a structural pro.
Quick answer: For cracks up to about 1/4 inch wide in driveways, sidewalks and patios, clean out the crack, insert foam backer rod in deeper gaps, and fill it with a flexible polyurethane concrete sealant. Use a two-part epoxy for stable cracks in walls and a patching compound for wide, chipped areas. Cracks wider than about 1/4 inch, cracks that keep growing, and any horizontal crack in a foundation wall need a professional assessment.
Types of concrete cracks
Almost all concrete cracks eventually. As it cures, concrete shrinks slightly, and slabs move with temperature, moisture and frost. The type, width and direction of a crack tell you whether it is cosmetic or a warning sign.
Hairline and shrinkage cracks
This Old House describes hairline cracks as thin, surface cracks typically less than 1/8 inch wide, often caused by shrinkage as the concrete cured. A fine spiderweb pattern on the surface, called crazing, comes from the top drying too fast during curing. These are usually cosmetic, but sealing them keeps water from getting in and widening them through freeze-thaw cycles.
Settlement cracks
Settlement cracks form when the soil under a slab compresses, washes out or shifts unevenly. One side of the crack often sits higher than the other, and the crack may get wider over time. On driveways and walks these are common near downspouts, where water erodes the base, and at edges where the soil was poorly compacted.
Structural cracks
Structural cracks are wider and deeper and are caused by forces the concrete was not designed to handle, such as soil pressure against a foundation wall, heavy loads, tree roots or frost heave. This Old House notes that cracks 1/8 inch wide or wider deserve a closer look, and it recommends calling a professional for cracks wider than 1/4 inch or any crack that keeps growing.
| Crack type | What it looks like | Typical cause | What to do |
|---|---|---|---|
| Hairline | Less than 1/8 inch, flat on both sides | Shrinkage during curing | Seal with flexible crack filler or sealant |
| Crazing | Fine spiderweb pattern on the surface | Surface dried too fast | Clean and apply a concrete sealer or resurfacer |
| Settlement | Wider, one side may be lower | Soil movement or erosion under the slab | Seal if stable; fix drainage; call a pro if it keeps moving |
| Wide or uneven slab crack | Over 1/4 inch, or edges offset | Base failure, heavy loads, roots | Pro assessment; possible slab lifting or replacement |
| Vertical foundation crack | Straight up and down, often near windows | Shrinkage or minor settling | Monitor; seal or inject if dry and stable |
| Horizontal or stair-step wall crack | Runs sideways or follows block mortar joints | Soil pressure or frost pushing the wall | Call a foundation pro or structural engineer |
Choosing the right crack filler
The biggest mistake is using a rigid filler on a crack that moves, or a soft caulk where you need strength. Match the product to the crack.
Polyurethane concrete sealant
Polyurethane sealants stay flexible after curing, so they stretch and compress as slabs expand and contract. That makes them the best choice for most driveway, sidewalk and patio cracks and for control joints. Self-leveling versions flow into horizontal cracks and settle flat, while non-sag versions stay put on vertical surfaces. Home Depot’s driveway crack guide recommends flexible fillers so they don’t pull away during freeze-thaw cycles.
Epoxy
Two-part epoxy cures hard and bonds strongly. This Old House recommends it for small to midsize cracks, especially on vertical surfaces, and notes that it can be stronger than the surrounding concrete. Because it is rigid, epoxy is best for cracks that have stopped moving. If the slab keeps shifting, a new crack can form right next to the repair.
Patching compound
Cement-based patching compounds, often vinyl- or polymer-modified, are for wide cracks, chipped edges, spalled spots and holes. They rebuild the surface rather than seal a moving gap. For large or deep repairs, Home Depot suggests a concrete mix that contains gravel.
Polyurethane foam injection
For leaking basement wall cracks, injection kits push expanding polyurethane foam through the full depth of the wall to stop water. Ask the Builder notes that polyurethane injection is for sealing and waterproofing, while epoxy injection is used when a crack needs a structural bond.
Tools and materials
- Wire brush, stiff broom and shop vacuum
- Cold chisel and hand sledge or hammer
- Garden hose or pressure washer
- Closed-cell foam backer rod sized slightly wider than the crack
- Polyurethane concrete sealant, epoxy or patching compound, depending on the crack
- Caulk gun, putty knife and margin trowel
- Safety glasses, work gloves and a dust mask
- Painter’s tape (optional, for clean edges)
Safety note: Wear safety glasses when chiseling concrete, since chips fly hard and fast. Fresh cement products are caustic and can burn skin, so wear gloves and long sleeves, and wash off any splashes quickly. Wear a dust mask when sweeping or vacuuming concrete dust, which contains silica.
How to repair a concrete crack step by step
Step 1: Check the conditions
Home Depot advises starting only when no rain is forecast and the concrete surface is at least 50 degrees Fahrenheit. Many sealants also list their own minimum temperature, so read the label. In late fall, work in the warmest part of a dry afternoon, or seal temporarily now and do the permanent repair in spring.
Step 2: Clean out the crack
- Pull out weeds, old filler and loose chunks with a screwdriver or wire brush.
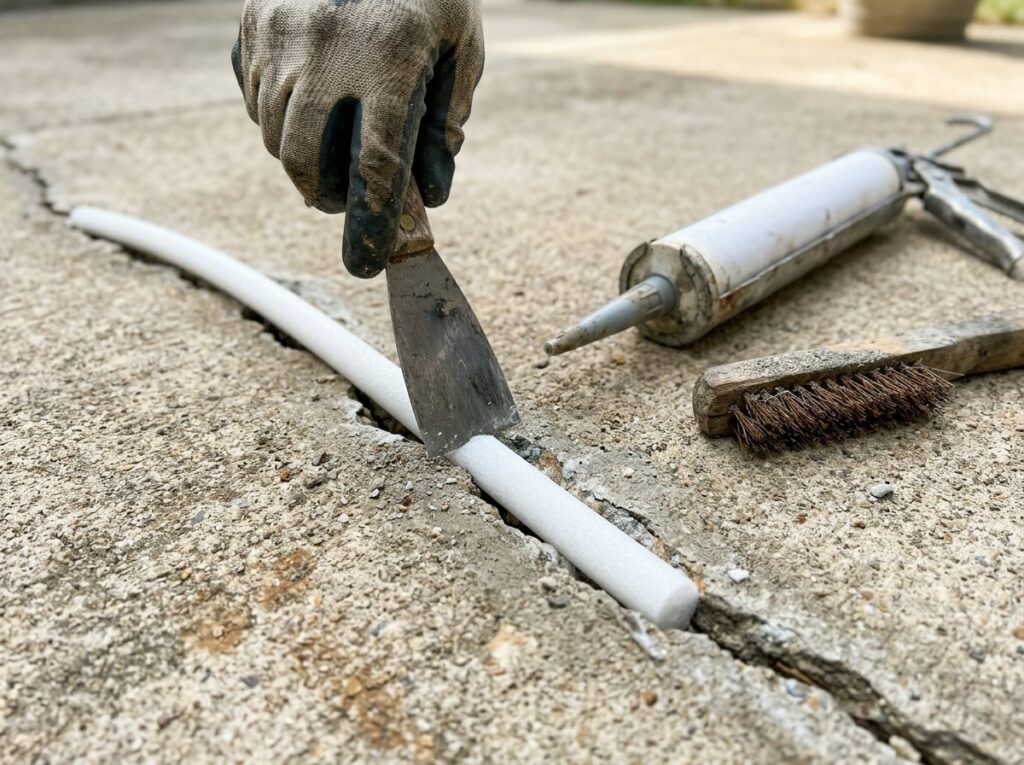
- For wider cracks, use a cold chisel to undercut the sides into an inverted V, wider at the bottom than at the top, so the patch locks in place.
- Vacuum out dust and debris, or flush it with a hose and let it dry thoroughly. Most fillers bond poorly to damp or dusty concrete.
Step 3: Insert backer rod in deeper cracks
Home Depot recommends backer rod for cracks wider than 1/4 inch. Push the foam rod into the crack with a putty knife so it sits evenly below the surface and leaves room for sealant on top. Backer rod saves sealant, and it keeps the sealant bonded only to the two sides of the crack, which lets it stretch as the slab moves instead of tearing. For deep, narrow cracks, some products allow you to fill partway with sand first; check the label.
Step 4: Apply the filler
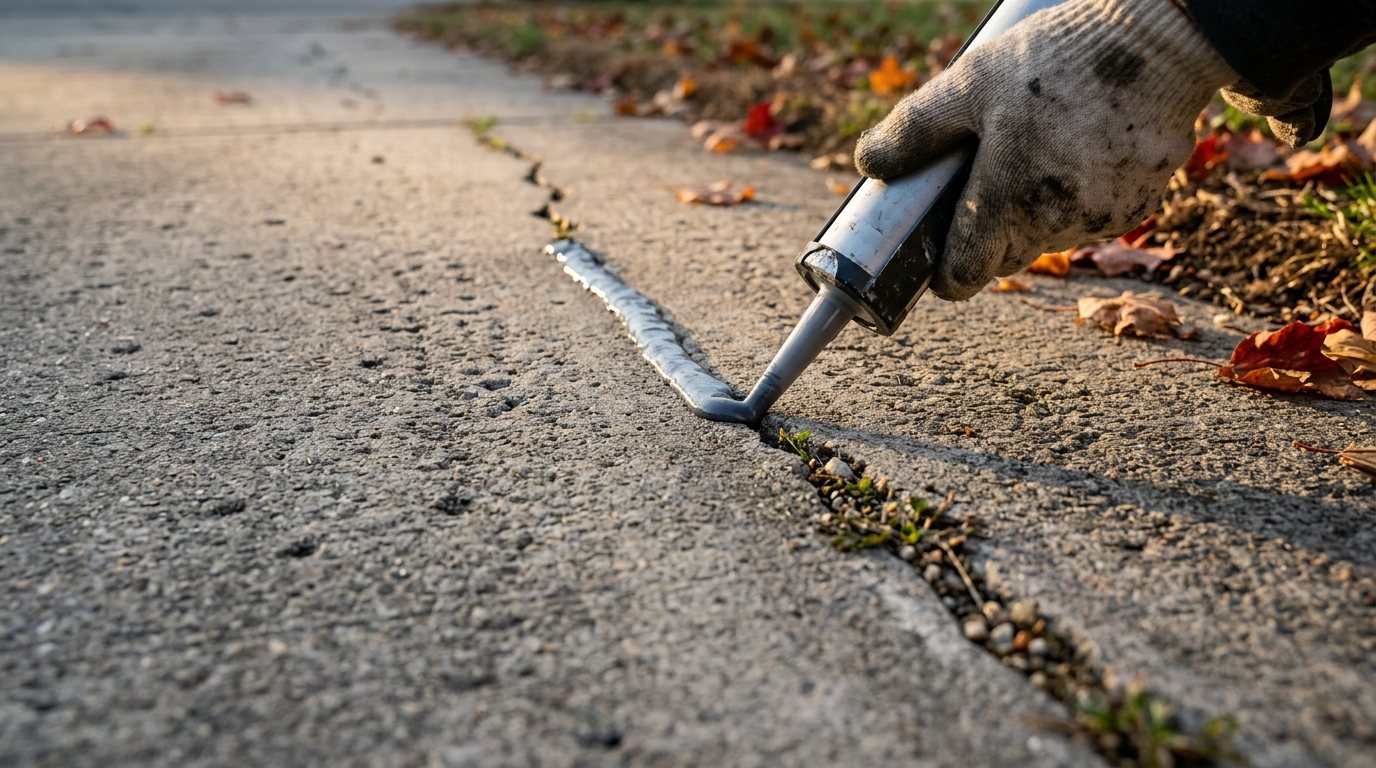
- For polyurethane sealant, cut the nozzle to match the crack width and fill from the bottom up in one continuous bead, slightly overfilling self-leveling sealant so it settles flush.
- For epoxy, mix the parts exactly as directed, work it into the crack with a putty knife and strike it flush.
- For patching compound, dampen the crack if the label says to, press the compound in firmly to remove air pockets, and smooth it level with a trowel.
Step 5: Let it cure
Keep foot and vehicle traffic off the repair until it has cured. Home Depot notes that some patching compounds harden within a few hours while others take days or up to a week, depending on temperature and humidity. Cool fall weather lengthens cure times.
Driveways vs walls vs foundations
Driveways, sidewalks and patios
Outdoor slabs face the harshest conditions: freezing water, de-icing salts and heavy loads. Use flexible polyurethane sealant for most cracks and patching compound for chips and broken edges. Fix the cause too: redirect downspouts away from the slab and fill eroded soil at the edges. In winter, This Old House suggests using sand rather than de-icing chemicals on concrete, and our guide on how to melt ice on a driveway covers concrete-safe options.
Concrete walls and steps
On vertical surfaces, use a non-sag polyurethane sealant for cracks that move and epoxy or a vertical patching mortar for stable cracks and chipped step edges. Patching compound on steps needs to be built up in thin layers and shaped with a trowel. For small gaps where concrete meets siding or trim, our guide to caulking covers choosing and applying the right sealant.
Foundation walls
A single thin vertical crack in a poured basement wall is common and often caused by shrinkage. If it is dry and not growing, you can seal it or use an injection kit. Horizontal cracks, stair-step cracks in block walls, cracks wider at one end, and walls that bow inward are different: Ask the Builder calls horizontal cracks the number one sign of a severe structural problem and advises against DIY injection on them. Watch for related signs indoors too, such as new cracks in walls and ceilings or doors that suddenly stick.
Pro tip: Before you fill a crack you are unsure about, monitor it. Draw a pencil line across each end, mark the date, and measure the width with a ruler or crack gauge. Check again every few weeks. A crack that grows longer or wider is still moving, and a pro should look at it before you seal it.
When to call a structural pro
Call a foundation repair contractor or a structural engineer if you notice:
- Any horizontal crack in a foundation wall, or a wall that bows or leans inward
- Stair-step cracks in a block foundation or brick veneer
- Cracks wider than about 1/4 inch, or cracks that keep growing
- One side of a crack sitting higher than the other
- Water seeping through a foundation crack
- Doors and windows that stick, sloping floors or gaps around trim
Costs vary widely with the cause. Angi notes that homeowners can patch concrete surfaces themselves for under $30 in materials. For structural problems, This Old House’s foundation crack guide lists general foundation repair at roughly $2,224 to $8,134, with an average around $5,179, and Ask the Builder puts major horizontal-crack repairs, such as wall anchors, at an average of $10,000 or more. A structural engineer’s independent assessment before hiring a repair company helps make sure you pay only for the fix you need.
Frequently asked questions
What is the best thing to fill cracks in concrete?
For most outdoor slab cracks, a flexible polyurethane concrete sealant is the best choice because it moves with the concrete. Use epoxy for stable cracks that need strength, especially on vertical surfaces, and patching compound for wide or chipped areas.
When should I worry about cracks in concrete?
Worry when a crack is wider than about 1/4 inch, keeps growing, has one side higher than the other, or is horizontal in a foundation wall. Water coming through a crack or doors that start sticking are also warning signs.
Can you just pour new concrete over cracked concrete?
A thin resurfacer can cover crazing and minor cracks on a sound slab, but it will not fix a slab that is still moving. Cracks below usually come back through the new layer if the base is unstable.
Do I need backer rod for concrete cracks?
Use backer rod for cracks wider than about 1/4 inch. It saves sealant and lets the sealant stretch properly as the slab moves.
Are hairline cracks in a new driveway normal?
Yes, small shrinkage cracks are common as concrete cures. Seal them to keep water out, and watch for any that widen or become uneven over time.
The bottom line
To repair cracks in concrete, first figure out what kind of crack you have. Clean it out, add backer rod to wider gaps, and fill it with the right product: flexible polyurethane sealant for moving slab cracks, epoxy for stable cracks that need strength, and patching compound for wide or chipped areas. Do the work on a dry day with the surface at least 50 degrees, and call a structural pro for horizontal foundation cracks, cracks wider than about 1/4 inch or anything that keeps growing.