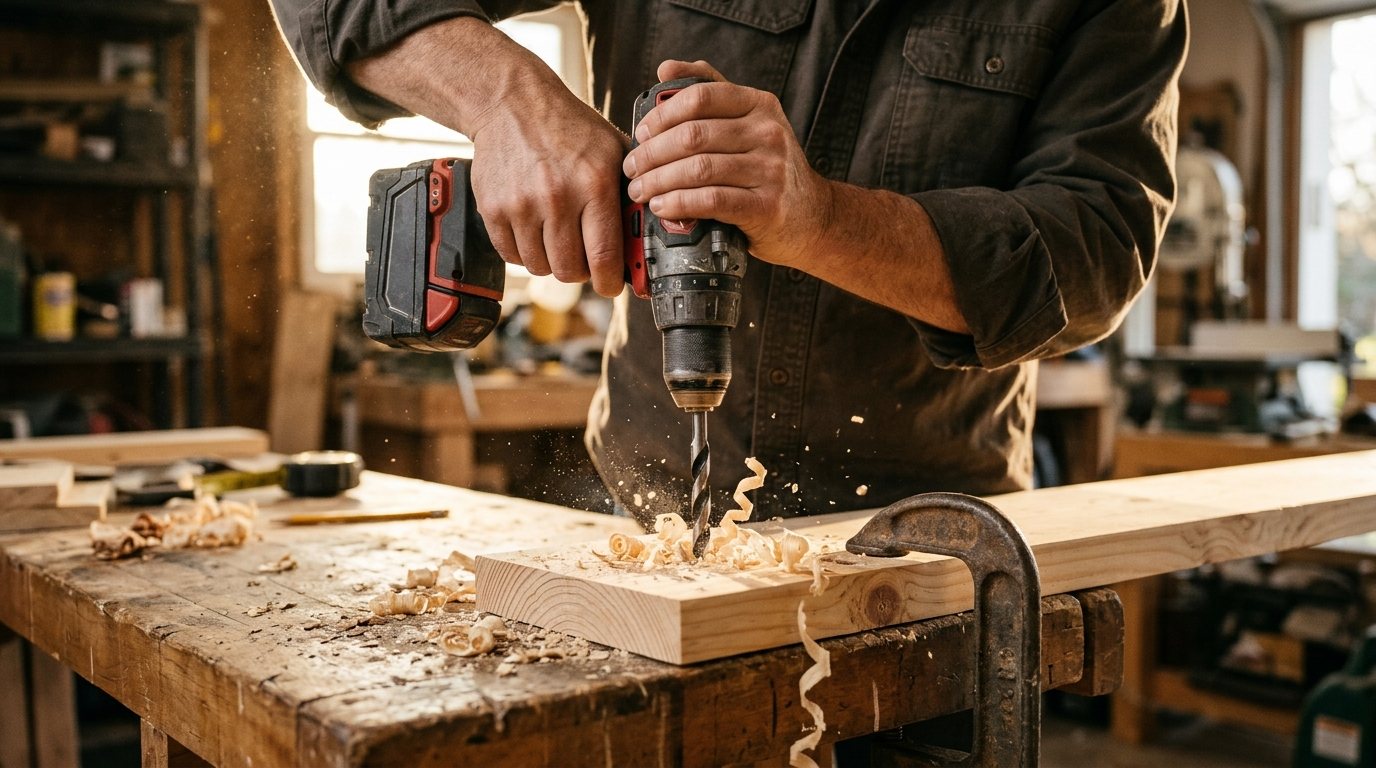
You finally bought a cordless drill, opened the case and found a ring of numbers, a two-position switch and a bag of bits you don’t recognize. Or maybe you have used one for years but still strip screws, crack tile or watch bits skate across metal.
This guide explains every control on a drill/driver, how to choose the right bit, when to drill a pilot hole and when to just drive the screw, and the technique for wood, metal, masonry and tile. It finishes with grip, battery care and a safety checklist, so your first holes are clean and your hands stay in one piece.
Quick answer: Lock the bit tightly in the chuck, choose low speed (gear 1) for driving screws and big bits or high speed (gear 2) for small holes, and set the clutch to the drill symbol for drilling or a low number for driving. Start slowly with the bit square to the surface, then add speed and steady, straight pressure. Wear safety glasses, clamp small workpieces and check walls for wires and pipes before you drill.
Know your drill: the parts that matter
Chuck
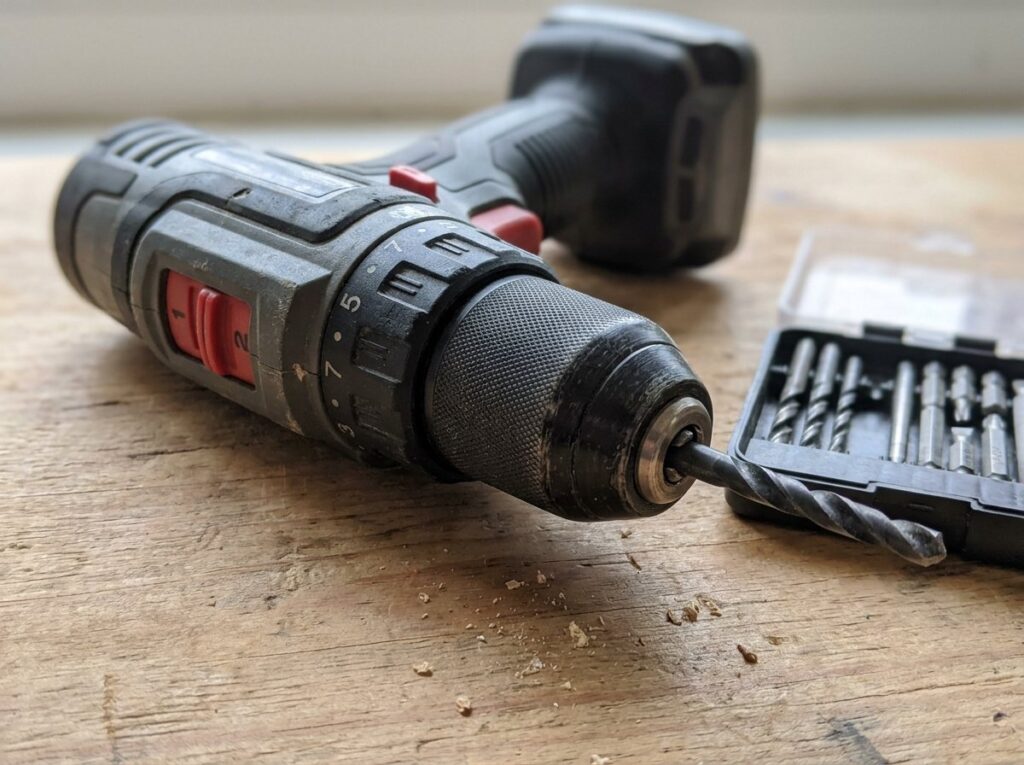
The chuck is the three-jaw collar at the front that grips the bit. On a keyless chuck, open the jaws, insert the bit’s smooth shank fully, then twist the collar firmly until the bit is centered and won’t move. Many chucks ratchet with a click when fully tight. Set the direction switch to its center lock position or remove the battery while you change bits, so a bumped trigger can’t spin the chuck.
Clutch collar
The numbered ring behind the chuck is the clutch. It limits torque: when the screw meets that resistance, the clutch slips with a ratcheting sound instead of driving the screw deeper. Low numbers suit small screws and soft materials; higher numbers suit longer screws in hardwood. The drill symbol bypasses the clutch for full power when drilling holes.
Speed switch
The slider on top usually has two gears. Gear 1 is slow with high torque, best for driving screws, hole saws and large spade bits. Gear 2 is fast with less torque, best for small holes in wood and drywall. Change gears only when the motor is stopped.
Trigger and forward/reverse
The trigger is variable: light pressure turns slowly, full pressure runs at the gear’s top speed. The button above it sets forward (clockwise, to drill and drive) or reverse (to remove screws and back out a stuck bit). Some drills also have a hammer setting for masonry, covered below.
Tools and materials
- Cordless drill/driver with charged battery (hammer drill for masonry)
- Bit set: twist bits, brad-point bits, masonry bits and driver bits
- Safety glasses and hearing protection
- Clamps and a scrap backer board
- Pencil, tape measure, center punch and painter’s tape
- Stud finder, plus a respirator and shop vacuum for masonry dust
Choosing the right bit
The bit matters as much as the drill. Use this quick guide, and see our full guide to types of drill bits for sizes and specialty bits.
- Twist bits (high-speed steel): the all-rounder for wood, plastic and light metal.
- Cobalt bits: harder twist bits for steel and stainless.
- Brad-point bits: a sharp center spur for clean, accurate holes in wood.
- Spade bits and hole saws: large holes in wood; hole saws also cut drywall and thin metal.
- Masonry bits: carbide tips for brick, block and concrete.
- Tile and glass bits or diamond bits: carbide spear points for ceramic, diamond for porcelain and stone.
- Driver bits: Phillips, square, star and hex tips matched to the screw head.
| Job | Bit | Gear | Clutch | Hammer mode |
|---|---|---|---|---|
| Small holes in wood or drywall | Twist or brad-point | 2 (fast) | Drill symbol | Off |
| Large holes in wood | Spade bit or hole saw | 1 (slow) | Drill symbol | Off |
| Driving screws | Matching driver bit | 1 (slow) | Low number, raise as needed | Off |
| Steel or aluminum | Cobalt or HSS twist, step bit for sheet metal | 1 (slow) | Drill symbol | Off |
| Brick, block, concrete | Carbide masonry bit | 2 (fast) | Drill symbol | On |
| Ceramic or porcelain tile | Carbide tile bit or diamond bit | 1 (slow) | Drill symbol | Off, always |
Pilot holes vs driving screws
When to drill a pilot hole
A pilot hole is a small hole that guides the screw and keeps wood from splitting. Drill one in hardwood, near the end or edge of a board, for long screws and whenever you want a screw to land precisely. To size it, hold the bit in front of the screw: you should see the threads past the bit on both sides, but not the solid core. Wrap painter’s tape around the bit as a depth flag so you stop at the screw’s length.
How to drive screws without stripping them
Switch to gear 1, fit a driver bit that fills the screw head snugly and set the clutch to a low number. Press the bit firmly into the screw, keep the drill straight and squeeze the trigger gently. If the clutch slips before the screw is flush, raise it one step at a time. Self-drilling screws can go straight into softwood and drywall. If a head does strip, our guide on removing a stripped screw will get it out.
How to drill a hole, step by step
- Check what is behind the surface. Before drilling a wall, ceiling or floor, scan it with a stud finder that detects wiring and avoid the areas directly above, below and beside outlets and switches. Our guide on how to find a stud covers the methods.
- Mark and secure. Mark the center with a pencil cross or a center punch. Clamp loose work to a bench, with scrap wood underneath if you are drilling through.
- Set the drill. Tighten the bit, choose the gear and set the clutch to the drill symbol.
- Get in position. Stand balanced with the work at chest height or lower, grip the handle with one hand and support the back or side handle with the other.
- Start slow. Set the tip on the mark, hold the drill square to the surface and squeeze gently until the bit cuts a shallow seat.
- Add speed and steady pressure. Let the bit do the work. If it slows sharply or smokes, ease off. Pull the spinning bit out every inch or so to clear chips.
- Back out cleanly. Keep the bit turning forward as you withdraw it, or switch to reverse if it is stuck. Let the bit cool before touching it.
Drilling different materials
Wood
Brad-point bits leave the cleanest holes. To prevent tear-out on the back side, clamp a scrap board behind the workpiece, or drill until the tip just pokes through and finish from the other side. With spade bits, start slowly so the point seats before the wings start cutting.
Metal
Center punch the mark so the bit can’t skate, clamp the part firmly and use slow speed with steady pressure. Add a few drops of cutting oil on steel. Drill a small pilot first for holes over about 1/4 inch, then step up. Metal chips are sharp and hot, so wear glasses and brush them away rather than wiping with your hand.
Masonry and concrete
Use a carbide masonry bit with hammer mode on. Start slowly without hammer to make a dimple, then switch it on and use firm, steady pressure. Pull the bit out often to clear dust. Concrete and mortar dust contains silica, so wear a well-fitted respirator, vacuum at the hole and keep others away. For many holes or large anchors in concrete, a rotary hammer is far faster than a drill.
Tile
Never use hammer mode on tile, as it cracks it. Put an X of painter’s tape over the mark to stop the bit wandering, use a carbide tile bit for ceramic or a diamond bit for porcelain, and run it slowly. Keep diamond bits cool with a spray of water, which means a cordless drill only and no outlets nearby. Once through the tile, switch to the right bit for the wall behind it.
Holding the drill and staying in control
Use two hands whenever you can. Keep your wrist straight and in line with the bit, and brace your forearm or body behind the drill rather than reaching. Never hold a small part in your hand while drilling it; clamp it.
Safety note: Large bits, hole saws and masonry bits can bind suddenly, twisting the drill hard enough to sprain a wrist or throw you off a ladder. Use gear 1 and the side handle for big bits, set the clutch to limit the twist where possible, and stay on a stable surface. Release the trigger instantly if the bit jams.
Battery care
Lithium-ion tool batteries last longer and stay safer with a little care. DeWalt’s battery safety guidance advises charging and storing packs in a cool, dry place away from extreme heat and cold, and the Power Tool Institute’s battery tips add several more:
- Use only the charger and batteries made for your tool brand.
- Remove packs from the charger when charged, and unplug the charger when not in use.
- Keep keys, screws and nails away from battery terminals.
- Stop using any pack that is cracked, crushed, swollen or leaking, and never open one.
- Recycle dead packs at a battery drop-off, never in the trash.
Battery voltage labels can be confusing too; our explainer on 18V vs 20V batteries clears that up.
Drill safety checklist
- Wear safety glasses every time, and hearing protection for masonry and long sessions.
- Tie back long hair, roll up loose sleeves and remove dangling jewelry.
- Remove the battery or lock the trigger before changing bits.
- Let bits cool before touching them.
- Check for wiring, pipes and ducts before drilling walls, floors and ceilings.
- Never drill into a post-tensioned concrete slab; look for a warning stamp in the garage.
When to call a pro
Most drilling is safe DIY, but stop and call a pro in these cases:
- You need to drill a slab marked as post-tensioned, or any structural concrete.
- You hit metal behind drywall or see sparks, water or a smell of gas.
- You are drilling through a waterproofed shower wall or tub surround.
- The job involves mounting heavy loads overhead or over seating.
For hanging shelves, mounting hardware or a few anchored holes, a handyman is usually the right call. HomeAdvisor’s handyman cost guide lists typical rates of about $60 to $125 per hour plus materials, with small one- to two-hour jobs often around $60 to $250.
Frequently asked questions
What do the numbers on a drill mean?
The numbered collar is the clutch, which sets how much torque the drill applies before it slips. Low numbers are for small screws and soft materials, higher numbers for longer screws and hardwood. The drill symbol turns the clutch off for drilling holes.
Should I use high or low speed?
Use low speed (gear 1) for driving screws, large bits, metal and tile. Use high speed (gear 2) for small holes in wood, drywall and masonry. Within either gear, start slowly with the trigger and build up.
Why does my drill bit keep slipping in the chuck?
Usually the chuck isn’t tight enough or the bit shank isn’t fully inserted. Re-seat the bit deep in the jaws and tighten until the chuck ratchets. Bits with hex shanks resist slipping better than round shanks.
Can a regular drill go through concrete?
A regular drill with a carbide masonry bit can manage a few small holes in brick or block, slowly. Concrete really needs a hammer drill, and frequent or large holes call for a rotary hammer.
Why won’t my drill bit go through the wall?
You may have hit a metal nail plate, a steel stud, masonry or a pipe. Stop, investigate with a stud finder and never force through metal you can’t identify, since nail plates are there to protect pipes and wires.
The bottom line
Using a drill well comes down to a few habits: the right bit, the right gear and clutch setting, a slow start and straight, steady pressure. Clamp your work, check for hidden wires and pipes, wear safety glasses and take care of your batteries, and the drill will handle almost every project in the house.