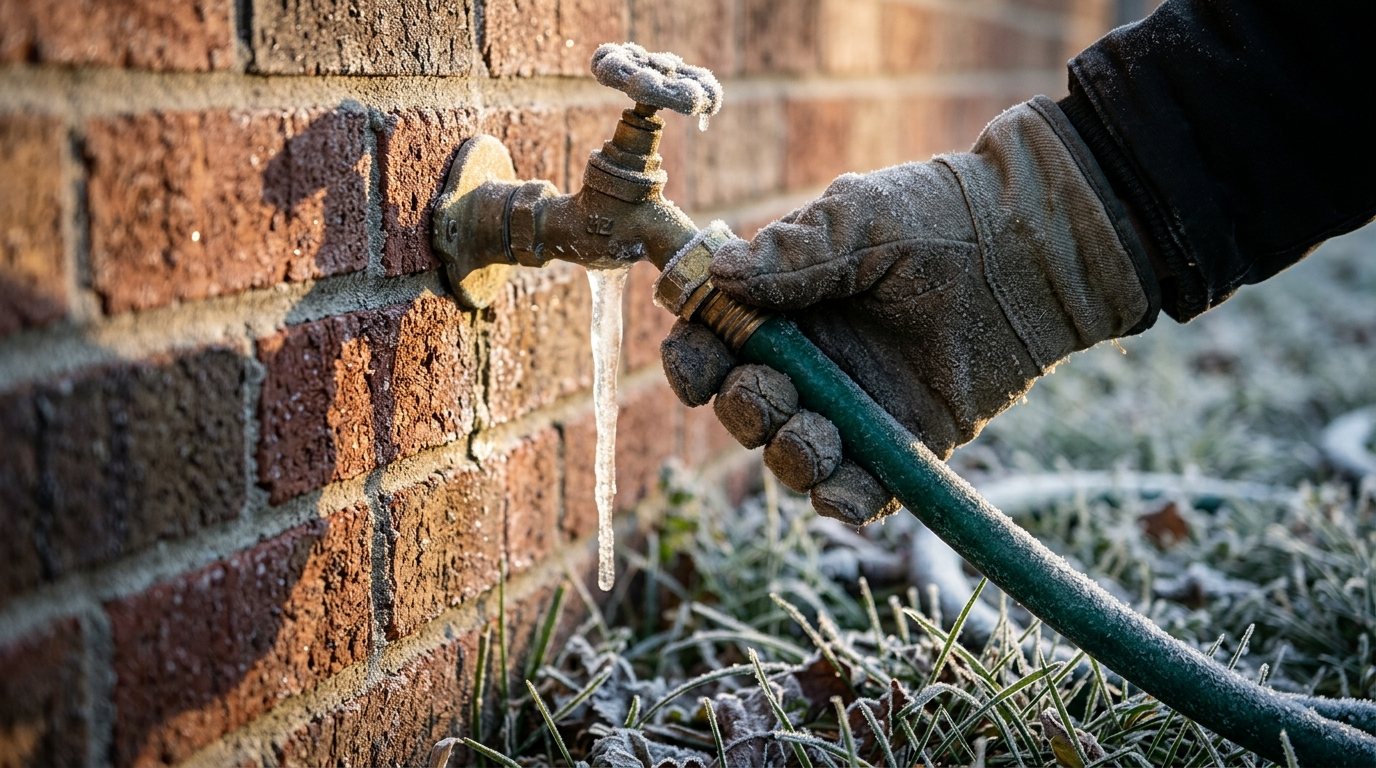
The first hard freeze of the season is the one that catches outdoor faucets off guard. A hose left connected overnight or a spigot that never got drained can crack inside the wall, and you often won’t find out until spring, when you turn on the hose and water sprays into your basement or crawl space.
This guide shows you how to winterize outdoor faucets the right way: disconnecting hoses, finding and closing the indoor shutoff, draining the line, handling frost-free sillcocks and vacuum breakers, choosing a faucet cover that actually helps, and spotting a burst sillcock when you turn the water back on.
Quick answer: Disconnect and drain every garden hose, then close the indoor shutoff valve that feeds each outdoor faucet. Open the outdoor faucet to let the line empty, open the small bleeder cap on the indoor valve to drain the rest, then leave the outdoor faucet open for the winter. Frost-free sillcocks mainly need the hose removed, but closing and draining them too adds a margin of safety.
Why outdoor faucets freeze and burst
Water expands as it turns to ice, and in a closed pipe that pressure builds until the weakest point gives way. With an outdoor faucet, that weak point is often the tube or valve body inside the wall, which is why the damage stays hidden.
The pipe that feeds an outdoor faucet runs through the rim joist or an exterior wall, the coldest framing in the house. The American Red Cross lists outdoor hose bibs among the pipes most likely to freeze for exactly that reason. The same principles apply to the rest of your plumbing, so pair this job with our guide on how to prevent frozen pipes.
When to winterize
Do it before overnight temperatures regularly drop to 32°F. In northern states that can be late September, while milder climates may have until November. If a hard freeze is in the forecast and you haven’t done it yet, do it that day.
Tools and materials
- A bucket and a few old towels or rags
- A flashlight for tracing pipes in a dark basement or crawl space
- Adjustable pliers for a stiff bleeder cap or hose connection
- An insulated faucet cover for each spigot (optional but useful)
- Foam pipe insulation sleeves for any exposed supply pipe in an unheated space
- Painter’s tape and a marker to label the shutoff valves
How to winterize an outdoor faucet step by step
Step 1: Disconnect and drain every hose
Unscrew the hose, along with any splitters, timers or quick-connect fittings. A connected hose holds water against the faucet, and on a frost-free sillcock it stops the long valve body from draining. Stretch the hose out on a slope to empty it, then coil it and store it in a garage or shed.
Step 2: Find the indoor shutoff valve
Go inside and find the spot where the faucet’s supply pipe passes through the wall. Trace that pipe back from the wall with a flashlight. The shutoff for an outdoor faucet is usually a few feet from the wall, often near the basement ceiling or in a crawl space.
Newer homes sometimes group these valves near the main water shutoff. In a finished basement, check behind ceiling tiles or an access panel. If there’s no dedicated valve, use the main shutoff, which our guide on how to shut off water to your house covers in detail.
Step 3: Close the valve
Turn a round handle clockwise until it stops, or turn a lever handle so it sits perpendicular to the pipe. If an old valve feels stuck, don’t force it with a wrench, because a corroded stem can snap or start leaking.
Step 4: Open the outdoor faucet
Go back outside and open the faucet fully. A short burst followed by a trickle is normal. If water keeps running steadily after a minute or two, you’ve closed the wrong valve or the valve isn’t sealing.
Step 5: Open the bleeder cap
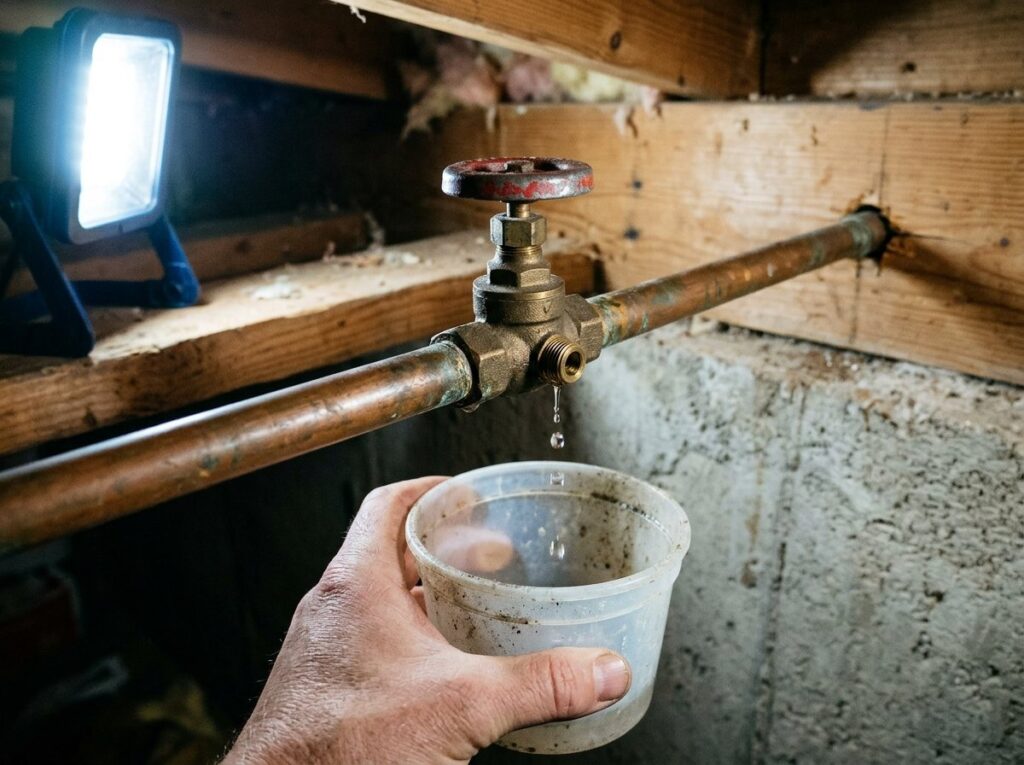
Many outdoor faucet shutoffs are stop-and-waste valves with a small brass cap on the side, called a bleeder or drain cap. Set a bucket underneath, unscrew the cap and let the trapped water drain out. Air coming in through the open faucet outside helps the line empty completely.
When the dripping stops, screw the cap back on hand-tight. If your valve has no bleeder cap, the open outdoor faucet will drain most of the water, which makes insulating any exposed pipe more important.
Step 6: Leave the outdoor faucet open
Leave the outside faucet open all winter. The Red Cross recommends this so any water still in the pipe has room to expand without breaking it. An open faucet also gives you an early warning, because a dripping spout in December tells you the indoor valve is leaking.
Step 7: Drain or remove the vacuum breaker
Many faucets have a vacuum breaker, a small backflow device on the spout or handle whose rubber seal can trap water and crack. Drain it by pressing its center post to one side or pulling down its outer ring, or unscrew a hose-thread model and store it indoors. Models fixed with a break-off set screw should be drained, not forced off.
Step 8: Insulate exposed pipe and add a cover
Slip foam sleeves over any supply pipe in an unheated garage, crawl space or rim joist bay, then fit an insulated cover over the faucet outside.
Pro tip: Put painter’s tape on each indoor valve with a note like “front hose, closed Oct 31.” Next spring you won’t have to trace pipes again.
Frost-free sillcocks: what’s different
A frost-free sillcock (also called a frost-proof hose bib) looks like a normal faucet from outside, but its actual valve sits at the end of a long tube, several inches inside the wall where the house keeps it warm. When you close the handle, the water stops inside the heated space and the tube drains out through the spout.
That design only works under two conditions. The faucet must be installed with a slight downward slope toward the outside so water can run out, and nothing can be attached to the spout. Leaving a hose or splitter connected traps water in the tube, and that is a common way frost-free faucets split.
How to tell if your faucet is frost-free
Look at the pipe from inside the house. On a standard hose bib, the pipe connects right at the exterior wall. On a frost-free sillcock, a long brass or copper body passes through the rim joist and the connection is well inside. Outside, frost-free models usually have a flat mounting flange screwed flush against the siding.
Winterizing a frost-free sillcock
- Remove the hose and any attachments.
- Turn the faucet off and watch the spout. Water should dribble out for a few seconds and then stop.
- If it keeps dripping, the washer inside is worn and should be replaced before a deep freeze.
- If there’s an indoor shutoff for that faucet, close and drain it too, especially in very cold climates or if you’re not sure the faucet slopes correctly.
- Add an insulated cover if your area sees long stretches below freezing.
Outdoor faucet types and what each needs
| Faucet type | Where it seals | Remove hose? | Close indoor shutoff? | Other winter steps |
|---|---|---|---|---|
| Standard hose bib | At the spout, outside the house | Yes | Yes | Open faucet, drain bleeder cap, add cover |
| Frost-free sillcock | Inside the heated wall | Yes, always | Recommended if a valve exists | Check that it stops dripping, add cover in severe cold |
| Faucet with vacuum breaker | Depends on faucet type | Yes | Same as the faucet type | Drain or remove the vacuum breaker |
| Freeze-proof yard hydrant | Underground, below the frost line | Yes | Usually not needed | Make sure it drains after each use |
Do insulated faucet covers work?
Insulated covers, usually a foam dome or padded pouch, trap a little heat from the house wall around the faucet. They help most on a frost-free sillcock during a severe cold snap, or on a faucet you couldn’t shut off from inside. They are a backup layer, not a substitute for draining, and they can’t keep an undrained standard hose bib from freezing through a long cold stretch.
A cover only works if it seals tight against the siding. Hook the loop over the faucet, tighten the cinch until the foam rim presses flat against the wall, and check it after windy storms.
What to do if a faucet is already frozen
If the faucet feels icy, won’t flow or has frost on it, thaw it before you winterize it. Warm the faucet and nearby pipe with a hair dryer, heating pad or hot, wet rags, working from the spout toward the wall. Our guide on how to thaw frozen pipes walks through the safe methods in more detail.
Safety note: Never use a torch or any open flame to thaw a faucet. Flames can ignite siding, sheathing or insulation inside the wall, and the fire may smolder out of sight. Avoid putting antifreeze into an outdoor faucet line as well, since it can contaminate your water supply.
Signs of a burst sillcock in spring
A cracked frost-free sillcock has a tricky symptom: it usually doesn’t leak while it’s turned off, because the valve sits inside the wall, upstream of the crack. The leak only starts when you open the faucet and water fills the split tube. That’s why many homeowners discover the damage weeks later.
The first time you use each outdoor faucet in spring, have someone stand inside near the wall while you turn it on. Watch for these signs:
- Water dripping or spraying inside the basement, crawl space or wall when the faucet is open
- Water running out from around the faucet’s mounting flange instead of the spout
- Weak flow at the spout even with the faucet fully open
- Damp drywall, a ceiling stain or a musty smell near where the pipe enters the house
- A water bill that jumps after you start using the outdoor faucets
If you see any of these, close the indoor shutoff right away and leave the faucet off until it’s repaired. Replacing the sillcock is the usual fix, ideally with the new one installed at the proper slope.
How to turn outdoor faucets back on in spring
- Wait until hard freezes are over in your area.
- Close the outdoor faucet and check that the bleeder cap is snug.
- Open the indoor shutoff slowly and look for drips.
- Open the outdoor faucet while someone watches inside, then reconnect the hose.
When to call a pro
Most outdoor faucets are an easy DIY job, but call a licensed plumber if you notice any of these red flags:
- You can’t find a shutoff for an outdoor faucet, or the shutoff won’t close fully
- Water leaks from the valve stem, bleeder cap or pipe after you close it
- A faucet leaks inside the house when it’s turned on
- A pipe is frozen inside a wall or ceiling you can’t reach
- You want to replace standard hose bibs with frost-free sillcocks or add dedicated shutoff valves
According to HomeAdvisor’s cost guide, these are typical price ranges for outdoor faucet work. Your cost depends on access to the pipe, local labor rates and whether any wall or siding repair is needed.
| Job | Typical range | Average |
|---|---|---|
| Replace a hose bib or outdoor faucet | $200 to $600 | About $300 |
| Basic hose bib replacement | $100 to $200 | About $150 |
| Install a frost-free sillcock | $150 to $500 | About $350 |
Frequently asked questions
Should outdoor faucets be left open or closed in winter?
Leave them open once the indoor shutoff is closed and the line has drained. An open faucet gives any leftover water room to expand and lets you see right away if the indoor valve starts leaking. The exception is a frost-free sillcock with no indoor shutoff, which you simply turn off with the hose removed.
Do frost-free outdoor faucets need to be winterized?
They need less work, but not zero. You still have to remove the hose and any attachments, because those trap water in the long valve body. If there’s an indoor shutoff, closing and draining it adds protection, especially if you’re not sure the faucet was installed with the correct downward slope.
Can I leave a hose connected to a frost-free spigot?
No. A connected hose keeps water in the faucet’s tube, and that water sits in the cold part of the wall where it can freeze and split the body. Even one cold night with a hose attached can be enough, so disconnect it as soon as freezing weather is forecast.
What if I can’t find the shutoff valve for my outdoor faucet?
Trace the pipe inward from where it passes through the wall, checking ceiling panels, closets and crawl spaces along the way. If there isn’t one, use the main shutoff to drain the line, or have a plumber add a dedicated valve.
How do I know if the pipe to my outdoor faucet burst?
The clearest sign is water appearing inside the house only when the outdoor faucet is open. You may also see weak flow at the spout, water around the faucet’s flange or damp spots near the wall. Test each faucet in spring with someone watching inside before you rely on it.
The bottom line
Winterizing outdoor faucets takes a few minutes per spigot and prevents a costly hidden leak. Disconnect the hoses, close and drain the indoor shutoff, leave the outdoor faucet open, and never leave a hose on a frost-free sillcock. Then test every faucet with someone watching inside when spring arrives. While you’re at it, take a few minutes to winterize your sprinkler system too.