
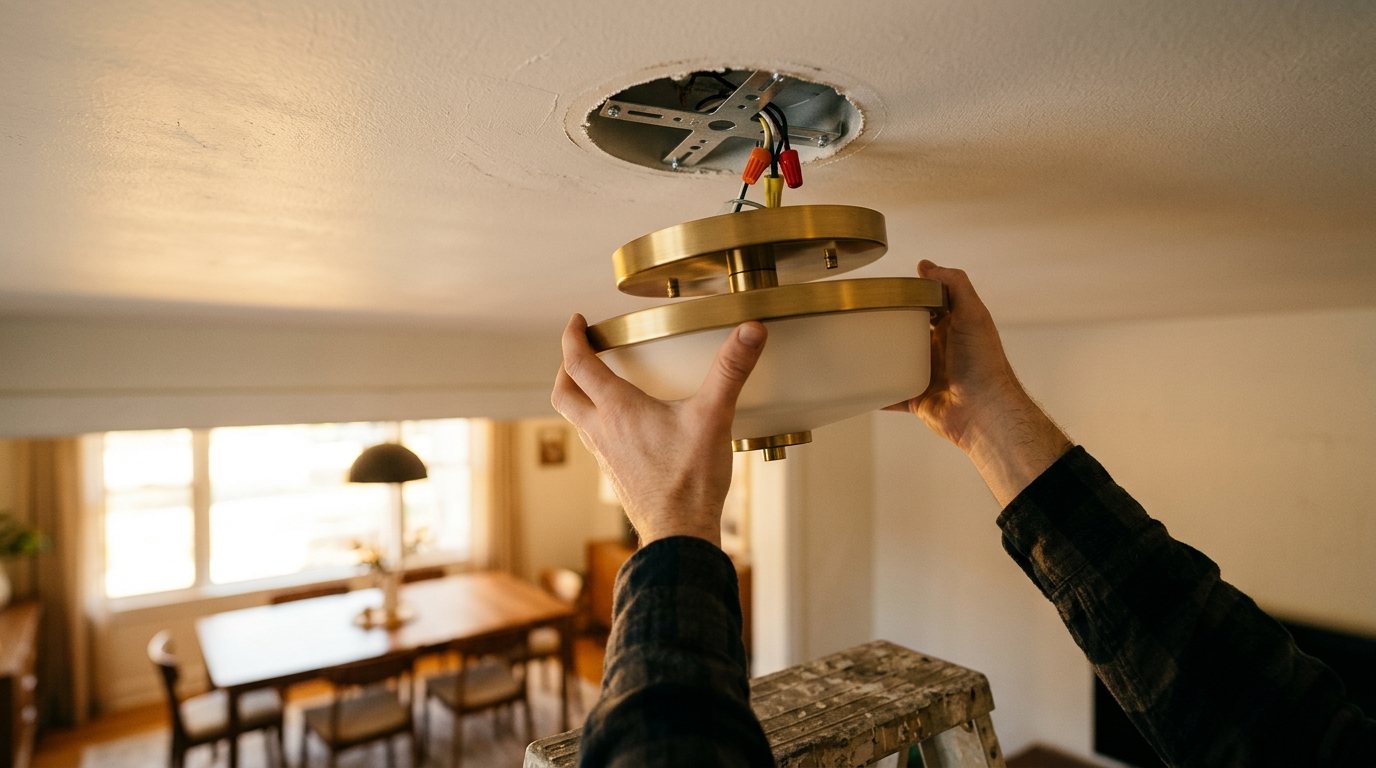
That dated dome light in the hallway, the builder-grade fixture over the dining table, or a ceiling light that flickers no matter what bulb you use: replacing a light fixture is one of the most satisfying upgrades you can make in an afternoon. It changes how a room looks and feels, and for a standard fixture on an existing box, it is well within reach of a careful DIYer.
This guide covers the safety steps that matter most, how to check that your electrical box can hold the new fixture’s weight, what the wire colors mean, how to install the mounting bracket and make the connections, and how to test your work. It also flags the situations where you should stop and call a licensed electrician.
Quick answer: Turn off the breaker, not just the wall switch, and confirm the wires are dead with a non-contact voltage tester. Remove the old fixture, check that the ceiling box is secure and rated for the new fixture’s weight, and install the new mounting bracket. Connect ground to ground (bare or green), white to white (neutral) and black to black (hot) with wire nuts, then mount the fixture, restore power and test. Stop and call an electrician if you find aluminum wiring, damaged insulation or a loose box.
Before you start: safety, permits and planning
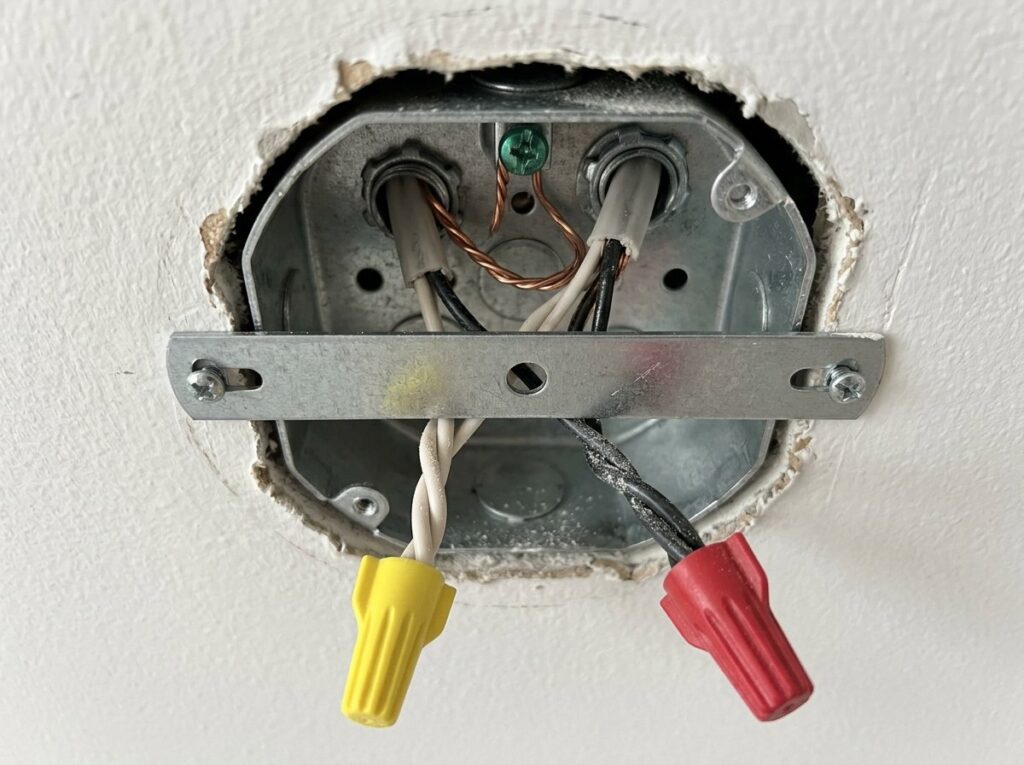
A light fixture usually connects to a ceiling or wall box that holds the house wiring, plus a metal bracket that the fixture hangs from. Most replacements reuse that box. Your job is to make sure the box and wiring can safely carry the new fixture, and to make tight, correct connections.
Safety note: Always switch off the circuit breaker, then verify the power is off with a non-contact voltage tester that you have just checked on a known live outlet. A wall switch alone is not enough: in some wiring layouts, wires in the ceiling box stay live even with the switch off. Work from a stable stepladder, wear safety glasses when working overhead, and have a helper hold heavier fixtures. Some jurisdictions require a permit for fixture replacement, so check with your local building department.
Check the fixture weight and the box rating
This is the step most people skip. Under the National Electrical Code, ceiling boxes designed for light fixtures must support a fixture of at least 50 pounds (about 23 kg). A fixture heavier than that must be supported independently of the box, unless the box is listed and marked by its manufacturer for the higher weight. Ceiling fans are a separate category: they need a box specifically rated for fan support, because a spinning fan puts very different stresses on the box.
Check the weight on the new fixture’s box or instructions. Then, once the old fixture is down, look inside the electrical box for weight or “fan” markings and make sure the box is firmly attached to a joist or a brace. A box that wiggles, is cracked, or is a shallow “pancake” box with a heavy chandelier planned for it needs an upgrade before you hang anything. If you need to locate framing for a new brace, our guide on how to find a stud shows the basics, but installing a new box is often a job for an electrician.
Check the wire temperature rating on older homes
Many fixtures include a label saying the supply wires must be rated for a certain temperature, commonly 90°C (194°F). Wiring in older homes may have lower-rated or brittle insulation, often cloth-covered. If the insulation cracks or crumbles when you move it, or the fixture’s rating does not match your wiring, stop and ask an electrician. Choosing an LED fixture, which runs cooler, also helps.
Watch for aluminum wiring
If the wires in the box are dull silver rather than copper, you may have aluminum branch wiring, common in some homes from the mid-1960s to the mid-1970s. The CPSC’s aluminum wiring guide warns that these connections can overheat and start fires, and strongly recommends repairs by a qualified electrician rather than homeowners. Light fixture connections are specifically included, so do not connect a new fixture to aluminum wire yourself.
Tools and materials
- New light fixture with its mounting bracket and hardware
- Non-contact voltage tester
- Stable stepladder
- Insulated flat and Phillips screwdrivers
- Wire stripper and needle-nose pliers
- Wire nuts sized for your wires (most fixtures include them)
- Safety glasses and a helper for heavy fixtures
- Phone camera to photograph the existing connections
Understanding the wire colors
In most US homes built in recent decades, the wiring follows a simple color code. Match like to like, but always confirm what you see in your own box before connecting anything.
| House wire | What it is | Connects to on the fixture |
|---|---|---|
| Black | Hot (switched power to the light) | Black, or the smooth wire on a two-wire cord |
| White | Neutral | White, or the ribbed or marked wire on a two-wire cord |
| Bare copper or green | Ground | Green or bare fixture wire and the green screw on the bracket |
| Red | Often a second switched hot (for example, a separate fan or light switch) | Fixture hot, if that switch should control the light |
| White with black or red tape | White wire used as a hot, often in a switch loop | Fixture hot; treat it as live |
If your box has more than one cable, extra wires may be bundled together and feeding other lights or outlets. Leave those bundles connected exactly as they were and attach the fixture only to the wires that went to the old fixture.
How to replace a light fixture step by step
- Turn off the power. Switch off the breaker for the light. Leave the wall switch on during your test so you can confirm the right breaker is off, and tape a note to the panel.
- Remove the old fixture. Take off the shade and bulbs, then unscrew the canopy (the part against the ceiling). Support the fixture’s weight with one hand or a helper as it comes loose.
- Test the wires. With the connections exposed, hold your non-contact tester near every wire, including those in other bundles. If anything reads live, stop and turn off the correct breaker.
- Photograph and disconnect. Take a clear photo, then unscrew the wire nuts and separate the fixture wires from the house wires. Remove the old mounting bracket.
- Inspect the box and wires. Confirm the box is tight and rated for the new fixture. Look for cracked insulation, scorching or aluminum wire. If the wire ends are nicked or blackened, trim and strip about 3/4 inch (19 mm) of fresh insulation.
- Install the new bracket. Screw the new crossbar or mounting strap to the box. If the fixture is heavy, use the sturdier mounting hardware supplied and confirm the screws bite into solid threads.
- Connect the ground. Attach the house ground to the green screw on the bracket, and connect the fixture’s ground wire to the house ground with a wire nut or under the same screw if the instructions allow.
- Connect the neutral and hot. Join the white house wire to the fixture’s white or neutral wire, then the black house wire to the fixture’s black or hot wire. Hold the wire ends parallel and twist the wire nut on clockwise until the wires twist together and no bare copper shows below the nut.
- Tug test. Pull gently on each wire. If any slips out, redo that connection.
- Mount the fixture. Fold the wires neatly into the box, lift the fixture into place and secure the canopy to the bracket. Do not let the fixture hang from its wires at any point.
- Install bulbs and restore power. Use bulbs at or below the fixture’s maximum wattage rating, turn the breaker back on and test.
How to test the new fixture
Flip the switch several times. The light should turn on and off cleanly, without flicker, buzzing or a hot smell. If it is on a dimmer, run it through the full range: LED fixtures and bulbs can flicker on older dimmers, which our guide on lights flickering in the house explains.
After the light has been on for 15 to 30 minutes, check that the canopy is not hot to the touch and that you do not smell anything burning. If the breaker trips when you turn it back on, you probably have a short where a hot wire touches ground or the box. Turn it off and recheck every connection before trying again.
Common problems and how to fix them
- The light does not come on. Check the breaker, bulbs and wall switch, then turn off the power and confirm the wire nuts are tight with no loose strands.
- The light stays on all the time. The fixture is probably connected to an always-hot wire instead of the switched one. Turn off the power and compare your connections with the photo of the original wiring.
- The switch now controls something else. Wires in a multi-cable box were mixed up. Restore the original connections from your photo, or call an electrician.
- The fixture flickers. Tighten the bulbs, check bulb and dimmer compatibility, and confirm the connections are tight.
- The fixture sags or the box moves. Remove the fixture and have the box braced or replaced before rehanging it.
If the switch itself is worn or you want to add a dimmer at the same time, follow our guide on how to replace a light switch.
When to call a pro
Call a licensed electrician if:
- The box is loose, damaged, not rated for the fixture’s weight, or you are replacing a light with a ceiling fan and the box is not fan-rated.
- You find aluminum wiring, cloth-covered or brittle insulation, or scorched wires.
- There is no box, or you want a fixture where none existed before.
- The breaker trips after installation and you cannot find the cause. Our guide on why a circuit breaker keeps tripping explains what can be going on.
- The box contains several cables and you are not sure which wires belong to the light.
- The fixture is very heavy or the ceiling is too high to work safely from a stepladder.
Costs vary widely with the fixture and the ceiling. HomeAdvisor’s electrician cost guide lists light fixture installation at typically $155 to $955, with hourly rates of about $50 to $130. A simple swap on an existing, sound box sits at the low end, while heavy chandeliers, high ceilings, new boxes or added wiring push the price up.
Frequently asked questions
Can I replace a light fixture myself?
Yes, in many areas homeowners can replace a fixture on an existing box, though local rules vary and some require a permit. The keys are turning off the breaker, verifying with a tester, confirming the box can carry the weight, and making tight connections. Leave aluminum wiring, new boxes and heavy fixtures that need extra support to an electrician.
What if there is no ground wire in the ceiling box?
Older homes sometimes have no ground. If the box is metal and grounded through metal conduit, the fixture ground can connect to the box. If there is no grounding path at all, ask an electrician about your options before installing a fixture with metal parts.
Which wire is hot on a light fixture?
On fixtures with colored wires, black is hot and white is neutral. On fixtures with two identical-looking wires, the smooth wire is usually hot and the ribbed or marked wire is neutral. Check the fixture instructions to be sure.
How heavy a light fixture can a ceiling box hold?
Boxes designed for ceiling fixtures must support at least 50 pounds under the National Electrical Code. Heavier fixtures need a box listed and marked for that weight or independent support, and ceiling fans always need a fan-rated box.
Do I need to turn off the breaker or is the light switch enough?
Turn off the breaker. Depending on how the circuit is wired, some wires in the ceiling box can stay live with the switch off. Always confirm with a non-contact tester before touching anything.
The bottom line
Replacing a light fixture is a rewarding project when you take the safety steps seriously: turn off the breaker, verify with a tester, and confirm the box can hold the new fixture’s weight. Match ground to ground, white to white and black to black, secure the bracket, and test for flicker and heat. Aluminum wiring, a loose or underrated box, or a breaker that trips mean it is time to call a licensed electrician.


