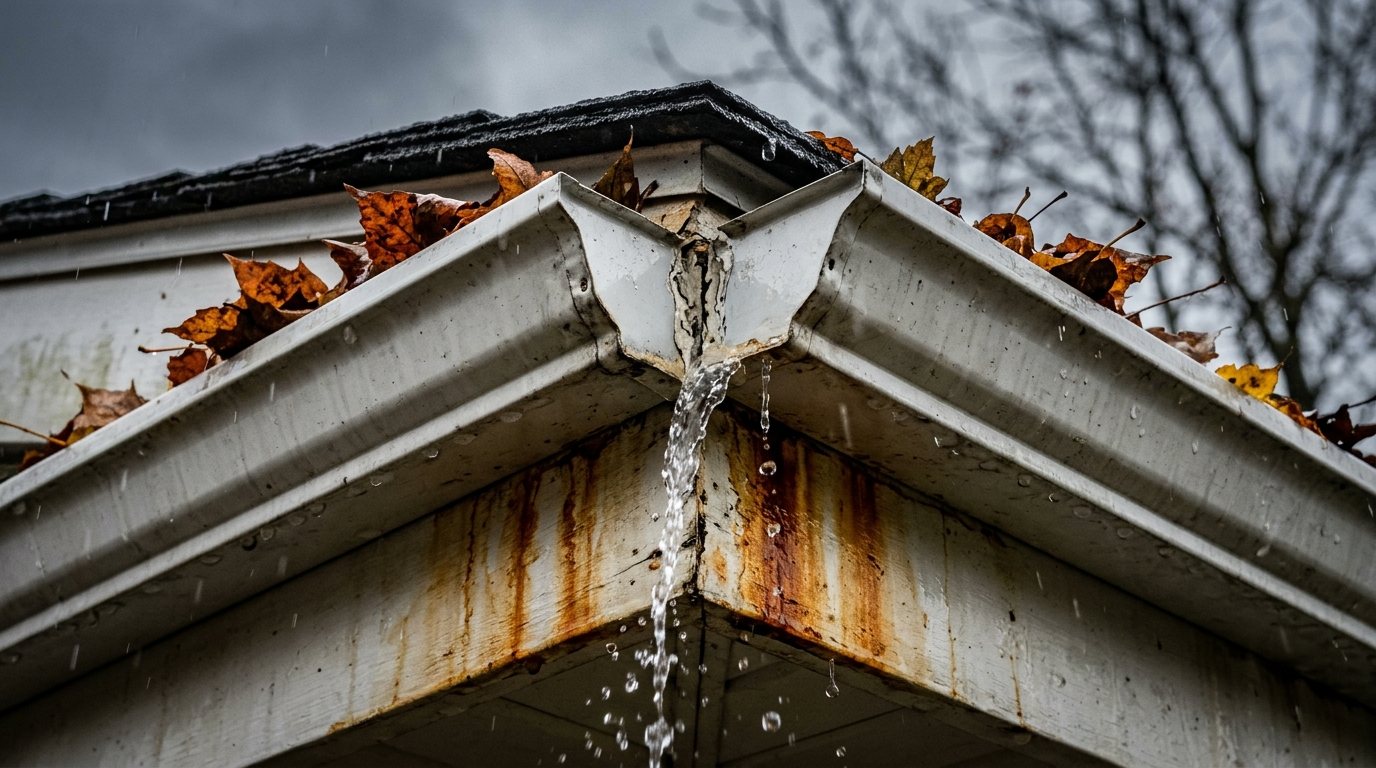
Every time it rains, water drips from the corner of your gutter, splashes on the walkway or soaks the flower bed below. Maybe you have noticed rust streaks on the fascia, peeling paint, or a sagging section that holds a puddle long after the storm has passed. A leaking gutter looks like a small problem, but it sends water exactly where you don’t want it: against your siding, trim and foundation.
This guide shows you how to find the leak, seal seams and end caps with gutter sealant, patch holes, rehang sagging gutters, clear and fix leaking downspouts, and check the slope so water actually reaches the downspout. It is a good job to finish before freezing weather, when leaks turn into icicles and icy patches.
Quick answer: Most gutter leaks come from seams and end caps. Clean the inside of the joint, scrub off old sealant, let it dry completely, then spread a gutter sealant made for your gutter material over the seam. Patch small holes with sealant or roofing cement and larger ones with a piece of matching metal flashing. If water pools or overflows, rehang sagging sections and check that the gutter slopes about 1/4 inch per 10 feet toward the downspout.
Why gutters leak
Home Depot’s gutter repair guide notes that the most common leaks occur at seams and end caps. On sectional aluminum and steel gutters, the sealant at these joints dries out, cracks and pulls away as the metal expands and contracts through hot summers and freezing winters. Even seamless gutters have joints at corners, end caps and downspout outlets.
Other causes include rust holes in older steel gutters, punctures from ladders or falling branches, loose hangers that let a section sag and hold water, and clogs that make water back up and spill over the edge. Water running behind the gutter, rather than through it, is usually a missing or short drip edge rather than a leak in the gutter itself.
Step 1: Find the leak
Leaks are easiest to find on a dry day, when you can see exactly where the water comes out.
- Clean the gutter first. Leaves and grit hide holes and make it impossible to seal anything. Our guide on how to clean gutters safely walks you through it.
- Run a garden hose into the high end of the gutter at a steady flow, or have a helper do it while you watch from the ground.
- Look for drips at seams, corners, end caps, the downspout outlet and along the bottom of each section.
- Mark each leak with tape or chalk on the outside of the gutter so you can find it again from the ladder.
- Watch how the water moves. If it pools in the middle of a run or flows away from the downspout, the slope is wrong. If it backs up at the outlet, the downspout is clogged.
Also check the clues leaks leave behind: rust or dark drip lines on the gutter face, rotting or stained fascia boards, peeling paint on siding below, and trenches washed into mulch or soil.
Tools and materials
- Sturdy extension ladder with a standoff, or a stepladder for single-story eaves
- Work gloves and safety glasses
- Gutter scoop, bucket and garden hose
- Wire brush, stiff nylon brush and an abrasive pad
- Putty knife or plastic scraper for old sealant
- Gutter sealant in a caulk gun, rated for your gutter material
- Plastic roofing cement for patching
- Aluminum flashing or a gutter patch kit, plus tin snips
- Replacement hidden hangers and screws, or gutter screws for spike-and-ferrule gutters
- Cordless drill, level and tape measure
- Pop rivets and rivet tool (optional, for loose end caps and downspout joints)
Safety note: Most gutter injuries come from ladder falls. Set the ladder on firm, level ground, use a standoff so the ladder does not rest on the gutter itself, keep three points of contact and never lean out past the rails to reach a spot. Move the ladder instead. Stay well clear of the electrical service drop where it meets the house. Our ladder safety tips cover setup in detail.
Step 2: Seal leaking seams and end caps
Sealant only sticks to clean, dry metal, so preparation is most of the job.
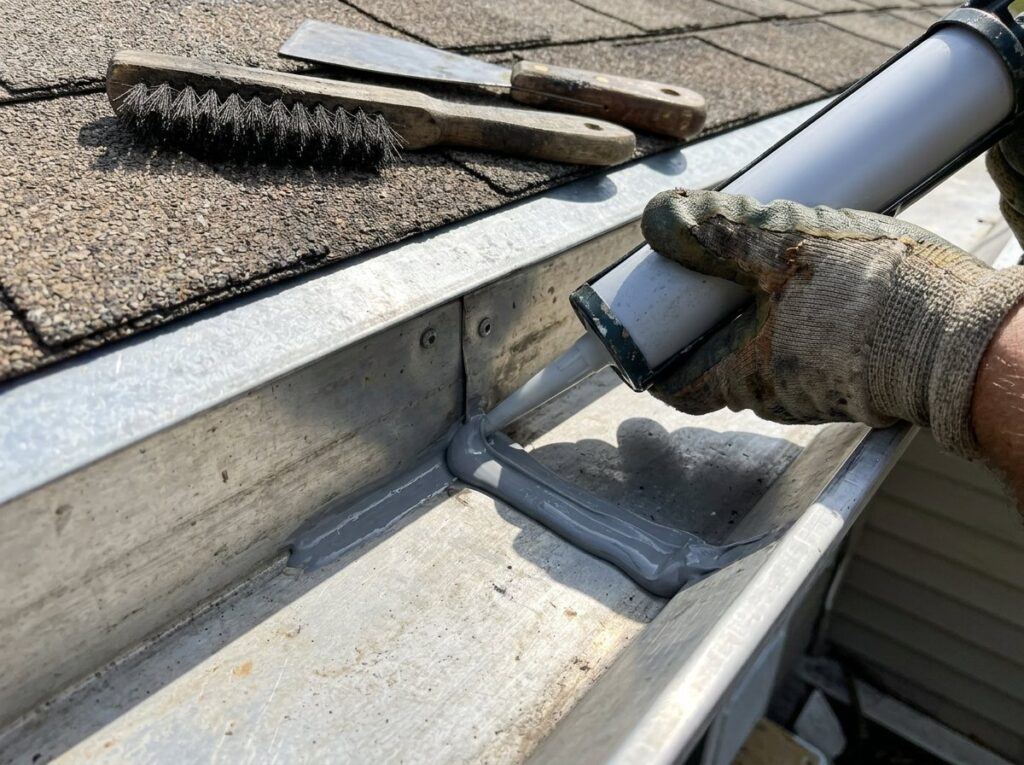
- Remove old sealant. Scrape out cracked, peeling sealant with a putty knife, then scrub with a wire brush.
- Wash the seam. Ask the Builder recommends scrubbing the area within about six inches of the seam with dish soap and water, then rinsing until it is completely clean. Any grime left behind weakens the bond.
- Dry it completely. Wipe with rags and let sun and wind finish the job, or use a leaf blower. Then scuff the surface lightly with an abrasive pad so the sealant can grip.
- Apply the sealant. Run a generous bead over the seam on the inside of the gutter and spread it about half an inch onto each side. Ask the Builder suggests a layer about 3/16 inch thick, since some volume is lost as it cures.
- Seal end caps from the inside. Run sealant along the full joint where the cap meets the gutter, pressing it into the crease. If the cap is loose, secure it with a couple of pop rivets or short screws before sealing.
- Let it cure. Check the label for cure time and the minimum temperature, and don’t test with a hose until it has cured.
Pro tip: Use a sealant sold specifically for gutters and compatible with your gutter material, not general-purpose bathroom caulk. Ask the Builder notes that the dedicated gutter sealants sold through roofing suppliers bond far better to aluminum than ordinary caulk. On vinyl gutters, seams usually rely on rubber gaskets in the connectors, so replacing the connector or gasket is often a better fix than caulking.
Step 3: Patch holes in the gutter
Small holes, such as nail holes or pinhole rust spots, can be sealed directly. Larger holes need a patch.
Small holes
Clean and scuff the area as you would a seam, then fill the hole completely with gutter sealant or plastic roofing cement. Feather the edges so water flows smoothly over the repair instead of pooling against a ridge.
Larger holes and rusted spots
- Wire-brush the area down to sound metal and clean it.
- Cut a patch of flashing with tin snips large enough to cover the damage with plenty of overlap on every side. Use the same metal as the gutter, such as aluminum flashing on an aluminum gutter, because mixing metals can speed up corrosion.
- Spread roofing cement or sealant around the hole, press the patch into it, and cover the edges with another thin layer, as Home Depot describes.
- Feather the cement so the patch does not form a dam.
If a section has several rust holes or the metal crumbles when you press it, patching only buys time. Replace that section instead.
Step 4: Rehang sagging gutters and fix the slope
Check the slope
Gutters need a gentle pitch toward each downspout. Home Depot gives a guideline of about 1/4 inch of drop for every 10 feet of gutter. Too little slope leaves standing water that rusts the metal and overflows in heavy rain, and too much makes the gutter look crooked and can overshoot the outlet.
Check it with a level on the gutter edge, or run a hose in the high end and watch where water collects. Small dips usually mean a failed hanger.
Replace loose spikes and hangers
- Locate the loose fastener. Old spike-and-ferrule systems are the most common culprit, because spikes work loose from the fascia over time.
- Pull the old spike and replace it with a gutter screw or a hidden hanger screwed into solid wood. Bob Vila’s leaking gutter guide recommends that spikes or long screws be at least 7 inches long, and 8 inches is better, so they reach the rafter tails behind the fascia. If the old hole is stripped, drill a new one just above it.
- Add hangers where the gutter sags between existing ones, following the spacing on the hanger packaging. Use closer spacing if you get heavy snow.
- Lift the sagging section back to the correct slope before tightening, and recheck with a level or hose.
If screws won’t bite because the fascia is soft or rotted, stop. The fascia board needs to be replaced before any gutter will stay up.
Step 5: Clear and fix downspouts
A clogged downspout can look like a leaking gutter, because water backs up and pours over the edge or out of the joints. Home Depot points out that leaks at the elbow or outlet often mean a clog, not a hole.
- Run a hose down the downspout from the top. If water backs up, there is a clog.
- Remove the bottom elbow and clear debris by hand. For deeper clogs, push a plumber’s snake or a long stick up from the bottom, or flush down from the top with a hose.
- Check the joints. Each upper section should fit inside the one below it so water flows down past the joint rather than out of it. Reassemble any reversed sections and secure them with short screws or rivets.
- Seal leaking downspout joints with gutter sealant and reattach loose downspout straps to the wall.
- Make sure the downspout extension carries water well away from the foundation and that the ground slopes away from the house.
Leaf screens over the outlet help prevent repeat clogs. If clogs happen every season, our look at whether gutter guards are worth it can help you decide on a longer-term fix.
Troubleshooting table
| What you see | Likely cause | Fix |
|---|---|---|
| Drips at a joint between sections | Failed seam sealant | Clean, dry and reseal the seam from the inside |
| Drips at the end of a run | Loose or unsealed end cap | Rivet or screw the cap and reseal |
| Drips mid-section, rust spots | Pinholes or rust-through | Seal small holes, patch larger ones, replace badly rusted sections |
| Water pools or overflows in one spot | Sagging section or wrong slope | Replace hangers and reset slope to about 1/4 inch per 10 feet |
| Water spills at the outlet or elbow | Clogged downspout | Flush and clear the downspout, add a leaf screen |
| Water runs down the fascia behind the gutter | Missing or short drip edge | Install a gutter apron or drip edge under the shingles |
When to call a pro
Call a gutter contractor or roofer if you see:
- Rotted fascia boards or rafter tails that won’t hold fasteners
- Gutters on a second or third story or a steep roof edge you can’t reach safely
- Widespread rust, many leaking seams or sections that keep pulling away
- Water stains on interior ceilings or walls near the eaves
- Ice dams or large icicles forming along the gutters each winter
According to Angi’s gutter repair cost guide, a typical gutter repair runs about $240 to $480, with a national average around $390. Angi puts fixing leaking gutters at about $80 to $140 and sagging gutters at about $80 to $600, depending on the cause. If leaks show up as ice in winter, our guide on how to prevent ice dams covers the roof side of the problem.
Frequently asked questions
What is the best sealant for leaking gutters?
Use a sealant labeled for gutters and compatible with your gutter material, typically a solvent-based or polymer gutter sealant for aluminum and steel. These stay flexible and bond to metal better than general-purpose caulk. Always apply it to clean, dry, scuffed metal.
Can you seal gutters from the outside?
It is much better to seal from the inside, where water actually flows. Sealant on the outside of a seam can hide the leak for a while, but water still gets into the joint from the inside and pushes it off.
Can I fix a leaking gutter in the rain or cold?
No. Sealant needs dry metal and a temperature above the minimum on the label to bond and cure. Wait for a dry day, and in late fall pick a mild afternoon before the first hard freeze.
Why does water come out behind my gutter?
Usually because there is no drip edge or gutter apron bridging the gap between the roof edge and the back of the gutter. Water clings to the underside of the shingles and runs down the fascia instead of into the gutter.
How long do gutter seam repairs last?
A well-prepared seam repair can last several years, but Bob Vila describes resealing as a temporary fix that may buy a season or two when gutters are badly worn. If the same seams keep failing, plan to replace those sections.
The bottom line
To fix a leaking gutter, start by cleaning it and finding the leak with a hose. Reseal seams and end caps from the inside with a proper gutter sealant on clean, dry metal, patch holes with matching flashing, rehang sagging sections to restore a slope of about 1/4 inch per 10 feet, and clear the downspouts. Do it on a dry, mild day before winter, and call a pro when fascia is rotted or the work is too high to reach safely.