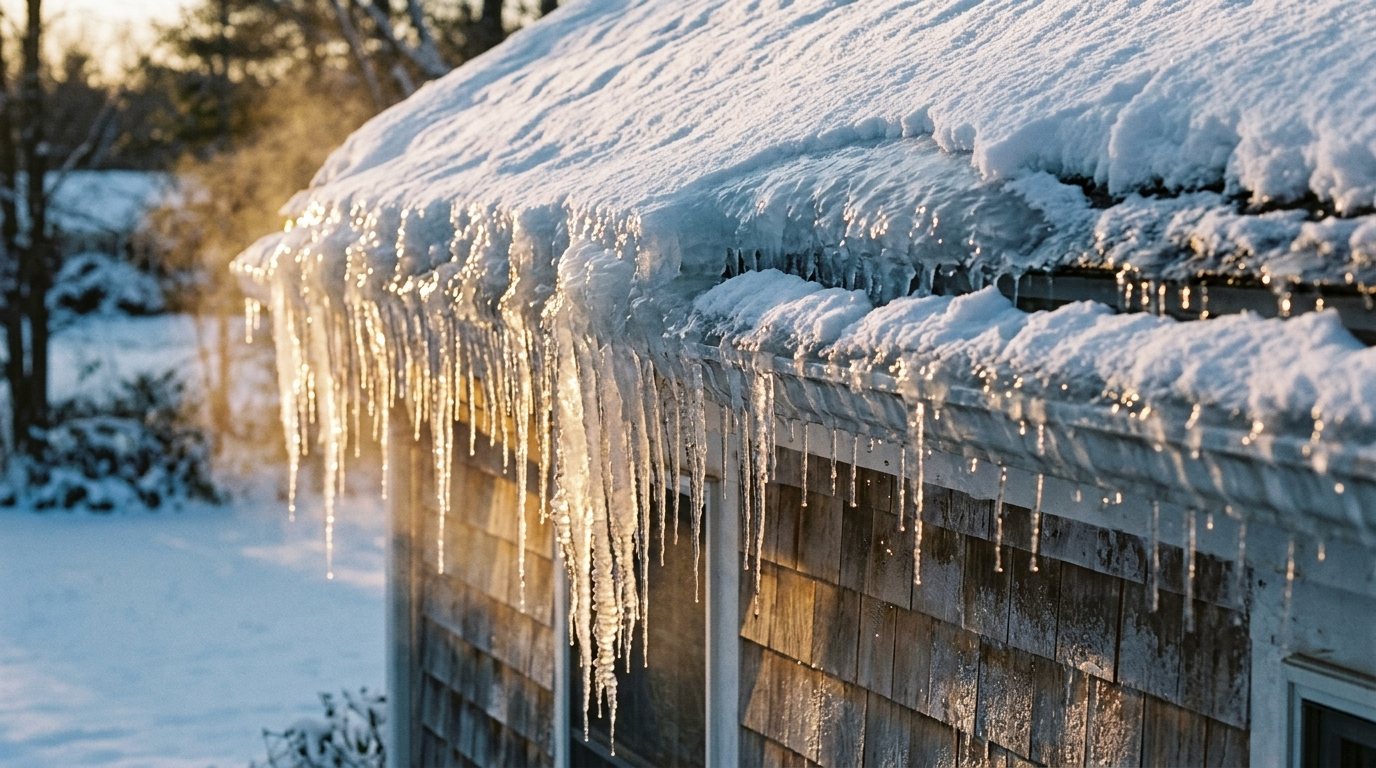
You look up after a January storm and see a thick ridge of ice along the edge of the roof, with icicles hanging off the gutters. A few days later, a brown stain appears on the ceiling near an outside wall, or water drips around a window frame. That is an ice dam, and in New England and other snowy regions it is one of the most common causes of winter roof leaks.
The good news is that ice dams are predictable and largely preventable. This guide explains why they form, the permanent fixes that stop them at the source, the short-term defenses that work during the season, how to remove a dam without wrecking your roof, and what to do if one is already leaking into your house.
Quick answer: Ice dams form when heat escaping from your living space melts snow on the upper roof and the water refreezes at the cold eaves. The lasting fix is to stop that heat loss: air seal the attic floor, bring attic insulation up to about R-49 to R-60 for cold climates, and keep soffit and ridge vents clear. During the season, rake the bottom few feet of snow off the roof from the ground after every storm, and never chip at the ice.
How ice dams form (and why so many New England homes get them)
An ice dam needs three things at once: snow on the roof, an upper roof surface above freezing, and a roof edge below freezing. According to the University of Minnesota Extension, heat from the house is the main reason one part of the roof stays warmer than another. Sunshine rarely causes the problem on its own.
Warm air leaks into the attic and heats the roof deck, so snow on the upper roof melts from underneath. The water runs down to the overhang, which sits outside the heated house and stays as cold as the outdoor air, and refreezes there. With every melt the ridge grows, until water pools behind it and works its way under the shingles into the attic, walls and ceilings.
Why older New England houses are especially prone
Capes, older colonials and homes with finished half-stories often have sloped ceilings and knee walls with little room for insulation, plus decades of wiring and plumbing holes through the top plates. Add heavy, wet nor’easter snow and the classic January thaw followed by a hard freeze, and you get ideal ice dam conditions.
Warning signs to look for
- A thick, continuous row of icicles along the eaves, not just a few small ones.
- Ice behind the gutters or on the soffit, which suggests water is already backing up.
- Bare stripes on a snowy roof that line up with recessed lights, bath fans or the chimney.
- Stains, peeling paint or damp drywall near the top of exterior walls or on ceilings close to the eaves.
- Frost or wet insulation in the attic near the eaves after a cold snap.
Long-term prevention: stop the heat at the source
Heat cables and roof raking treat symptoms. The permanent fix is a cold roof: keep the heat in your living space so the whole roof deck stays close to the outdoor temperature. Work through these steps in order.
1. Air seal the attic floor first
Warm air rising through gaps in the ceiling is often the biggest heat source, and fiberglass insulation does not stop moving air. Seal these common attic bypasses before you add insulation:
- Holes around plumbing vents, wiring and ducts where they pass through the top plates of walls.
- The attic hatch or pull-down stairs: add weatherstripping and an insulated cover.
- Older recessed lights that are not airtight or IC-rated. Replace them or use covers made for that purpose.
- Bath and kitchen fans that dump air into the attic. Duct them all the way outside.
- Ductwork in the attic. Seal joints with mastic or foil tape and insulate the ducts.
- The chimney chase. Use sheet metal and fire-rated caulk here, never spray foam against the chimney.
Use low-expansion spray foam for larger gaps and caulk for cracks. An energy auditor can run a blower door test and use an infrared camera to show exactly where heat escapes. Many New England utility and state programs, such as Mass Save in Massachusetts and Efficiency Maine, offer home energy assessments and insulation incentives, so check what is available before you hire anyone.
Safety note: Tightening up a house changes how air moves through it. Before major air sealing, make sure your furnace, boiler, water heater and any wood stove have enough combustion air and vent properly, and that you have working carbon monoxide alarms. An energy auditor or heating contractor can run a combustion safety test.
2. Bring attic insulation up to the recommended level
Once air leaks are sealed, add insulation. ENERGY STAR recommends R-60 for an uninsulated attic in the coldest climate zones, and R-49 if you are adding to 3 to 4 inches of existing insulation. Most of New England falls in climate zones 5 through 7, so those targets apply.
Pay close attention to the eaves, where space is tight. Install baffles (rafter vents) first so the insulation does not block the soffit vents, then insulate as close to the outer wall as the baffles allow. For sloped ceilings and knee walls with little depth, rigid foam or dense-pack cellulose gives more R-value per inch.
3. Balance your attic ventilation
Ventilation carries away whatever heat still reaches the attic. The standard setup is continuous soffit vents low on the roof for intake and a ridge vent up high for exhaust. Make sure the soffit vents are not painted over or packed with insulation.
Ventilation is a helper, not a cure. The University of Minnesota Extension notes that only modest ventilation is needed once heat loss is controlled, and it advises against powered attic fans because they can pull warm, moist air from the house into the attic.
Ice dam fixes compared
Costs below are typical national ranges from Angi’s ice dam removal cost guide and vary with your roof and region.
| Fix | What it does | Typical cost | Best for |
|---|---|---|---|
| Air sealing and attic insulation | Stops the heat that melts the snow | Insulation typically $1,500 to $6,000 | The permanent fix for most homes |
| Roof rake (DIY) | Removes snow from the lower roof | Cost of the tool | Every snowy home, after each storm |
| Pro roof snow removal | Clears snow before dams grow | Typically $250 to $500 per visit | Steep or two-story roofs |
| Heat cables | Melt drainage paths through the ice | Installed, typically $470 to $1,500 | Trouble spots insulation can’t fix |
| Pro steam removal | Melts an existing dam without damaging shingles | Typically $800 to $2,100 | Large dams or active leaks |
Short-term defenses during the season
Rake the roof after every big storm
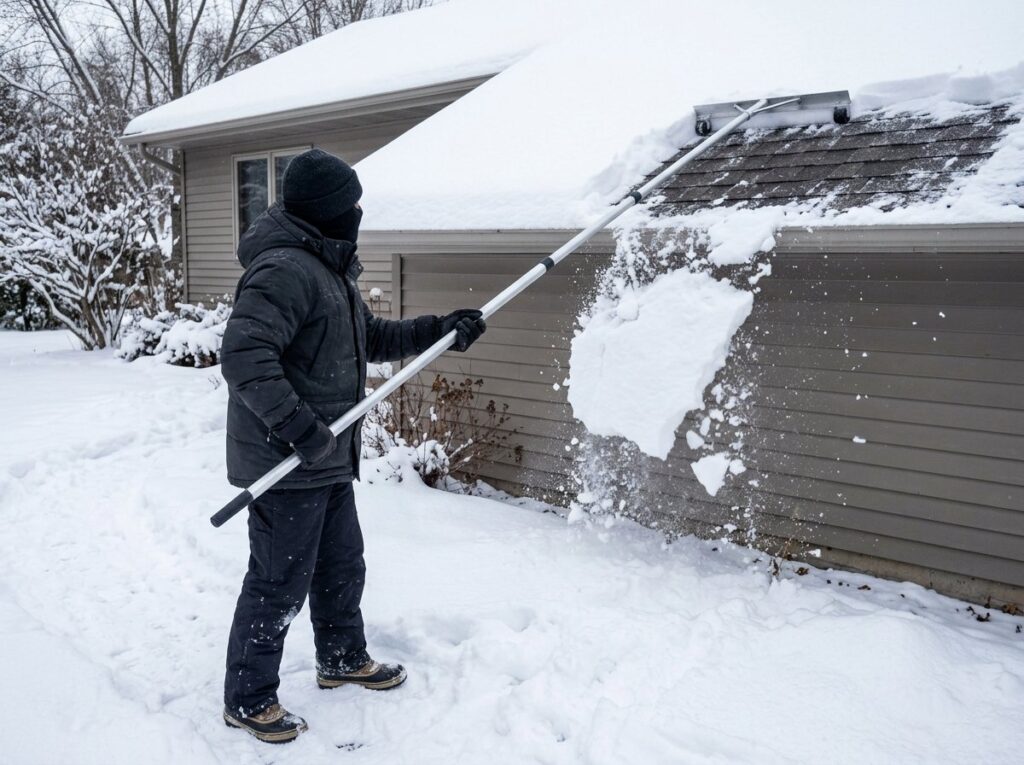
A roof rake is a wide blade on a telescoping pole that lets you pull snow off the roof while standing on the ground. Clear the bottom 3 to 4 feet of roof above the eaves, which removes the snow that would feed a dam. Choose a rake with small rollers that hold the blade slightly off the shingles, and pull gently so you don’t strip granules or crack frozen shingles.
Safety note: Most roof rakes are aluminum and conduct electricity. Keep the pole well away from the power line to your house, stand to the side of where snow will slide off, and never use a roof rake from a ladder or climb onto a snowy roof.
Heat cables: where they make sense
Heat cables run in a zigzag along the roof edge and through gutters and downspouts. They don’t stop ice from forming; they melt drainage paths so water can escape. They suit trouble spots, such as a valley over an entry door, but they use electricity all winter and do nothing about the heat loss behind the problem. If you install them, use cables listed for roof and gutter use, follow the maker’s instructions, plug them into a GFCI-protected outdoor outlet and put them up before the first snow.
Calcium chloride stockings for an emergency channel
If water is already backing up, fill a leg of old pantyhose with calcium chloride ice melt, tie it off and use a roof rake to lay it vertically across the dam so the end hangs over the gutter. It slowly melts a channel that lets trapped water drain. Use calcium chloride, not rock salt, which kills shrubs and corrodes gutters and flashing.
How to remove an ice dam safely
When a dam is already in place, the goal is to drain the water behind it without damaging the roof or getting hurt. Stay off the roof and avoid these common mistakes:
- No chipping. Axes, hammers, ice picks and shovels gouge shingles, crack flashing and bend gutters. The repair often costs more than the dam.
- No pressure washers or open flames. High-pressure water drives water under shingles, and torches are a fire risk.
- No rock salt on the roof. It harms plants below and corrodes metal.
- Don’t yank off big icicles frozen to the gutters. They can pull the gutter down. Keep people and pets away from the drip line.
For a large dam, hire a roofing or ice dam company that uses low-pressure steam, which melts ice without harming shingles. Angi lists typical professional removal at $650 to $2,000. Many companies charge by the hour with a two-hour minimum, and schedules fill fast after big storms, so call early.
What to do if an ice dam is leaking into your house
- Protect the room. Move furniture and electronics, lay down towels and set buckets under drips.
- Cut power to wet fixtures. If water is coming through a light or near outlets, switch off that circuit at the panel. Our guide to circuit breaker problems explains how the panel works.
- Drain a bulging ceiling. If drywall is sagging with water, set a bucket underneath and poke a small hole at the lowest point with a screwdriver so it drains in a controlled way.
- Cool the roof deck. In the attic, aim a box fan at the underside of the roof where water is coming in. Cold air refreezes the water and can stop the leak quickly.
- Relieve the roof from outside. Rake the snow above the leak from the ground and lay a calcium chloride stocking across the dam.
- Document everything. Photograph the ice, stains and damaged belongings, then call your insurer.
- Dry it out before repairs. Remove soaked insulation, run fans and a dehumidifier, and wait until drywall and framing are fully dry before patching.
Standard homeowners policies generally won’t pay to remove an ice dam, but they often cover sudden interior water damage it causes, minus your deductible. Damage that builds up slowly from poor maintenance is commonly excluded, so report leaks promptly and check your own policy.
Tools and materials
- Roof rake with telescoping pole and rollers
- Calcium chloride ice melt and old pantyhose
- Box fan, buckets, tarps and towels
- Low-expansion spray foam, caulk and fire-rated caulk
- Attic hatch weatherstripping and insulated cover
- Rafter baffles and insulation
- Headlamp, gloves, dust mask and eye protection
When to call a pro
Call an ice dam removal company or roofer right away if:
- Water is leaking into walls, ceilings or light fixtures.
- The dam is large, the roof is steep or two stories up, or ice hangs over an entry or walkway.
- Gutters are pulling away from the fascia or the roof sags under heavy snow.
- You get ice dams every winter despite raking, which points to a heat loss problem.
For prevention, an energy auditor or insulation contractor is the right call. Attic insulation typically runs $1,500 to $6,000 depending on attic size and material, and a roof inspection averages about $230, according to Angi. That is often less than one season of emergency steaming plus interior repairs. If water has already gotten in, our guide on how to find a roof leak helps you trace where it entered.
Frequently asked questions
Are icicles always a sign of an ice dam?
Not always. A few small icicles can form from normal sun melting. A heavy row of thick icicles, especially with ice on the soffit or behind the gutters, is a strong sign that heat loss is melting snow higher up.
Do gutters cause ice dams?
No. Ice dams form on the roof edge because of heat loss, and they happen on houses without gutters too. Clogged gutters can fill with ice faster and add weight, so clean them in the fall. Our guide on how to clean gutters safely walks you through it.
Do heat cables really work?
They work for what they do: melting drainage paths in a specific spot. They don’t stop ice from forming elsewhere, they use electricity all winter, and poorly installed cables can damage shingles. Treat them as a backup to air sealing and insulation, not a replacement.
Why does my house get ice dams when my neighbor’s doesn’t?
Two houses on the same street can have very different attics. Leaky recessed lights, an uninsulated attic hatch, ducts in the attic or a bath fan venting into the attic can all heat the roof. Roof shape matters too, since valleys, dormers and low-slope sections hold more snow.
The bottom line
Ice dams are a heat loss problem that shows up on your roof. Rake the lower roof after every storm, keep calcium chloride and a box fan ready for emergencies, and never chip at the ice. Then fix the cause by air sealing and insulating the attic, ideally before the next snow season. For more ways to get ready, see our winter home maintenance checklist.