Your towels need two full cycles to dry, the laundry room feels like a sauna, and the top of the dryer is hot to the touch. Before you shop for a new dryer, look behind it. In most cases the problem isn’t the machine at all but a vent duct packed with lint that the dryer can’t push air through.
This guide explains why a clogged dryer vent is a real fire risk, how to tell if yours needs attention, and how to clean it yourself from the dryer to the outside wall. You’ll also learn how often to do it, which vent materials are safe (and which to throw away), and when a professional cleaning is worth the money.
Quick answer: Unplug the dryer (and shut off the gas if it’s a gas model), pull it away from the wall and disconnect the duct. Vacuum the dryer outlet, run a dryer vent brush through the duct and wall vent from both ends, then clear the outside hood. Reconnect with rigid or semi-rigid metal duct, never foil or plastic, and check that air blows strongly outside. Do this at least once a year, or sooner if drying times creep up.
Why a clogged dryer vent is dangerous
Lint is fine, dry and highly flammable. The lint screen catches most of it, but some always slips past and settles inside the duct, especially at bends, low spots and the outside hood. As it builds up, hot, moist air can’t escape, the dryer runs hotter and longer, and the lint sits right next to the heat.
The U.S. Fire Administration estimates that about 2,900 home clothes dryer fires are reported each year, causing roughly 5 deaths, 100 injuries and $35 million in property loss. Failure to clean is the leading cause, behind 34 percent of those fires, and they happen most often in fall and winter, peaking in January. Heavier winter loads like sweaters, blankets and flannel sheets shed more lint and keep the dryer running longer.
A blocked vent also costs you money, because every extra cycle uses more energy and wears out parts faster. On a gas dryer, a restricted vent can push exhaust gases, including carbon monoxide, back into the house.
Signs your dryer vent is clogged
Match what you’re noticing with what it usually means. If you see more than one sign, clean the vent before your next load.
| Sign | What it usually means | What to do |
|---|---|---|
| Clothes take more than one cycle to dry | Airflow is restricted somewhere in the duct | Clean the full vent run |
| Dryer top or clothes are unusually hot | Heat can’t escape, so the dryer is overheating | Stop using it and clean the vent now |
| Burning smell while running | Lint near the heater or in the duct is scorching | Turn it off, unplug it and inspect before reuse |
| Outside vent flap barely opens | Lint or a nest is blocking the hood | Clean the hood and check the duct behind it |
| Lint on the floor behind the dryer or around the hood | Loose or torn duct connection, or a clogged run forcing lint out | Reseal joints and clean the duct |
| Laundry room feels humid or musty | Moist exhaust is leaking indoors | Check for a disconnected or crushed duct |
| Dryer shuts off mid-cycle or won’t heat | Thermal fuse or high-limit thermostat has tripped from overheating | Clean the vent, then have the dryer checked |
Tools and materials
- Dryer vent cleaning kit: a round lint brush on flexible rods that connect for length
- Long, narrow lint trap brush for the lint screen housing
- Shop vacuum or household vacuum with a crevice tool
- Screwdriver or nut driver for duct clamps
- Aluminum foil tape (not cloth duct tape) for sealing joints
- Dust mask and work gloves
- Drop cloth or old sheet
- Replacement rigid or semi-rigid metal duct and clamps, if your current duct is foil, plastic or damaged
- Stable step ladder only if the outside hood is just above ground level
How to clean a dryer vent step by step
Plan on 30 to 60 minutes for a typical short run through an exterior wall. Pick a dry day, since you’ll be working at the outside hood too.
Step 1: Clean the lint screen and its housing
Pull out the lint screen, peel off the lint and wash the screen with warm, soapy water if it looks waxy from dryer sheets. Let it dry completely. Then slide a long lint trap brush or the vacuum’s crevice tool into the slot where the screen sits and remove the lint packed below it.
Step 2: Disconnect the power and gas
Unplug the dryer from the wall. If you have a gas dryer, turn the gas shutoff valve on the supply line so the handle sits crosswise to the pipe. Move a gas dryer gently, because the flexible gas connector can kink or crack. If you aren’t comfortable working around the gas line, this is a good job to hand to a pro.
Step 3: Pull the dryer out and detach the duct
Slide the dryer out far enough to work behind it, usually 2 to 3 feet. Loosen the clamp at the dryer’s exhaust outlet and pull the duct off, then do the same where the duct meets the wall. Vacuum the dryer’s outlet as far in as you can reach, and clean up the lint and dust on the floor behind the machine.
Step 4: Brush out the wall duct
Feed the vent brush into the wall opening and push it toward the outside, turning it clockwise as you go so the rod sections don’t unscrew. Add rods as needed. Work it back and forth in short strokes, then pull it out and vacuum the lint that comes with it. Many kits let you spin the rods with a cordless drill on low speed; keep it on low and always turn clockwise.
Step 5: Clean from the outside
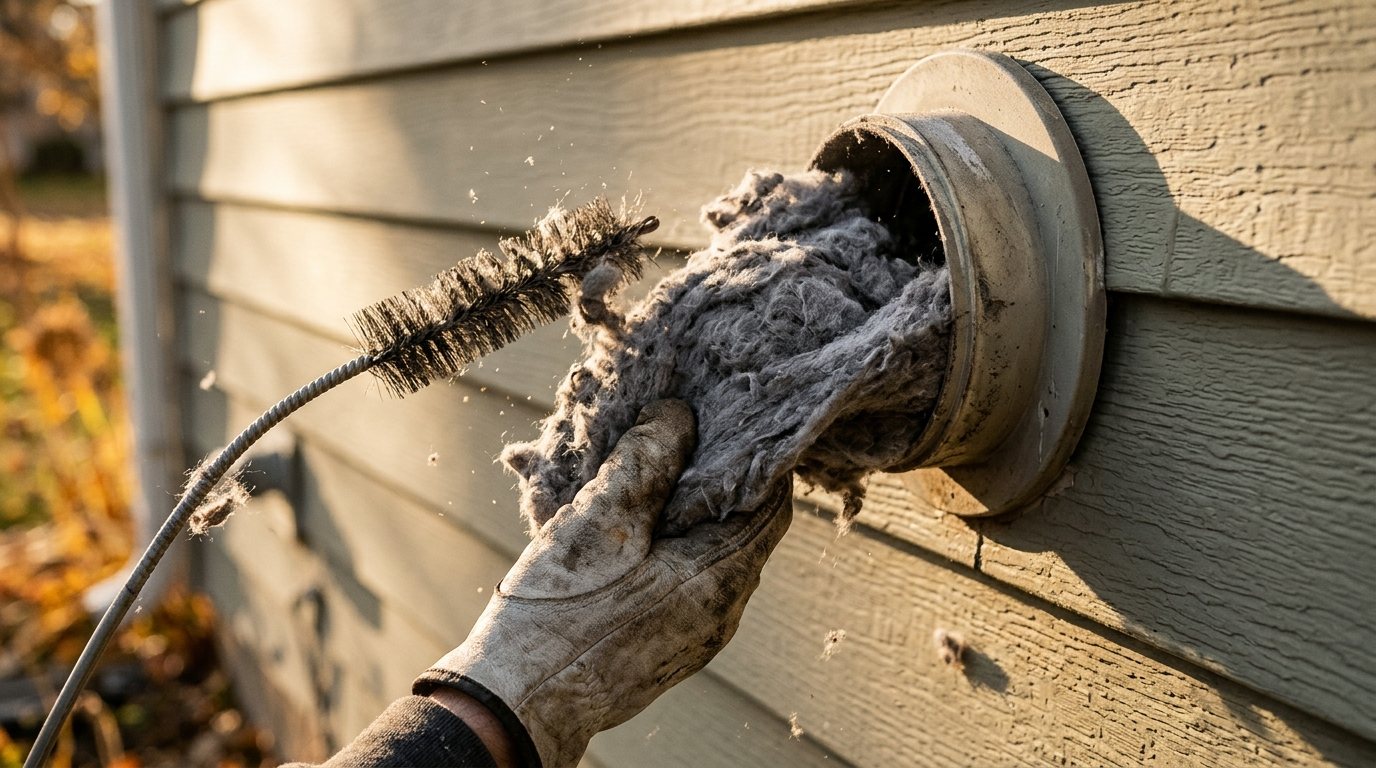
Go outside and remove the vent hood cover or louvers if they come off. Pull out the lint by hand, then run the brush in from the outside to catch anything you pushed toward the end. Never install a screen over a dryer vent, because it traps lint and blocks airflow.
Look for bird or rodent nests, and make sure the flap or louvers swing freely. If you find droppings or chewed material, our guide on how to get rid of mice can help.
Step 6: Clean or replace the transition duct
The short connector between the dryer and the wall is often where the worst lint and crushing happen. Shake out and brush a rigid or semi-rigid metal connector. If yours is white vinyl or thin foil accordion duct, replace it now with metal duct listed for dryer use.
Step 7: Reconnect and test
Reattach the duct with clamps and seal joints with foil tape rather than screws, which poke into the duct and catch lint. Push the dryer back without crushing the duct. Restore power and gas, run the dryer on an air-only setting for 10 to 15 minutes, and check outside: you should feel a strong, steady stream of air and see the flap open fully.

Safety note: After reconnecting a gas dryer, brush soapy water on the gas connection and watch for growing bubbles. If you see bubbles or smell gas, shut the valve, ventilate the room and call your gas utility or a licensed technician. Never use a lighter or flame to check for leaks.
How often to clean a dryer vent
NFPA advises cleaning the lint screen before or after every load and clearing lint from the vent pipe about once a year, sooner if drying takes longer than normal. The U.S. Fire Administration also recommends checking the venting behind the dryer for crushing or damage. Some homes need cleaning more often:
- Every 6 months: large households running several loads a day, homes with pets, or long ducts with several bends.
- Once a year: average use with a short, straight run to an exterior wall.
- Immediately: any time you notice a burning smell, an overheating dryer or a flap that won’t open.
Cleaning the vent once a year fits naturally into your winter home maintenance checklist, since January is the peak month for dryer fires. While you’re in the laundry room, it’s also a good time to clean your washing machine.
Dryer vent materials: foil vs rigid metal
The material behind your dryer matters as much as how often you clean it. Ridged, accordion-style ducts trap lint in every fold, sag into low spots and crush easily when the dryer is pushed back. NFPA safety tips call for rigid or flexible metal venting to keep airflow and drying time where they should be.
| Duct type | Safety | Best use |
|---|---|---|
| White vinyl or plastic | Unsafe; can melt and burn, and isn’t allowed by most dryer manufacturers | None. Replace it. |
| Thin foil accordion | Poor; crushes easily, traps lint in folds, can tear | Avoid. Replace with semi-rigid metal. |
| Semi-rigid aluminum | Good when listed for dryer transition use | Short connector between dryer and wall |
| Rigid metal with smooth interior | Best; smooth walls shed lint and resist crushing | Duct runs inside walls, ceilings and attics |
Under the International Residential Code, which most US jurisdictions adopt, the duct inside walls must be rigid metal at least 4 inches in diameter with a smooth interior. The total run is generally limited to 35 feet, minus an allowance for each elbow, and the termination needs a backdraft damper with no screen. Your dryer’s installation manual may set a shorter maximum length, and local codes can vary, so check both before rerouting a vent.
Common dryer vent mistakes
- Cleaning only the lint screen. It catches most lint but not all, and the duct still clogs over time.
- Using screws to join duct sections. Screw tips inside the duct snag lint and start clogs. Use clamps and foil tape.
- Pushing the dryer tight against the wall. This crushes the transition duct and can cut airflow dramatically.
- Venting into an attic, crawl space or garage. Moist, linty air causes mold and a fire hazard. Dryer exhaust must go outside.
- Leaving the dryer running when you leave home or go to bed. If a fire starts, no one is there to catch it early.
- Using a leaf blower without checking the hood. Blowing air from inside can pack lint tighter against a stuck flap or nest. Clear the outside first.
When to call a pro
A simple run of a few feet through an exterior wall is a straightforward DIY job. Call a dryer vent cleaning service or HVAC contractor if:
- The vent exits through the roof or a second-story wall you can’t reach safely from the ground.
- The run is long, has several elbows, or passes through a ceiling or attic.
- Your brush hits a blockage it can’t break through, or you suspect a nest.
- The duct is crushed or disconnected inside a wall or ceiling.
- You’ve had a burning smell, scorch marks or a tripped thermal fuse.
- You have a gas dryer and aren’t comfortable disconnecting it.
Based on Angi and HomeAdvisor data, professional dryer vent cleaning typically costs about $102 to $179. Removing a bird nest typically runs $150 to $400, and installing or replacing a vent duct typically costs $175 to $600, depending on the length and route.
Frequently asked questions
Can I clean my dryer vent myself?
Yes, if the vent is a short, accessible run through an exterior wall. A brush kit with flexible rods and a vacuum handles most homes in under an hour. Roof vents, long runs and gas dryers you aren’t comfortable moving are better left to a pro.
How do I know if my dryer vent is clogged?
The most common sign is clothes that need more than one cycle to dry. Other clues include a hot dryer cabinet, a burning smell, a weak or missing airflow at the outside flap, and lint collecting behind the dryer. Check the outside flap while the dryer runs: it should open fully.
Is a foil dryer vent hose safe?
Thin foil accordion hose is a poor choice because it crushes, sags and traps lint in its ridges. Replace it with semi-rigid aluminum duct listed for dryer use for the short connector, and rigid metal for any run inside walls. Never use white plastic or vinyl duct.
Can I use a leaf blower to clean my dryer vent?
It can work on a short, straight run, but only after you clear the outside hood so the lint has somewhere to go. It doesn’t scrub lint stuck to the duct walls the way a brush does, and on a long or damaged run it can blow joints apart. A brush kit is the more reliable method.
Is it OK to vent an electric dryer indoors?
Indoor lint-catching kits are sold, but most dryer manufacturers and codes call for exhaust to go outside. Indoor venting adds a lot of moisture and fine lint to the air, which can cause condensation and mold. A gas dryer must always vent outside because its exhaust contains combustion gases.
The bottom line
A clean dryer vent dries clothes faster, saves energy and removes the leading cause of dryer fires. Clean the lint screen every load, brush out the duct from both ends at least once a year, and replace any foil or plastic duct with metal. If your vent runs through the roof, stretches a long way or has already overheated, a professional cleaning is a small price for peace of mind.