You pulled up the old flooring and found a dip in the middle of the room, a hump over a joist, or a concrete slab that rolls like a gentle wave. Or maybe new planks are already clicking, flexing and separating because the floor underneath is not flat. Either way, you need to fix the base before the new floor goes down.
This guide shows you how to check a floor properly with a straightedge, what flatness your flooring manufacturer actually expects, how to use self-leveling underlayment over concrete and over wood, how to sand or grind high spots, when shimming or sistering joists makes sense, and when the problem is big enough to call a pro.
Quick answer: Check the floor with a 6- to 10-foot straightedge in several directions and mark highs and lows. Most hard flooring needs the floor flat to about 3/16 inch over 10 feet, so sand or grind high spots, then fill low spots with a cement-based patch or self-leveling underlayment applied over primer. Wood subfloors need extra prep such as screws, metal lath and a stiff enough structure, and dips that follow the joists usually need the framing corrected. Call a pro if the floor is off by more than 3/4 inch over 10 feet or shows signs of structural movement.
Flat vs level: what your new floor really needs
Level means perfectly horizontal. Flat means no sudden dips or humps over a short distance. Most flooring manufacturers care about flatness, because a click-lock plank or tile can sit on a gentle overall slope but will flex, crack or separate over a hollow. As This Old House contractor Tom Silva puts it, when level is out of reach, aim for flat.
A whole-house slope still matters if it is steep enough to notice, makes doors swing open on their own, or is getting worse. Those are signs of a structural problem rather than a surface fix.
Typical flatness tolerances
Always follow the instructions for the exact product you are installing, since warranties are tied to them. These are common published figures, including the wood flooring standards described by Hardwood Floors magazine:
| Flooring type | Typical flatness requirement | Source |
|---|---|---|
| Wood flooring, general industry standard | 3/16 inch in 10 feet or 1/8 inch in 6 feet | Hardwood Floors magazine |
| Nail-down solid wood | 1/4 inch in 10 feet or 3/16 inch in 6 feet | Hardwood Floors magazine |
| Luxury vinyl plank and laminate (one manufacturer’s spec) | 3/16 inch over 10 feet | Manufacturer install guide |
| Herringbone vinyl plank (same manufacturer) | 1/8 inch over 6 feet and 1/16 inch over 1 foot | Manufacturer install guide |
| Tile, especially large-format | Usually stricter; check the tile and mortar instructions | Product instructions |
Tools and materials
- Straightedge 6 to 10 feet long (an aluminum screed or a straight, true board) and a 4-foot level
- Laser level (optional) for measuring overall slope across a room
- Tape measure, pencil or marker, and a few washers or shims to gauge gaps
- Drill-driver and subfloor screws for loose panels
- Random-orbit or belt sander with 60- to 80-grit paper for wood high spots
- Angle grinder with a diamond cup wheel for concrete high spots, plus a shroud and vacuum
- Primer made for your leveler, cement-based patch or self-leveling underlayment
- Large mixing bucket, heavy-duty drill with a paddle mixer, gauge rake and smoother
- Foam backer rod, tape or wood strips for dams; metal or plastic lath and staples for wood subfloors
- Respirator, safety glasses, gloves and knee pads
How to check a floor for flatness
- Strip and clean the floor. Remove old flooring, staples and debris, then vacuum. If you are starting from carpet, see our guide on how to remove carpet. Debris under the straightedge gives false readings.
- Look for loose spots first. Walk the floor and listen for squeaks or movement. Screw loose panels down to the joists before you measure, since they can change the reading.
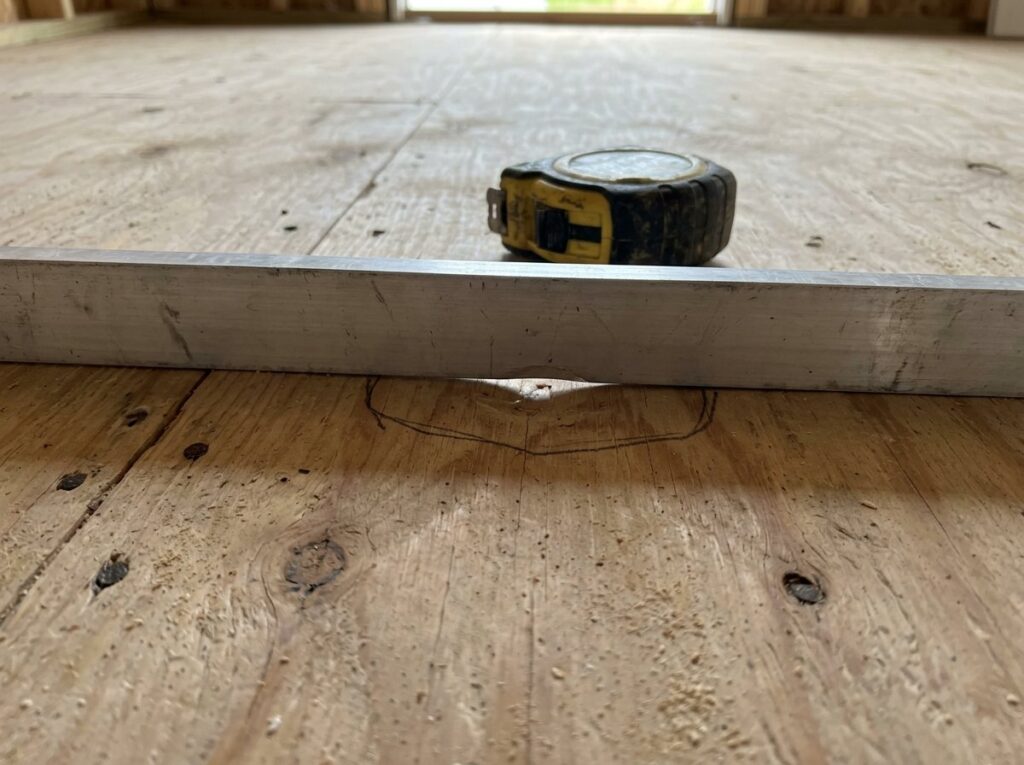
- Lay the straightedge on edge. Start along one wall and work across the room, then repeat at right angles and on the diagonals.
- Mark lows and highs. Gaps under the straightedge are low spots; draw around them and write the depth inside. If the straightedge rocks, you are on a high spot.
- Measure the gaps. Slide washers, shims or a tape measure into the deepest part of each gap and compare it to your flooring’s tolerance.
- Check overall slope. Set a laser level in the middle of the room and measure from the beam down to the floor at several points to see whether the whole room tilts.
Decide how big the problem is
Variations within your flooring’s tolerance need no work. This Old House suggests that differences under 3/4 inch over 10 feet are generally DIY territory, while anything greater calls for a professional. Dips that run in a straight line across the room usually follow a joist, which points to a framing fix rather than a surface patch.
How to fix high spots
On a wood subfloor
First drive screws into the joists along any raised seam or popped nail, since a lifted panel edge is a common cause of humps. For true high spots, sand with a random-orbit or belt sander and 60- to 80-grit paper, checking often with the straightedge. Do not sand so much that you thin the subfloor; plywood seams that sit higher than their neighbors only need the edges brought down.
On concrete
Grind humps and ridges with an angle grinder fitted with a diamond cup wheel, or rent a floor grinder for larger areas. Work slowly, recheck with the straightedge and vacuum when done. Small ridges at slab joints are common and usually take only a few minutes each.
Safety note: Grinding concrete releases fine silica dust, and Home Depot warns that a basic dust mask is not enough. Wear a properly fitted respirator, use a grinder shroud connected to a vacuum, and seal off the room. If you find old resilient tile or black adhesive on the slab, do not grind or sand it until it has been tested for asbestos.
Self-leveling underlayment over concrete
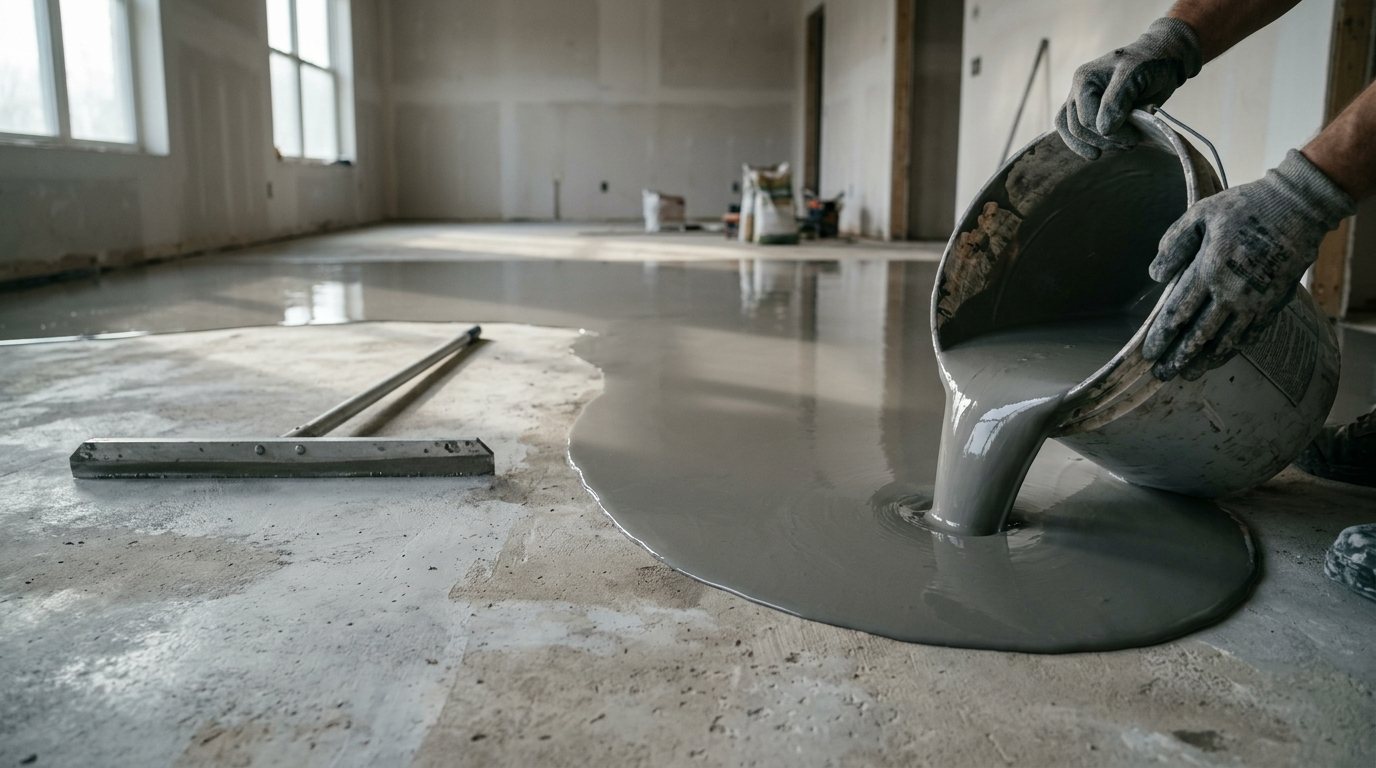
Self-leveling underlayment is a cement-based mix that you pour like a thick liquid. It flows into low areas and cures hard, giving you a flat surface. Cement-based products are generally preferred over gypsum-based ones for floors because they handle moisture better.
- Prepare the slab. Scrape off old adhesive, paint and dust, patch cracks and grind high spots. The leveler can only bond to clean, sound concrete.
- Build dams. Seal floor drains and gaps at walls with foam backer rod or tape, and screw a temporary wood strip across doorways so the mix stays where you want it.
- Prime. Roll on the primer specified by the leveler manufacturer and let it dry, usually to a clear film. Skipping primer is the most common reason leveler cracks or comes loose.
- Mix exactly. Measure water precisely and mix with a paddle on a heavy-duty drill for the time on the bag. Extra water weakens the surface.
- Pour and spread. Start at the farthest point from the exit and pour into the lowest areas first. Spread with a gauge rake and smoother, keep a wet edge, and feather the edges into the surrounding floor.
- Let it cure. Keep traffic and drafts off the floor and follow the cure times before installing flooring.
Work quickly. One widely used cement-based leveler lists 25 to 35 minutes of working time, walking on it after 2 to 3 hours, and 16 to 24 hours before installing moisture-sensitive flooring. Its data sheet shows a 50-pound bag covering about 50 square feet at 1/8 inch thick but only about 25 square feet at 1/4 inch, so measure your low spots before buying.
Leveling a wood subfloor
Wood moves and flexes, so leveling it is more demanding than leveling concrete. Choose the method based on the size of the problem.
Patch compound for small dips
For shallow dips, seams and screw holes, a trowel-applied cement-based floor patch is quick and easy. Prime if the instructions call for it, feather the edges, let it dry and sand flush. For hardwood that will be nailed down, choose a leveler rated to accept fasteners.
Self-leveler over plywood
Pouring self-leveler over wood is possible but needs the right base. The same data sheet requires exterior-grade plywood or OSB at least 3/4 inch thick on joists up to 24 inches on center, a stiff floor that meets L/360 deflection, primer, and metal or plastic lath stapled every 6 to 8 inches. It also calls for a minimum pour of 3/8 inch over the lath. Seal every gap and hole first, or the liquid will leak into the basement or crawlspace.
A new layer of plywood
When a wood subfloor is uneven all over, a new layer of plywood can be simpler. This Old House recommends plywood at least 1/4 inch thick, a 1/4-inch gap at the walls and screws every 6 to 8 inches. Fill low spots first, since a thin sheet will follow the dips beneath it.
Shimming and sistering joists
If a dip or hump lines up with a joist, or the floor sags toward the middle of a span, the fix is in the framing. Check from the basement or crawlspace with a string line or straightedge across the bottoms of the joists.
- High joist: With the subfloor removed, plane or trim the top edge of the joist down to match its neighbors.
- Low joist: Glue and screw tapered shims or a strip of plywood to the top edge to bring it up, checking with a straightedge across several joists.
- Sagging or cracked joist: Jack it up slowly to a string line and sister a new, straight board of the same size alongside it, glued and fastened along its length.
Never notch or cut into joists to flatten a floor, since that weakens them. Sistering and jacking are best left to a pro if the sag is large, the joist is damaged, or the floor carries heavy loads such as a bathtub or kitchen island.
When to call a pro
- The floor is off by more than 3/4 inch over 10 feet.
- The whole house slopes toward one side, doors stick or swing on their own, or you see new cracks in walls and ceilings.
- Joists are cracked, rotted, notched or sagging, or the floor feels bouncy.
- You need to level several rooms or a large slab, where pump-applied leveler gives better results.
- There is old flooring or adhesive that may contain asbestos.
This Old House puts professional floor leveling at about $3 to $12 per square foot depending on complexity. Foundation or structural repairs are a separate, larger job, so get a structural engineer or foundation specialist involved if movement is ongoing.
Frequently asked questions
Does a floor have to be perfectly level?
No. Most flooring needs to be flat within the manufacturer’s tolerance, not perfectly level. A gentle, stable slope is usually fine, but a steep slope or one that is getting worse should be inspected.
Can you put self-leveling compound on a plywood floor?
Yes, if the product is rated for wood and the subfloor is thick and stiff enough. You will typically need primer, metal or plastic lath and a minimum pour thickness, so read the data sheet before you start.
Will underlayment fix an uneven floor?
No. Foam or cork underlayment smooths tiny imperfections but will not bridge real dips, and some manufacturers warn against using it to cover high spots. Fix the floor first, then install underlayment.
How long does self-leveler take to dry?
Many products can be walked on within a few hours, but moisture-sensitive flooring such as wood, laminate or vinyl often needs a full day or more. Thicker pours, cool rooms and high humidity extend the time.
What happens if you install flooring on an uneven floor?
Click-lock planks can flex, separate at the joints or break their locking edges, and tile can crack or sound hollow. Our guides on installing vinyl plank flooring and laminate floor buckling explain what goes wrong.
The bottom line
To level a floor, start by measuring with a long straightedge and comparing what you find to your flooring’s flatness spec. Sand or grind the highs, fill the lows with primer and a cement-based leveler, give wood subfloors the extra stiffness and lath they need, and fix dips that follow the joists from below. If the floor is far out or still moving, bring in a pro before you spend money on new flooring.