You pull up the lift rod and nothing happens. Or the stopper drops shut on its own, will not hold water, or is stuck closed while the basin slowly fills with soapy water. Bathroom sink stoppers are simple parts, but when they misbehave they make a daily chore annoying.
The good news is that almost every stopper problem comes down to a few parts under the sink that you can adjust, clean or replace with basic tools. This guide explains how a pop-up drain works, then shows you how to adjust the linkage, remove the stopper, clear hair clogs, free a stuck stopper and replace the whole assembly if it is worn out.
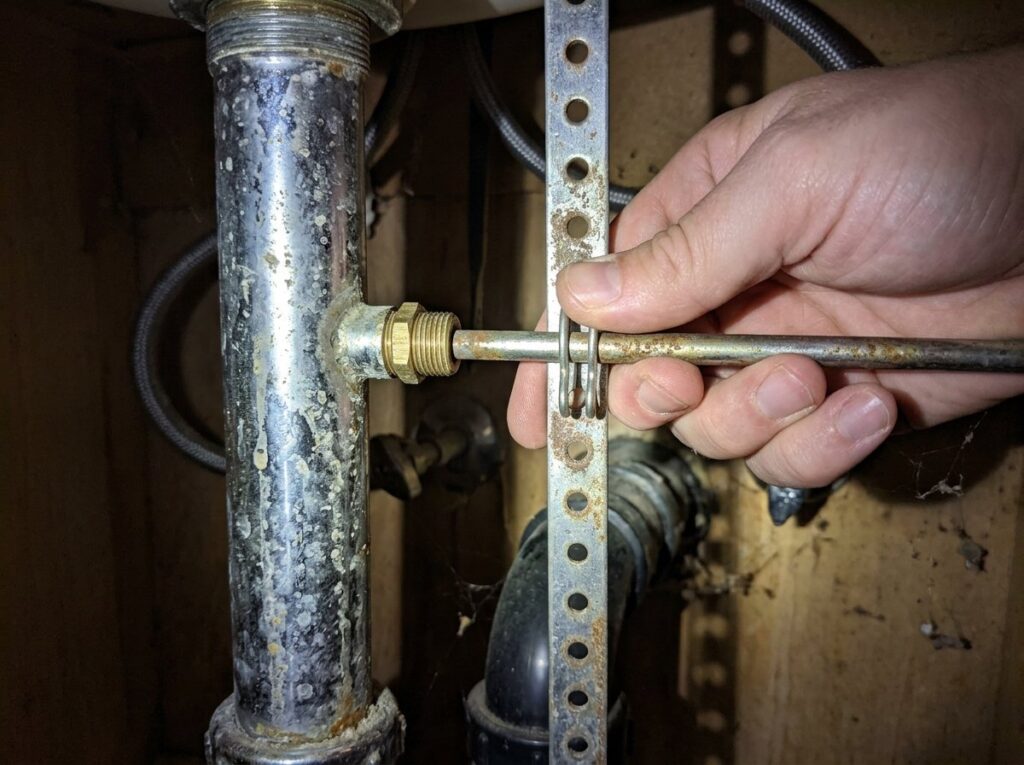
Quick answer: Look under the sink where a horizontal pivot rod enters the drainpipe and connects to a flat metal strap with holes (the clevis). Most stopper problems are fixed by moving the pivot rod to a different hole in the clevis, snugging or loosening the pivot nut, or removing the stopper to clean out hair. If parts are corroded or broken, a new pop-up assembly or a universal push-button stopper is an inexpensive fix.
How a pop-up drain works
A traditional bathroom pop-up drain uses a short chain of linked parts. Knowing what each one does makes the fixes obvious.
- Lift rod: the knob behind the faucet spout that you pull up or push down.
- Clevis strap: a flat, vertical metal strip with a row of holes, clamped to the bottom of the lift rod with a small screw.
- Pivot rod: a horizontal rod that passes through one hole in the clevis and into the side of the drain body. A plastic ball near its end acts as a pivot point.
- Spring clip: a small V-shaped clip that holds the pivot rod in the clevis hole.
- Pivot nut: the nut where the rod enters the drain body. It holds the ball against a seal so water cannot leak out.
- Stopper: the plug in the sink. The end of the pivot rod either passes through a loop on its bottom or simply pushes it up from underneath.
When you pull the lift rod up, the clevis rises, which tilts the pivot rod down at the drain end and pulls the stopper shut. Pushing the lift rod down reverses the motion and lifts the stopper. Many newer sinks skip the linkage and use a push-button stopper with a spring inside instead.
Tools and materials
- Flashlight and a towel or small bucket
- Adjustable pliers (channel-lock style)
- Screwdriver
- Plastic drain-cleaning strip or a bent wire
- Old toothbrush, rubber gloves and white vinegar
- Plumber’s putty or silicone sealant and pipe joint compound (for replacement)
- Plumber’s grease (optional, for the pivot ball)
- New pop-up drain assembly or universal stopper (if needed)
How to adjust a sink stopper
Most “broken” stoppers are just out of adjustment. Clear out the cabinet below the sink and work with a flashlight.
Stopper will not close fully or will not open far enough
- Find the spring clip on the clevis and squeeze it to slide it off the pivot rod. Note which hole the rod is in, or mark it with a marker, so you can return to it.
- Pull the pivot rod out of the clevis. Move it to a higher hole if the stopper will not close fully, or a lower hole if it will not open far enough. Push the rod through the clip, the clevis and the clip again.
- Test with the lift rod. If the stopper still does not seat, loosen the screw that clamps the clevis to the lift rod, slide the clevis up or down, and retighten.
The goal is a lift rod that closes the stopper firmly when pulled all the way up and opens it high enough when pushed down that the sink drains at full speed.
Stopper drops shut or will not stay up
If the stopper falls closed by itself, the pivot nut is usually too loose. Tighten it by hand about a quarter turn at a time, testing as you go. The nut adds friction on the ball so the rod holds its position. Stop as soon as the stopper stays where you put it, because overtightening makes the lift rod stiff and can crack a plastic nut.
Water leaks from the pivot nut
A small drip where the pivot rod enters the drain, often only when a full basin drains, means the nut is loose or the seal behind the ball is worn. Snug the nut slightly first. If the leak continues, remove the nut and rod, then replace the plastic washer or gasket inside with one from a hardware store or a pop-up repair kit. A light coat of plumber’s grease on the ball helps it seal and move smoothly.
Pro tip: Before you take anything apart, put a towel in the cabinet and close the sink drain with a rag or sponge from above if the pivot rod will be out. Water run while the rod is removed will pour straight out of the hole in the drain body.
How to remove the stopper and clean hair clogs
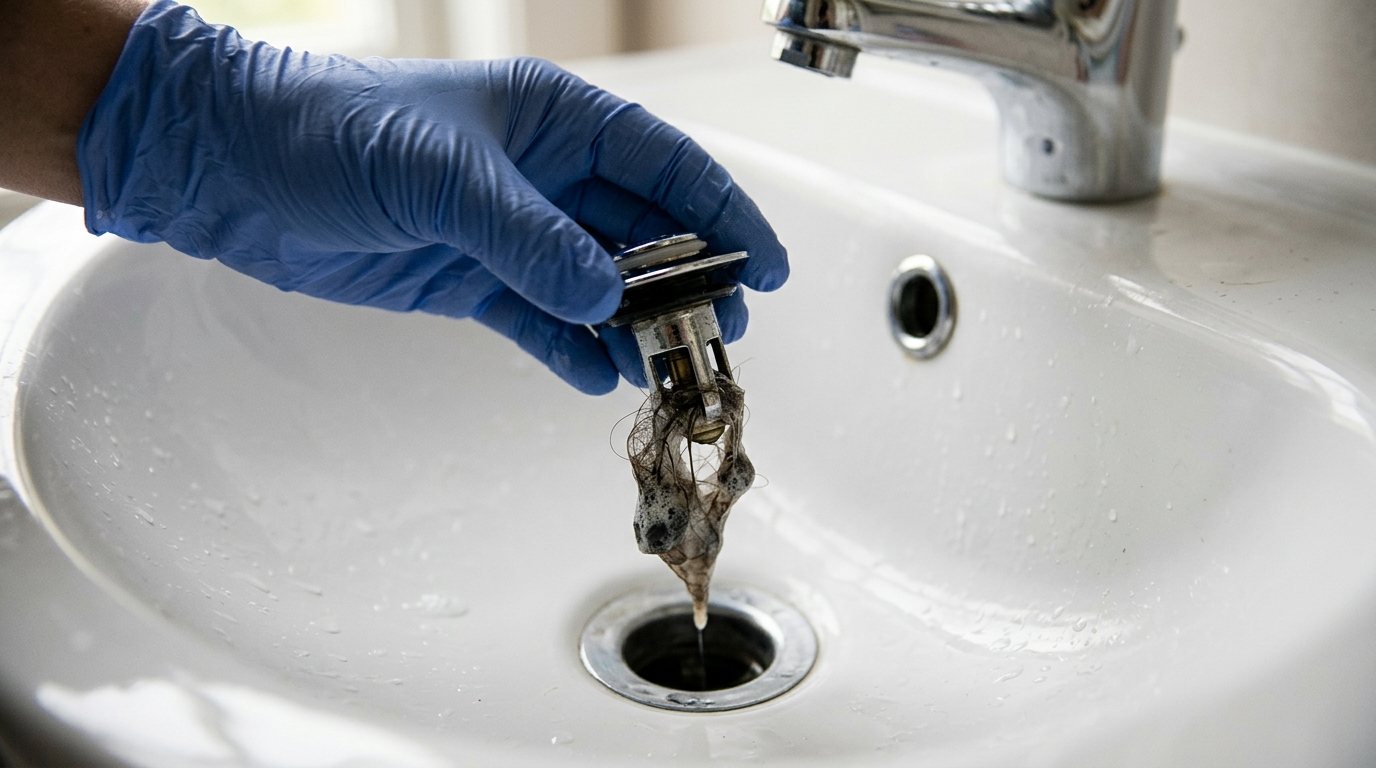
Hair and soap scum wrap around the bottom of the stopper and the pivot rod, which slows drainage and can jam the stopper. Cleaning every few months keeps the sink draining quickly.
- Try lifting the stopper straight out. Many simply rest on the rod, and some release with a quarter turn.
- If it will not lift out, unscrew the pivot nut under the sink and pull the pivot rod back a few inches. The stopper should now come out from above.
- Pull hair and gunk off the stopper with gloved fingers, then scrub it with an old toothbrush and white vinegar to remove soap film.
- Feed a plastic drain-cleaning strip down the drain, twist it and pull it back out to remove hair caught below. Repeat until it comes back clean.
- Run hot water for a minute to flush the line, then reinstall the stopper with its loop or slot facing the back of the sink so the pivot rod can catch it.
- Slide the pivot rod back in, through the stopper loop if it has one, and hand-tighten the nut.
If the sink still drains slowly with the stopper out, the clog is deeper in the trap. Our guide on how to unclog a drain without chemicals covers cleaning the P-trap and using a hand snake.
How to fix a stuck sink stopper
A stopper that is stuck closed or will not lift out is usually held by one of four things: a disconnected linkage, a pivot nut that is too tight, a wad of hair, or mineral buildup.
Stuck closed
Check under the sink first. If the pivot rod has slipped out of the clevis or the spring clip is missing, the stopper has nothing lifting it. Reconnect the rod and fit a new clip if needed. If everything is connected but the rod will not move, loosen the pivot nut slightly.
Will not come out
Remove the pivot rod as described above. If the stopper still will not budge, wrap it in a cloth and wiggle it gently while pulling up with pliers. Do not pry against the sink with a screwdriver, which can chip porcelain. Soaking scale with vinegar for 15 to 30 minutes often loosens it.
Push-button stoppers that stick
Push-and-seal (click-clack) stoppers have a spring cartridge inside. Unscrew the cap counterclockwise, or unscrew the whole stopper from the drain, then clean hair and scale from the spring and threads. If the spring is broken or the stopper wobbles, replace it with a matching universal stopper.
Troubleshooting table
| Problem | Likely cause | Fix |
|---|---|---|
| Stopper will not close fully | Pivot rod in a low clevis hole | Move the rod up one hole or slide the clevis |
| Stopper barely opens, slow drain | Rod too high or hair on stopper | Move the rod down a hole, clean the stopper |
| Stopper drops shut | Loose pivot nut | Tighten nut a quarter turn at a time |
| Lift rod does nothing | Rod out of clevis, missing clip, loose clevis screw | Reconnect, replace clip, tighten screw |
| Drip at pivot nut | Loose nut or worn gasket | Snug nut, replace gasket |
| Sink will not hold water | Worn stopper seal or poor adjustment | Adjust linkage, replace stopper |
| Leak around drain flange | Failed putty or loose locknut | Reseal flange or replace the assembly |
| Push-button stopper sticks | Hair or scale in spring cartridge | Unscrew, clean or replace the stopper |
How to replace a pop-up drain assembly
Replace the assembly when the drain body is corroded, the threads are stripped, the flange leaks or the parts are too worn to adjust. A new pop-up kit includes the flange, drain body, stopper, pivot rod and gaskets. Check that it suits your sink: sinks with an overflow hole need a drain body with overflow openings, and sinks without one need a no-overflow version.
- Shut off the faucet supply valves if you need more room, and put a bucket under the P-trap.
- Loosen the slip nuts on the P-trap and remove it. This is a good time to clean it.
- Remove the spring clip, pivot nut and pivot rod, and lift out the stopper.
- Unscrew the large locknut under the sink that holds the drain body. If it is seized, use adjustable pliers, or carefully cut it off with a hacksaw blade.
- Push the old flange up and out of the sink. Scrape away old putty and clean the drain hole.
- Roll plumber’s putty into a rope and press it under the new flange, or use the supplied gasket or a bead of silicone. Use stain-free putty or silicone on marble and other natural stone.
- From below, slide the gasket, washer and locknut onto the new drain body and thread it to the flange. Turn the pivot opening to face the back of the sink, then tighten by hand plus a little more with pliers.
- Wipe away squeezed-out putty, drop in the stopper, connect the pivot rod and clevis, and reattach the P-trap.
- Fill the sink, then drain it while you check every joint below for drips.
This Old House’s pedestal sink pop-up guide and Home Depot’s pop-up drain instructions show the same sequence. If you are also changing the faucet, many new faucets include a matching drain. Our guide to a leak under the sink can help if a slip joint drips afterward.
Safety note: Do not overtighten plastic drain parts, which crack easily, and wear gloves when cleaning hair and sludge from drains. Never mix drain cleaners, and do not use chemical cleaners just before you open the trap, since the caustic water will pour out onto your hands.
When to call a pro
Most stopper repairs are DIY jobs, but call a plumber if the drain body or tailpiece is cracked and leaking into the cabinet, the locknut is seized onto old metal pipe that may break, or the sink is set in stone and you are worried about damage. Also call if water backs up in the sink and other drains at the same time, which points to a clog further down the line.
According to HomeServe’s sink drain cost guide, which cites HomeGuide data, a plumber typically charges about $100 to $350 to replace a bathroom sink drain, with hourly rates around $45 to $150 and some companies adding a minimum visit fee of $50 to $200. Doing it yourself costs about $50 to $65 for a typical pop-up drain kit, and a basic universal push-button stopper is often $10 to $15.
Frequently asked questions
Why will my bathroom sink stopper not stay up?
The pivot nut is usually too loose, so the rod cannot hold its position. Tighten the nut under the sink a little at a time until the stopper stays open. If it still drops, check that the pivot rod is in the right clevis hole and the spring clip is in place.
How do I get a bathroom sink stopper out?
Try lifting or twisting it first. If it is attached to the pivot rod, loosen the pivot nut under the sink and pull the rod back, then lift the stopper out from above. Push-button stoppers usually unscrew counterclockwise.
Can I replace a pop-up stopper without replacing the drain?
Often, yes. If the drain body is sound, you can buy a replacement stopper that fits your drain or a universal push-button stopper. Measure the drain opening and check the threads before buying.
Should I use plumber’s putty or silicone on a sink drain?
Plumber’s putty is the traditional choice and is easy to remove later. Silicone works too and is a good choice on natural stone, where ordinary putty can stain. Some kits include a rubber gasket that needs neither, so follow the kit instructions.
How often should I clean my sink stopper?
Every two to three months is a good habit, or whenever drainage slows. Pulling hair off the stopper before it builds up prevents most clogs and stuck stoppers.
The bottom line
A bathroom sink stopper that will not open, close or stay put is almost always fixed by adjusting the pivot rod and clevis, setting the pivot nut tension, or cleaning out hair. If the drain is corroded or leaking, a new pop-up assembly is an affordable afternoon job, and a plumber is only needed for cracked drains, seized metal pipe or deeper clogs.