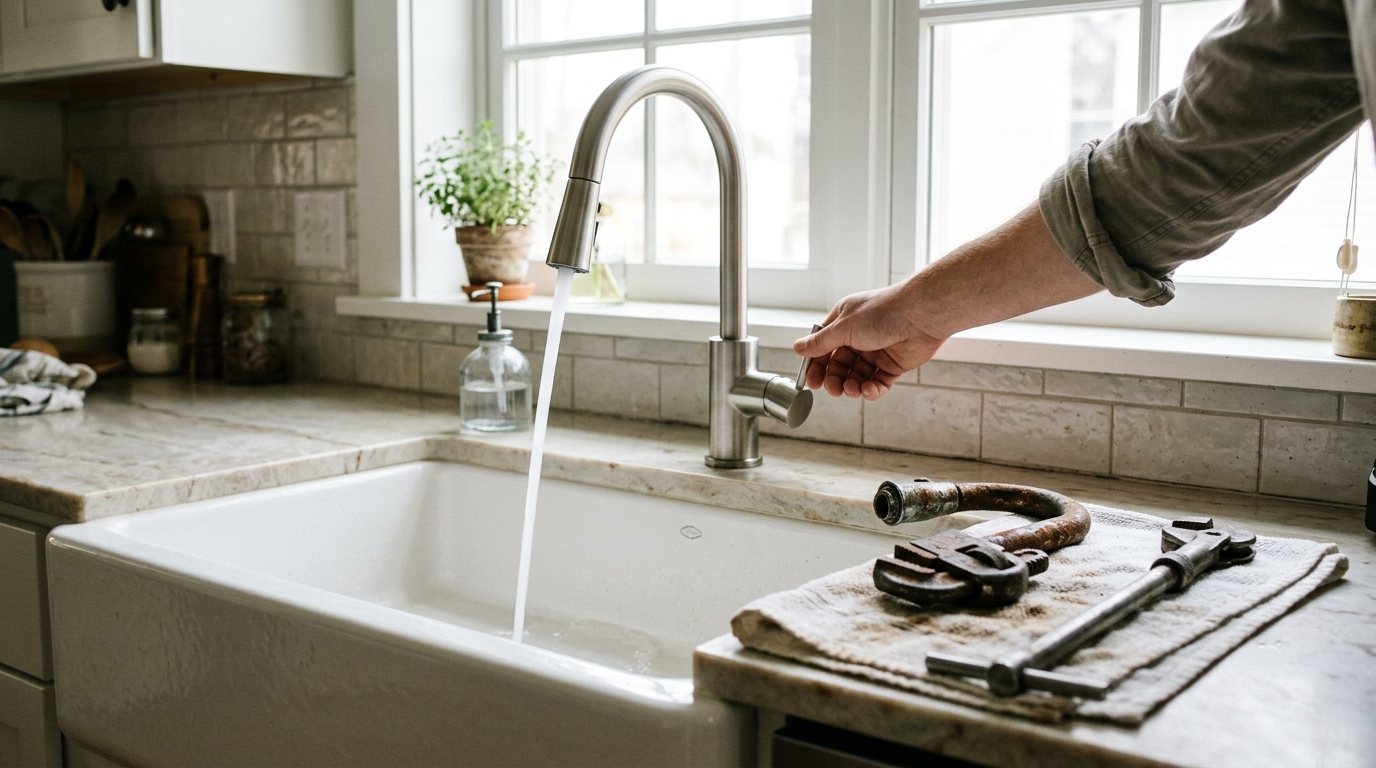
Your kitchen faucet drips no matter how hard you turn the handle, the sprayer hose sticks, or you are simply tired of the dated finish. Replacing it yourself sounds simple until you look under the sink and see a tangle of pipes, a garbage disposal and nuts you can barely reach.
The good news is that most faucet swaps take a couple of hours with the right tools, and the hardest part is usually getting the old faucet out. This guide walks you through checking your sink before you buy, shutting off the water, removing a stubborn old faucet, installing the new one, testing for leaks, and comparing the DIY cost with hiring a plumber.
Quick answer: Count the holes in your sink and buy a faucet that fits them. Turn off the shut-off valves under the sink, open the faucet to relieve pressure, disconnect the supply lines, and use a basin wrench to remove the mounting nuts. Set the new faucet with its gasket, tighten the mounting hardware from below, connect new braided supply lines, flush the lines with the aerator off, and check every connection for leaks.
Before you buy: check your sink and valves
Count the holes
Look at the sink deck behind the faucet, or under the sink if a deck plate covers the holes. Most kitchen sinks have one to four holes. Single-hole faucets often include a deck plate to cover a three-hole sink. If your sink has a fourth hole for a side sprayer, soap dispenser or dishwasher air gap, plan to keep using it or cover it with a blank cap.
| Faucet style | Holes needed | Notes |
|---|---|---|
| Single-handle pull-down | 1 (or 3 with deck plate) | Most popular; tall spout, spray head docks in spout |
| Single-handle pull-out | 1 (or 3 with deck plate) | Lower profile, good under shelves or windows |
| Two-handle with side sprayer | 3 or 4 | Separate hot and cold handles |
| Faucet plus soap dispenser or air gap | 2 to 4 | Uses extra holes in the sink or countertop |
Also check the space above and behind the sink. A tall pull-down faucet may hit a windowsill or a shelf, and a spout that swings too far can splash onto the counter.
Test your shut-off valves
Turn both shut-off valves under the sink clockwise until they stop, then open the faucet. If water keeps flowing or dripping, the valves need replacing, which turns a faucet swap into a bigger plumbing job. Family Handyman recommends checking the valves before you shop so you can buy everything in one trip. If you are not comfortable replacing valves, this is a good time to call a plumber.
Tools and materials
- Basin wrench (the key tool for reaching nuts behind the sink bowl)
- Adjustable wrench and slip-joint pliers
- Screwdrivers and the hex key included with the new faucet
- Flashlight or headlamp, and safety glasses
- Bucket and old towels
- Penetrating oil for corroded nuts
- Putty knife or plastic scraper and a nonabrasive cleaner
- New faucet with its gasket or deck plate
- New braided stainless steel supply lines sized to your valves and faucet
- Plumber’s putty or silicone, only if the faucet instructions call for it
A basin wrench is worth buying even if you only use it once. It turns a frustrating hour into a few minutes. If you are building out your kit, see our guide to a basic home tool kit.
Safety note: If your sink has a garbage disposal, switch it off and unplug it or turn off its breaker before reaching around it. Wear safety glasses while working under the sink, since rust flakes and grit often fall when you loosen old nuts. If you have to close the main water valve, tell everyone in the house before you start.
Step 1: Shut off the water and relieve pressure
- Clear everything out from under the sink and lay down towels.
- Close the hot and cold shut-off valves by turning them clockwise.
- Open the faucet to drain the remaining water and confirm the valves are holding.
- Take a photo of the under-sink layout so you can reassemble drains and hoses correctly.
Step 2: Disconnect the supply lines and sprayer
Place a bucket under the connections. Use an adjustable wrench to loosen the nuts where the supply lines connect to the shut-off valves. Hold the valve body steady with a second wrench or pliers so you do not twist the pipe. On pull-down faucets, remove the hose weight and disconnect the spray hose at its quick connector, usually by squeezing a clip.
If drain pipes or the disposal block your reach, you can remove the P-trap with a bucket underneath, or ask a helper to steady parts while you work. Most of the time you can work around them.
Step 3: Remove the old faucet
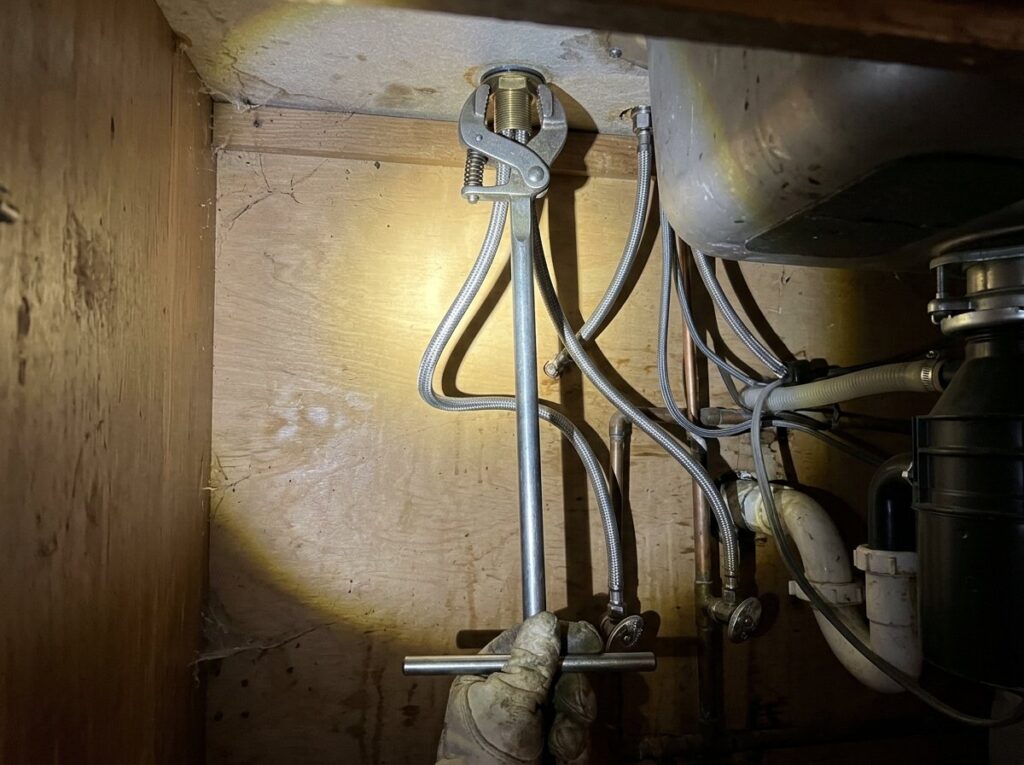
Lie on your back under the sink with a flashlight. Find the nuts that hold the faucet to the sink, usually one large nut or bracket for single-hole faucets, or one nut under each handle and the spout for older three-hole models.
- Clamp the basin wrench jaws onto the nut and turn counterclockwise as seen from below.
- If a nut will not move, spray it with penetrating oil, wait 15 minutes and try again.
- Remove the nuts and any mounting brackets, then lift the old faucet up through the sink.
- If a side sprayer is present, unscrew its base nut from below and remove it.
When the nuts will not budge
Old nuts are often corroded or cross-threaded. Plastic wing nuts can sometimes be cut away carefully with an oscillating tool or a hacksaw blade held in your hand, keeping the blade away from the sink and supply lines. For a badly seized faucet on a drop-in sink, Family Handyman suggests cutting the caulk and lifting the sink out to reach the nuts. That is a bigger job, so if you get stuck here, it may be time to call a plumber.
Step 4: Clean the sink deck
Scrape off old putty, mineral deposits and grime with a plastic scraper, then clean the area with a nonabrasive cleaner and dry it. The new gasket needs a clean, flat surface to seal. Avoid metal scrapers on stainless steel or composite sinks, which scratch easily.
Step 5: Install the new faucet
Read the faucet’s instructions before you start. Mounting systems vary, and some faucets install mostly from above with a single nut and a long threaded rod.
- If you are using a deck plate, set it with its gasket over the holes. Most new faucets use a rubber or plastic gasket instead of plumber’s putty. Use putty only if the instructions call for it, and avoid it on natural stone, which it can stain.
- Feed the faucet’s supply lines and hose down through the hole and set the faucet in place.
- Check the handle orientation before tightening, so the handle swings the right way and clears the backsplash.
- From below, slide on the mounting bracket or washer and thread on the nut. Hand-tighten, check that the faucet is straight, then snug it with the supplied tool or a basin wrench. Do not overtighten.
Step 6: Connect the spray hose and weight
For pull-down and pull-out faucets, connect the spray hose to the faucet’s outlet with the quick connector until it clicks. Pull the spray head out to its full length and attach the hose weight at the point the instructions specify, usually near the bottom of the hose loop. The weight is what pulls the head back into the spout, so a weight in the wrong spot causes a droopy spray head.
Step 7: Connect the supply lines
Many new faucets come with permanently attached supply tubes that connect directly to the shut-off valves. Others need separate braided lines. Measure from the faucet connection to each valve and buy lines a little longer than needed, so they can curve gently without kinks.
- Connect hot to the left valve and cold to the right, unless your plumbing is labeled differently.
- Thread the nuts on by hand to avoid cross-threading, then tighten them with a wrench, usually a quarter to half turn past hand tight unless the instructions say otherwise.
- Do not use thread tape on compression connections. The seal is made by the cone washer or ferrule, not the threads.
Step 8: Flush and test for leaks
- Remove the aerator or spray face, or set the spray head into a bucket, so debris from the lines does not clog it.
- Open the shut-off valves slowly.
- Run hot and cold water for a minute to flush out grit.
- Reinstall the aerator or spray face.
- Wipe every connection dry, then hold a dry paper towel under each one. Any dampness means a leak.
- Check again after a few hours and the next day. Slow drips often show up later and can cause a leak under the kitchen sink.
Reconnect the disposal power, the P-trap if you removed it, and the dishwasher drain if you moved it. If the dishwasher drains through an air gap on the sink deck, make sure the hoses are reconnected exactly as before; our dishwasher not draining guide shows the correct routing.
Common mistakes to avoid
- Buying before checking the holes and valves. A mismatched faucet or failing valve stops the project mid-way.
- Reusing old supply lines. New braided lines are inexpensive and far less likely to leak.
- Overtightening. Cranking on mounting nuts or compression fittings can crack parts and damage seals.
- Using thread tape on compression fittings. It can prevent a proper seal.
- Skipping the flush. Debris from the pipes can clog a brand-new aerator or cartridge.
- Replacing a faucet that only needs a cartridge. If your faucet is newer and just drips, see how to fix a leaky faucet first.
DIY cost vs hiring a plumber
According to HomeAdvisor’s faucet installation cost guide, most homeowners pay between $162 and $364 to replace a kitchen faucet, with an average of about $262. A simple install usually takes a plumber 1 to 2 hours, and the guide puts labor rates at roughly $45 to $200 per hour depending on the area.
| Item | Typical cost |
|---|---|
| Professional kitchen faucet replacement | $162 to $364 |
| Plumber labor rate | $45 to $200 per hour |
| Kitchen faucet (fixture only) | $25 to $1,800 depending on style and features |
| Added features such as touchless or filtration | $100 to $1,200 extra |
If you do it yourself, your cost is the faucet, a pair of supply lines and possibly a basin wrench. Hiring a pro makes sense when the valves need replacing, the old faucet is seized, or you are adding a filtration system or new holes in a stone countertop.
When to call a pro
- The shut-off valves will not close fully or leak when turned.
- The pipes under the sink are corroded, galvanized steel or show signs of an old leak.
- The old faucet is seized and would require lifting the sink.
- You need a new hole drilled in a granite, quartz or other stone countertop.
- Water leaks persist after you have tightened the connections.
Frequently asked questions
Can I replace a kitchen faucet myself?
Yes, if your shut-off valves work and you can reach the mounting nuts. Most DIYers finish in two to three hours. The job gets harder when valves need replacing or old nuts are badly corroded.
Do I need plumber’s putty to install a kitchen faucet?
Usually not. Most new faucets include a gasket or deck plate seal. Use putty or silicone only if the manufacturer’s instructions call for it, and avoid standard putty on natural stone.
What is a basin wrench and do I need one?
It is a long-handled wrench with a swiveling jaw that grips nuts in the tight space behind a sink bowl. For removing an old faucet, it is close to essential.
Should I replace the supply lines when I replace the faucet?
Yes. Many faucets include attached lines, but if yours need separate ones, install new braided stainless steel lines. Old lines may be brittle and close to failing.
How long does it take to replace a kitchen faucet?
A plumber can usually do a simple swap in 1 to 2 hours. Plan on a few hours yourself, longer if the old nuts are seized or you need to work around a disposal.
The bottom line
Replacing a kitchen faucet is a very doable DIY project when you check your sink holes and shut-off valves first and have a basin wrench on hand. Take your time removing the old faucet, follow the new faucet’s instructions, use new supply lines, flush before installing the aerator and check for leaks over the next day. If the valves fail or the old faucet will not come out, a plumber typically handles it in an hour or two.