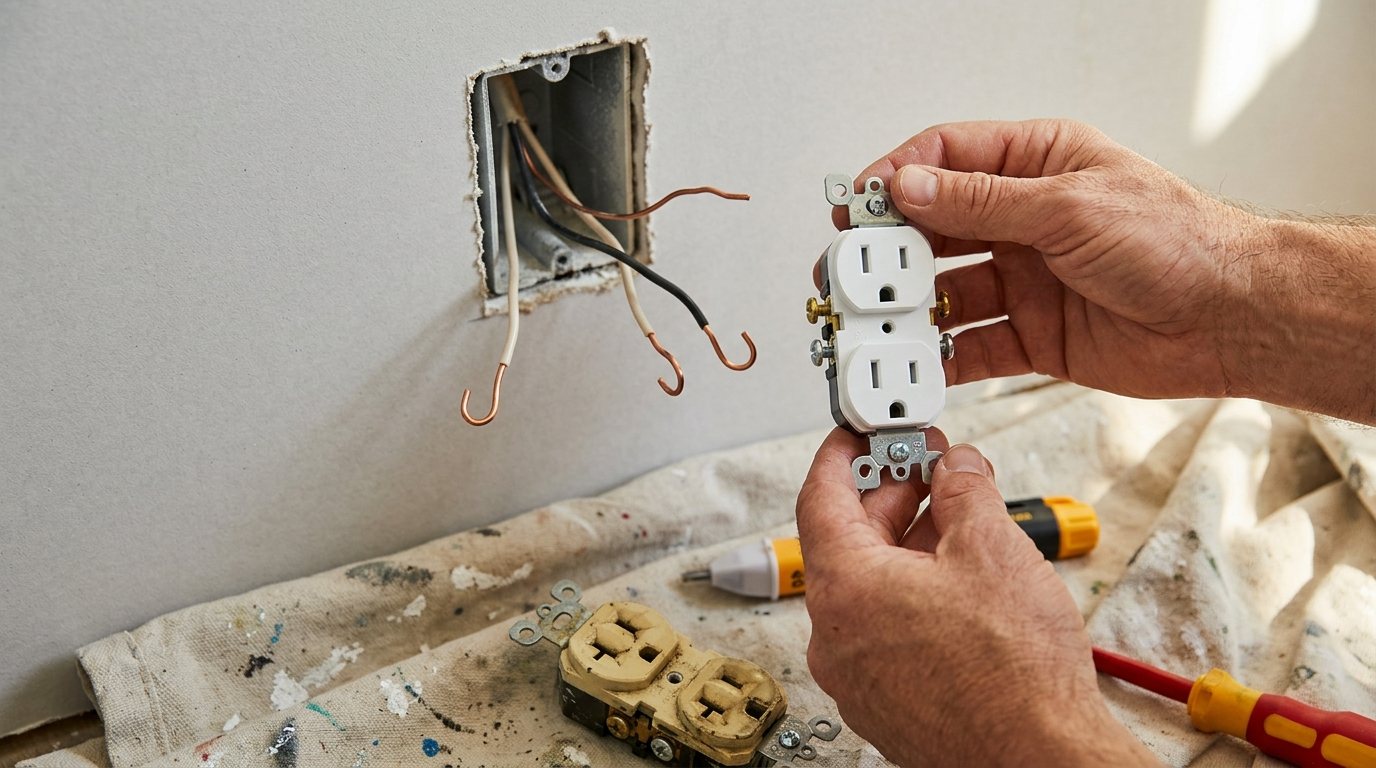
Plugs fall out of it, it is cracked or discolored, it only works when you wiggle the cord, or you just want a cleaner look or USB ports. Replacing an outlet is a common DIY electrical job, and with the right replacement and a careful shutoff routine, it usually takes less than 30 minutes.
The tricky part is not the screws, it is choosing the correct outlet. This guide explains 15-amp versus 20-amp outlets, when you need tamper-resistant, GFCI or AFCI protection under typical code rules, how to wire the new outlet step by step, and how to test it so you know it is safe.
Quick answer: Turn off the breaker and confirm the outlet is dead with a non-contact voltage tester. Note how the old outlet is wired, then connect the black (hot) wire to a brass screw, the white (neutral) to a silver screw and the bare or green ground to the green screw on a new outlet with the same amp rating. Use a tamper-resistant outlet, plus GFCI protection in kitchens, bathrooms, garages, outdoors and other damp areas. Restore power and test with a plug-in tester.
Choose the right replacement outlet
Before you buy anything, check the breaker that feeds the outlet and look at the old outlet itself. The amp rating, the location and the age of your wiring all decide what you should install.
15-amp vs 20-amp outlets
A 20-amp outlet has a small sideways “T” on the neutral (wider) slot, so it can accept 20-amp plugs. A 15-amp outlet has two straight slots. Match the outlet to the circuit: a 15-amp breaker uses 14-gauge wire and calls for 15-amp outlets, while a 20-amp breaker uses heavier 12-gauge wire.
Never install a 20-amp outlet on a 15-amp circuit. On a 20-amp circuit with more than one outlet, standard 15-amp outlets are generally allowed, but if the outlet is the only one on a dedicated 20-amp circuit, it must be a 20-amp outlet. When in doubt, replace like for like.
Outlet types and typical prices
Device prices below come from Fixr’s outlet installation cost guide and are for the outlet only, before any labor.
| Outlet type | What it does | Where you need it | Typical device cost |
|---|---|---|---|
| Standard | Basic 15- or 20-amp outlet | Older installs; most homes now need TR | $1 to $5 |
| Tamper-resistant (TR) | Shutters block objects pushed into one slot | New and replacement outlets in homes under current code | $1 to $6 |
| GFCI | Cuts power on a ground fault to prevent shock | Kitchens, baths, garages, outdoors, basements, laundry | $10 to $20 |
| AFCI | Detects dangerous arcing to prevent fires | Where code requires AFCI protection and no AFCI breaker exists | $20 to $32 |
| USB | Adds built-in charging ports | Anywhere a standard outlet is allowed (choose a TR model) | $20 to $40 |
Tamper-resistant outlets
Tamper-resistant outlets have spring-loaded shutters that only open when both prongs of a plug press in at the same time, which helps keep children from inserting keys or hairpins. Current editions of the National Electrical Code (NEC) require them in homes, including when you replace an existing outlet. Look for “TR” stamped on the face. They cost about the same as standard outlets, so there is no reason to skip them.
GFCI requirements
GFCIs protect you from shock in places where water and electricity meet. The CPSC’s GFCI fact sheet lists locations where the NEC calls for them, including bathrooms, kitchens, garages, outdoor outlets, crawl spaces, unfinished basements and laundry or utility sinks. Under current code, if you replace an outlet in a location that now requires GFCI protection, the replacement must be GFCI protected, either with a GFCI outlet or because it is already downstream of one. If you already have GFCIs that trip often, see our guide on why a GFCI outlet keeps tripping.
AFCI requirements
Arc-fault circuit interrupters detect the type of arcing that happens at damaged cords and loose connections, which can start fires. Newer codes require AFCI protection for outlets in most living areas, such as bedrooms, living rooms, hallways and kitchens. When you replace an outlet in an area that requires AFCI protection, codes generally require adding it, usually with an AFCI outlet or an AFCI breaker in the panel. Rules vary by local code edition, so check with your building department or an electrician.
Outdoor and damp locations
Outdoor outlets should be weather-resistant (“WR” on the face) and GFCI protected, with an in-use cover that stays closed while a cord is plugged in. These details matter more than usual during holiday lighting season, when outdoor outlets carry heavy loads in wet weather.
Two-prong outlets
If the old outlet has only two slots, there is probably no ground wire in the box. Do not install a three-prong outlet and leave the ground screw empty: it gives a false sense of safety. Your options are a two-prong replacement, a GFCI outlet labeled “No Equipment Ground” (the CPSC fact sheet notes this label requirement), or having an electrician add a ground.
Safety, permits and tools
Safety note: Turn off the breaker for the outlet and verify the power is off with a non-contact voltage tester that you have just checked on a known live outlet. Test every wire in the box, since some boxes contain more than one circuit. If you find aluminum wiring, scorched or brittle insulation, or a hot or melted outlet, stop and call a licensed electrician. Some cities and states require permits or licensed electricians for outlet work, so check local rules first.
Tools and materials
- New outlet with the correct amp rating (TR, and GFCI, AFCI or WR where required)
- Non-contact voltage tester
- Plug-in outlet tester
- Insulated flat and Phillips screwdrivers
- Wire stripper and needle-nose pliers
- Painter’s tape and a marker
- New cover plate, if the old one is cracked or does not fit
How to replace an outlet step by step
- Turn off the power. Plug a lamp or radio into the outlet, then switch off breakers until it goes off. Leave a note on the panel so nobody turns it back on.
- Verify it is dead. Check your non-contact tester on a live outlet, then test both receptacles on the outlet you are replacing.
- Remove the cover and outlet. Unscrew the cover plate and the two mounting screws, and gently pull the outlet straight out of the box.
- Test again and take a photo. Hold the tester near every wire now that they are exposed. Photograph the wiring so you can copy it.
- Check the brass tab. If the small metal tab between the two brass screws has been snapped off, the outlet is split (often half-switched). Break the same tab on the new outlet with pliers.
- Label and disconnect. If there are two sets of wires, label which pair was on top and bottom. Loosen the screws and remove the wires, or release backstabbed wires and strip fresh ends if they are nicked.
- Connect the ground. Attach the bare copper or green wire to the green screw. If the box is metal and has a ground pigtail, keep that connection.
- Connect the neutral and hot. White wires go to the silver screws on the side with the wider slot, and black (or red) wires go to the brass screws. Form clockwise hooks, wrap them clockwise around the screws and tighten firmly. Use the side screws rather than the push-in holes.
- For a GFCI, connect the incoming power cable to the LINE terminals and any cable feeding other outlets to the LOAD terminals. If you are not sure which cable brings power in, stop and call an electrician.
- Mount the outlet. Fold the wires neatly behind it, push it into the box, screw it in place so it sits flush and straight, and install the cover plate.
How to test the new outlet
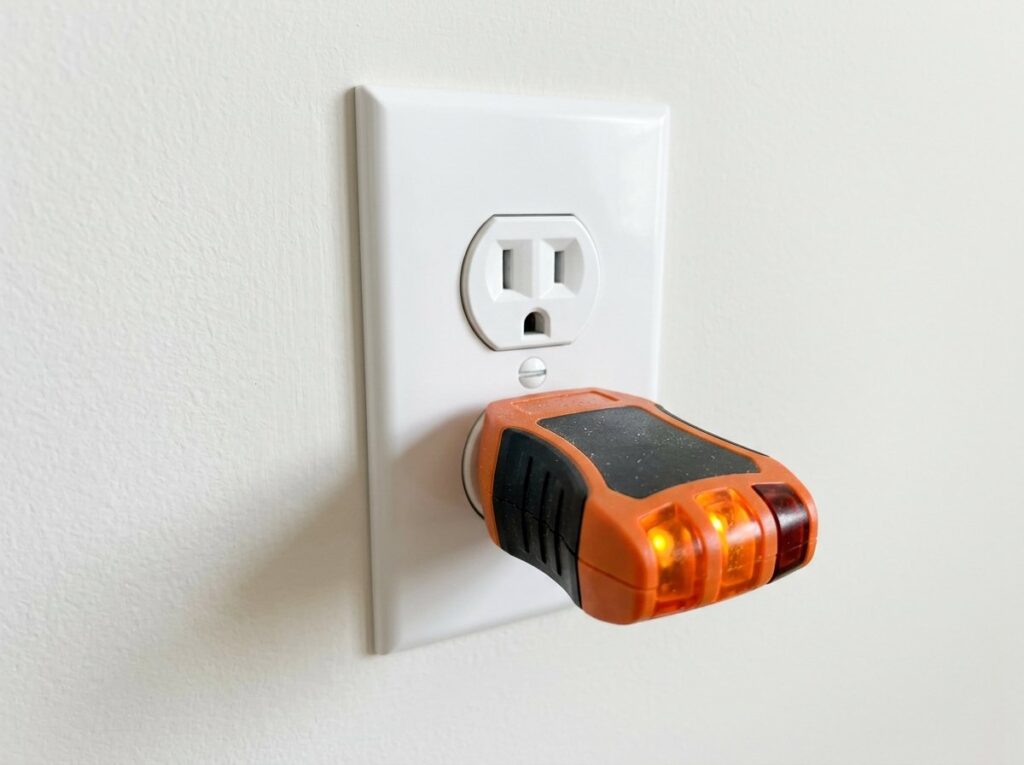
Turn the breaker back on and test before you call the job done.
- Plug-in tester: Insert it into each receptacle. The lights should show “correct” wiring. Any other pattern, such as open ground or reversed hot and neutral, means you should turn off the power and fix the connections.
- GFCI outlets: Press RESET, then TEST. Power should cut off, including at any downstream outlets, and come back when you press RESET.
- Switched outlets: Confirm the switch still controls the correct half.
- Heat check: After running a lamp or other device for a while, the cover plate should not feel warm. Warmth can mean a loose connection, as our guide on a warm outlet or light switch explains.
If the outlet does not work at all, recheck the breaker and any upstream GFCIs. Our guide to an outlet that is not working walks through the full checklist. If the breaker trips when you turn it on, you likely have a short, so turn it off and recheck the wiring before trying again.
Common mistakes to avoid
- Skipping the tester. A mislabeled panel is common. Always verify the outlet is dead.
- Reversing hot and neutral. The outlet may still work, but appliances can be left energized even when switched off.
- Installing a three-prong outlet without a ground. Use a two-prong outlet or a properly labeled GFCI instead.
- Leaving the brass tab intact on a split outlet. This joins two hot wires and can trip a breaker or create a hazard.
- Using backstab holes. Screw terminals are more reliable over time.
- Putting a 20-amp outlet on a 15-amp circuit. Match the outlet to the breaker and wire size.
When to call a pro
Call a licensed electrician if:
- You find aluminum wiring, cloth-covered wiring or damaged insulation.
- The outlet or wires are scorched, melted or smell of burning.
- The breaker trips immediately after the replacement and you cannot find the cause.
- You need to add a ground, a new circuit, an AFCI breaker or an outlet where none exists.
- The box is overcrowded or you cannot tell which cable brings power in.
According to Fixr, having an electrician install an outlet costs a national average of about $141, with a typical range of $120 to $200 including the device. GFCI and specialty outlets cost more, and many electricians charge a minimum service fee, so grouping several outlets into one visit can save money. Breaker trips after the work point to a wiring fault; our guide on why a circuit breaker keeps tripping explains the causes.
Frequently asked questions
Can I replace an outlet myself?
In many areas, yes, homeowners can replace an outlet in their own home, though some jurisdictions require a permit or a licensed electrician. If you turn off the breaker, verify the power is off and match the outlet to the circuit, it is a manageable job. Aluminum wiring and damaged wires belong with a pro.
Can I put a 20-amp outlet on a 15-amp circuit?
No. A 20-amp outlet invites 20-amp appliances onto wiring that is only rated for 15 amps. Check the breaker and the wire gauge, and use a 15-amp outlet on a 15-amp circuit.
Do I have to use a tamper-resistant outlet?
Under current NEC editions, tamper-resistant outlets are required in homes, including for replacements. They cost about the same as standard outlets and work the same way once the plug is in.
Can I replace a two-prong outlet with a three-prong outlet?
Only if a ground is present, or if you install a GFCI outlet and label it “No Equipment Ground.” Otherwise, use a two-prong replacement or have an electrician add a ground.
Which side does the white wire go on?
The white neutral wire goes on a silver screw, on the side of the outlet with the wider slot. The black hot wire goes on a brass screw, and the bare or green ground goes on the green screw.
The bottom line
Replacing an outlet is simple once you have the right part: match the amp rating, choose tamper-resistant, and use GFCI, AFCI or weather-resistant outlets where code requires them. Turn off the breaker, verify with a tester, wire black to brass, white to silver and ground to green, then test with a plug-in tester. Aluminum wiring, damage or repeated breaker trips mean it is time to call a licensed electrician.