A backsplash protects the wall behind your counters from splashes and grease, and it is one of the quickest ways to change the look of a kitchen or bathroom. It is also one of the most approachable tiling projects, because the area is small, vertical and sits on a ready-made level surface: the countertop.
This guide helps you choose between peel-and-stick and real ceramic or porcelain tile, then walks through layout, choosing mastic or thinset, working safely around outlets, grouting, caulking and sealing. You will also find a cost table and advice on when a pro is worth hiring.
Quick answer: Clean and degrease the wall, turn off power to the outlets, and plan your layout from the center of the main wall so the end cuts are even. Set tile in mastic or thinset with a notched trowel, using spacers and leaving a 1/8-inch gap at the countertop. After the adhesive cures, grout the joints, caulk the countertop gap with matching caulk, fit box extenders so the outlets sit flush, and seal cement grout once it has cured.
Peel-and-stick vs ceramic or porcelain tile
Decide on the material first, because it changes almost every step that follows.
| Factor | Peel-and-stick | Ceramic or porcelain tile |
|---|---|---|
| Skill level | Beginner | Confident DIYer |
| Time for a typical kitchen | An afternoon | A weekend plus cure time |
| Tools | Utility knife, level, roller | Trowel, tile cutter or wet saw, grout float |
| Durability | Good on dry walls, can lift with heat and moisture | Very durable and heat resistant |
| Behind a range | Check the product’s heat rating | Suitable |
| Removal | Usually peels off | Requires demolition and wall repair |
| Typical material cost | About $4 per sq ft, up to $30 for premium | About $2 (ceramic) to $3 to $6 (porcelain) per sq ft |
Peel-and-stick is a good choice for renters, quick updates and dry areas. Real tile lasts longer, handles heat and water better and adds more value. Material prices above are from Bob Vila’s backsplash cost guide, which draws on Angi data.
Tools and materials
- Tile plus 10 to 20 percent extra for cuts and breakage
- Mastic or thinset mortar, and a notched trowel
- Tile spacers, a 4-foot level and a pencil
- Snap tile cutter, tile nippers, or a rented wet saw
- Grout, rubber grout float, sponges and two buckets
- Color-matched caulk or silicone
- Box extenders for each outlet and switch
- Non-contact voltage tester and screwdriver
- Painter’s tape, drop cloth and degreasing cleaner
- Safety glasses and gloves
How to prepare the wall
Tile and peel-and-stick both need a clean, sound, flat surface. Remove anything on the counter, protect it with a drop cloth or cardboard, and tape the edges of cabinets.
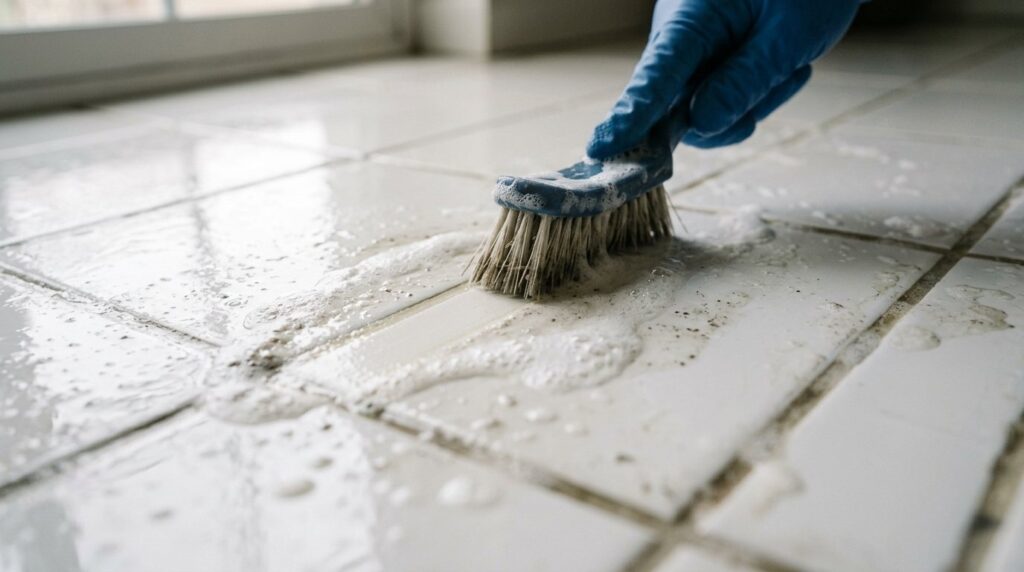
- Scrub the wall with a degreasing cleaner, especially near the range, then rinse and let it dry. Grease is the main reason adhesive fails.
- Patch holes and scrape off lumps of old drywall compound around outlets so tile can sit flat.
- Lightly sand glossy paint to give the adhesive some grip. Remove wallpaper completely; do not tile over it.
- For peel-and-stick, make sure fresh paint has fully cured and the wall is smooth. Textured walls will show through and reduce adhesion.
Safety note: Turn off the breaker that feeds the outlets and switches in the backsplash area, then confirm power is off with a non-contact voltage tester before removing cover plates or touching any device. Leave the power off until the outlets are reinstalled. Wear safety glasses when cutting tile, and keep a wet saw’s cord and plug away from water.
How to plan the layout
Good layout is what makes a backsplash look professional. Spend time here before you open the adhesive.
- Measure the width and height of each wall section and multiply to get square footage. Add 10 to 20 percent for waste.
- Mark a vertical center line on the main wall, or center the layout on a focal point such as the range or the sink window.
- Dry-lay a row of tile with spacers on the counter, starting at the center line. If the end pieces would be thinner than about half a tile, shift the center line by half a tile so both ends get wider cuts.
- Plan to start with a full tile at the countertop and let the cut row fall at the top, under the cabinets, where it is least visible.
- Where there is no countertop, such as behind a slide-in range, screw a straight, level board to the wall to support the bottom row.
Mastic vs thinset: which adhesive to use
Both work on backsplashes, but they suit different jobs.
Mastic
Mastic is a premixed, organic adhesive that grabs tile quickly, which helps on vertical walls. It is convenient for small ceramic tiles in areas that only see occasional splashes. It is not suited to wet areas such as showers, and many tile pros avoid it for larger or heavier tiles because it can shrink as it dries.
Thinset
Thinset is a cement-based mortar that you mix with water to a creamy, peanut-butter consistency. Polymer-modified thinset bonds strongly, resists moisture and mold, and is the better choice for porcelain, natural stone, large tiles and glass tile. It takes a little more skill and you must mix it in small batches.
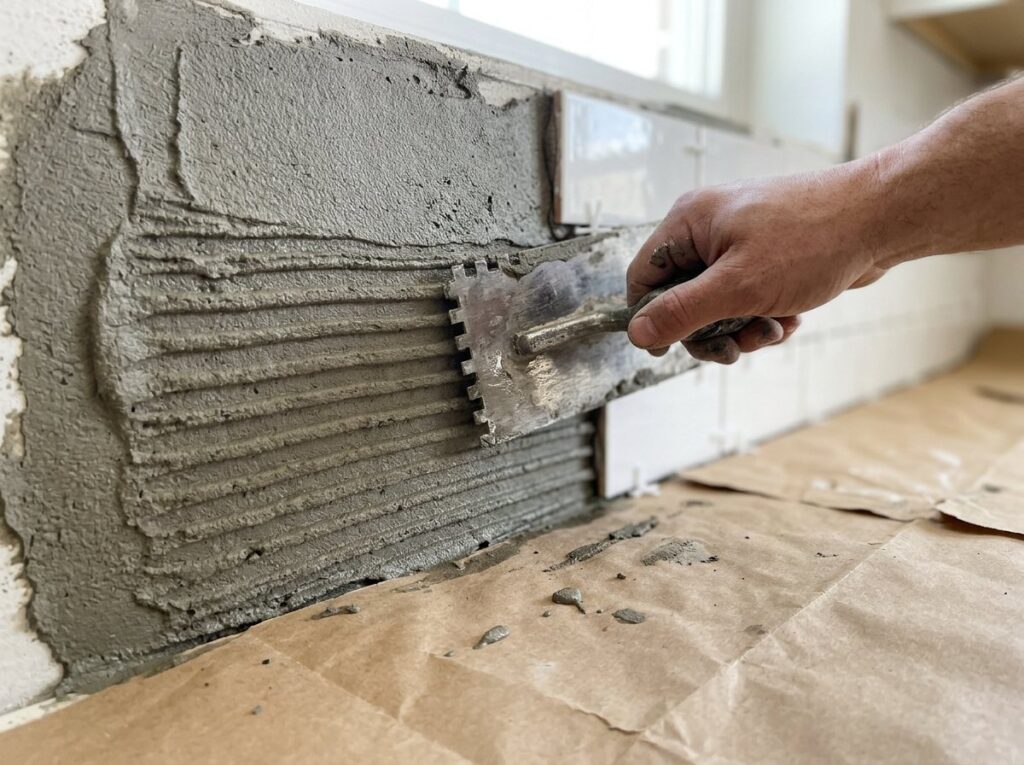
For trowel size, DAP’s backsplash tiling guide suggests a 3/16-inch notch for standard tiles and 1/4-inch for tiles larger than 6 inches, and Fine Homebuilding’s kitchen backsplash guide uses a 1/4-inch square notch for 3×6 subway tile. Always check the tile and adhesive labels.
How to install a tile backsplash step by step
1. Set the tile
- Spread adhesive over a small area, about what you can tile in 15 minutes, holding the trowel at roughly 45 degrees to comb even ridges.
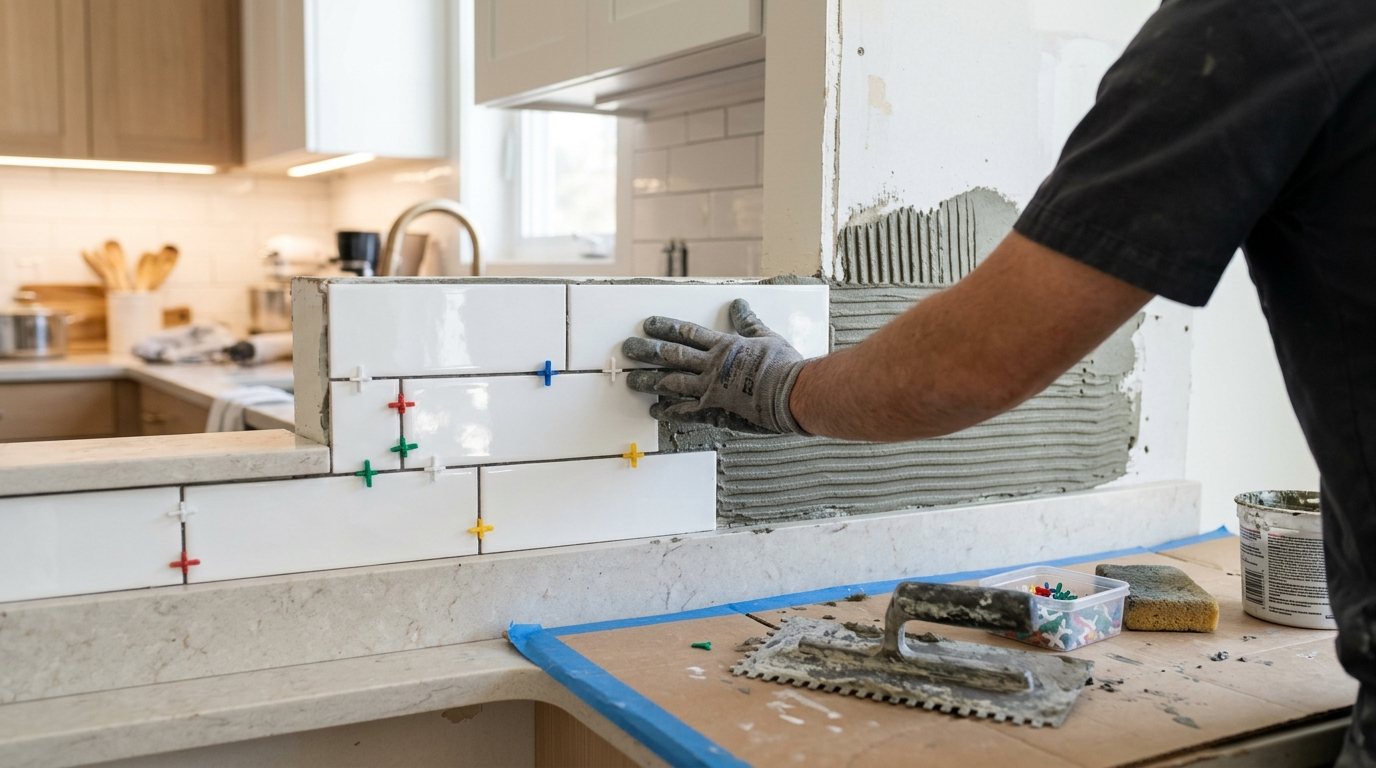
- Press the first tile or sheet at your center mark with a slight twist, leaving a 1/8-inch gap above the counter with spacers.
- Work outward and upward, adding spacers in every joint and checking with the level every few rows.
- Pull a tile off occasionally to check coverage. The back should be mostly covered with adhesive.
- Wipe adhesive off the tile faces and out of joints as you go, before it hardens.
2. Cut around outlets and edges
With the power off, remove the cover plates and unscrew the outlets so they can be pulled forward slightly. Mark tiles in place, then cut notches with a wet saw or nippers. Keep cuts inside the area the cover plate will hide. Finish exposed edges with bullnose tile or a metal edge trim.
3. Let it cure
Remove the spacers once the adhesive has set and let it cure before grouting, usually about 24 hours. Check the adhesive label, since some products need longer.
4. Grout
- Use unsanded grout for joints of 1/8 inch or less and sanded grout for wider joints. Seal natural stone before grouting to prevent staining.
- Mix grout to a smooth paste, let it rest for the time on the bag, then remix without adding more water.
- Press grout diagonally into the joints with a rubber float, then scrape off the excess at a 45-degree angle.
- After the grout firms slightly, usually 10 to 15 minutes, wipe the tile with a barely damp sponge, rinsing often. Do not pour grout water down the sink.
- Buff off any haze with a dry cloth once the grout has set.
5. Caulk and reinstall outlets
Fill the 1/8-inch gap at the countertop and inside corners with color-matched caulk, not grout, because those joints move. Our guide on how to caulk covers clean, even beads.
Fit a box extender into each outlet and switch box so the box comes out flush with the new tile surface, then remount the devices with the longer screws supplied. Many local electrical codes limit how far a box can sit behind the finished wall, and an extender meets that requirement where simple screw spacers may not. Restore power and test each outlet. If a device is damaged or worn, our guide on how to replace an outlet can help.
6. Seal the grout
Cement grout is porous, so seal it once it has cured, usually one to three days after grouting depending on the product. Apply a penetrating sealer to the joints, let it soak in for a few minutes, and wipe off the excess. Epoxy and many urethane grouts do not need sealing. To keep it looking new, see our guide on how to clean grout.
How to install a peel-and-stick backsplash
- Clean and degrease the wall, turn off power and remove the outlet covers.
- Mark a level line for the first row. Some brands want a small gap at the counter for caulk.
- Peel the backing a little at a time and press the sheet in place, aligning the edges or overlaps as directed.
- Smooth each sheet firmly with a roller or flat tool to bond it fully.
- Cut around outlets with a sharp utility knife, then reinstall cover plates. Use extenders if the sheets are thick enough to need them.
- Caulk the bottom edge and the ends with clear or matching silicone.
How much does a backsplash cost?
Bob Vila’s cost guide, citing Angi, puts a professionally installed kitchen backsplash at about $600 to $1,300, with an average near $1,000, or roughly $15 to $45 per square foot for labor and materials. Contractors typically charge around $40 to $60 per hour, more for complex patterns. Removing an old backsplash often adds about $3 to $6 per square foot, and drywall damage underneath can add more.
Doing it yourself, your main costs are tile, adhesive, grout, caulk, sealer, extenders and possibly a wet saw rental. Ceramic tile at about $2 per square foot keeps a small kitchen budget-friendly, while glass tile, at about $30 per square foot, or natural stone can cost several times more.
When to call a pro
Consider hiring a tile installer if the wall is badly out of flat, you are working with glass, large-format or natural stone tile, or the design includes complex patterns or a mosaic feature behind the range. Call a licensed electrician if outlets need to be moved, added or upgraded, if a box is damaged or loose, or if you are not comfortable working on wiring. Kitchen countertop outlets also need GFCI protection, and an upgrade can cost about $130 to $300 per outlet according to the same cost guide.
Frequently asked questions
Can I install a backsplash over drywall?
Yes. Sound, clean, painted drywall is a fine base for a kitchen backsplash because it only sees occasional splashes. Degrease it, scuff glossy paint and repair any damage first. Use cement board instead in wet areas such as showers.
Should a backsplash be grouted or caulked at the countertop?
Caulk it. The joint between the counter and the wall moves slightly, so grout there tends to crack. Leave a 1/8-inch gap and fill it with color-matched caulk or silicone.
Do I need box extenders for my outlets?
Usually, yes. Tile adds thickness, which leaves the outlet box recessed behind the new surface. A box extender brings the box forward so the device mounts securely and the box stays enclosed.
Is mastic or thinset better for a backsplash?
Mastic is fine for small ceramic tiles on a dry kitchen wall and is easy to use. Thinset is stronger and more moisture resistant, and is the better choice for porcelain, stone, glass and larger tiles.
Does peel-and-stick backsplash last?
Quality peel-and-stick tiles can last years on a clean, smooth, dry wall. They are more likely to lift near heat sources and in steamy areas, so check the product’s heat and moisture guidance.
The bottom line
A backsplash is a rewarding weekend project. Prepare a clean wall, plan the layout from the center, choose the right adhesive and leave the countertop joint for caulk. Above all, turn off the power before you work around outlets and finish with box extenders, and your new backsplash will look sharp and stay safe for years.