Painting a ceiling is the part of a room makeover most people dread. Paint drips toward your face, your neck aches, and when afternoon light hits the finished surface you can see every roller stripe. Old water stains make it worse, because they often bleed right back through fresh paint.
This guide covers choosing the right paint and finish, prepping and priming stains, cutting in a clean edge, and rolling with an extension pole so you get an even coat without lap marks or drips.
Quick answer: Clean and patch the ceiling, then spot-prime any water stains with an oil-based or shellac-based stain-blocking primer. Cut in a 2 to 3 inch band along the edges with a brush, then roll flat ceiling paint with a roller on an extension pole, working in small sections and always rolling back into wet paint. Add a second coat at a right angle to the first if coverage looks uneven.
Ceiling paint vs wall paint: what to buy
What makes ceiling paint different
Ceiling paint is formulated for working overhead. It is usually thicker than wall paint, which helps it resist dripping and spatter, and it comes in a flat finish that hides small dents and seams. Home Depot’s ceiling guide notes that ceiling paint is made to drip less than wall paint. Some versions go on tinted pink or blue and dry white, which makes it easy to see where you have already rolled.
Why flat finish is the standard
Light from windows skims across a ceiling at a low angle, which exaggerates every bump and roller ridge. A flat finish scatters that light instead of reflecting it, so imperfections fade into the background, and it touches up more invisibly than eggshell or satin. Wall paint works on a ceiling too if it is flat or matte, but expect a little more spatter.
The exception is a bathroom or a steamy kitchen. There, choose a paint labeled moisture- and mildew-resistant, which may come in a low-sheen finish you can wipe down. Our guide to paint finishes explained covers the trade-offs room by room.
| Feature | Ceiling paint | Typical wall paint |
|---|---|---|
| Finish | Flat or ultra-flat | Flat through semi-gloss |
| Consistency | Thicker, resists drips and spatter | Thinner, flows out on vertical surfaces |
| Hides flaws | Very well | Depends on sheen |
| Washability | Low, except bath-rated versions | Moderate to high in eggshell and satin |
Tools and materials
- Flat ceiling paint, plus stain-blocking primer if you have stains
- Roller frame and cover: 3/8 inch nap for smooth ceilings, 1/2 to 3/4 inch for textured
- Extension pole (2 to 4 feet is usually enough for an 8 foot ceiling)
- 2 to 2 1/2 inch angled brush for cutting in
- Paint tray with liner
- 2 inch painter’s tape (1 inch is too narrow to protect walls from the roller)
- Drop cloths, step ladder, safety glasses and a cap
- Lightweight spackle, putty knife and a fine sanding sponge
How to prep a ceiling for paint
- Clear the room. Move furniture out or cover it in the center. Overlap drop cloths by about a foot so spatter cannot slip through.
- Remove what you can. Turn off power at the breaker before removing light fixtures, and take down vent covers and smoke alarm bodies (reinstall alarms the same day).
- Clean the surface. Dust off cobwebs. Wash greasy kitchen ceilings with mild detergent, rinse and let them dry.
- Repair damage. Fill small cracks and dents with spackle and sand flush. For recurring cracks, read our guide to cracks in walls and ceilings first.
- Test textured ceilings. Dampen a hidden corner of popcorn texture. If it softens or falls off, a roller may pull it down, and older popcorn can contain asbestos, so have it tested before scraping or sanding.
- Mask the edges. If you are only painting the ceiling, tape the top of the walls or crown molding. If you are painting the whole room, paint the ceiling first and skip the wall tape.
Safety note: If your home was built before 1978, the existing paint may contain lead. Do not dry-sand or scrape it until it has been tested, and follow the lead-safe practices in the EPA’s Renovation, Repair and Painting program.
How to prime water stains so they do not bleed through
Fix the source first
A water stain is a symptom. Make sure the leak is fixed and the ceiling is completely dry before you prime. If the stain is under a roof, our guide on how to find a roof leak can help. Press on the area: if it is soft or sagging, it needs repair, not paint.
Use a true stain-blocking primer
Latex paint is water based, so it re-wets the minerals in a water stain and pulls them back to the surface as a yellow or brown ring. A stain-blocking primer seals the stain first. Oil-based primer is the usual choice for water stains, and shellac-based primer is the strongest option for smoke and nicotine.
Spot-prime or prime everything?
For one or two small stains, prime the stain and a few inches beyond it, feathering the edges. On a flat ceiling, primed spots can show through as a slightly different sheen, so if you have many or large stains, prime the whole ceiling.
Safety note: Oil-based and shellac-based primers give off strong fumes. Open windows, run a fan blowing out of the room, keep flames away, and wear a respirator rated for organic vapors for anything bigger than a small spot.
How to cut in a ceiling
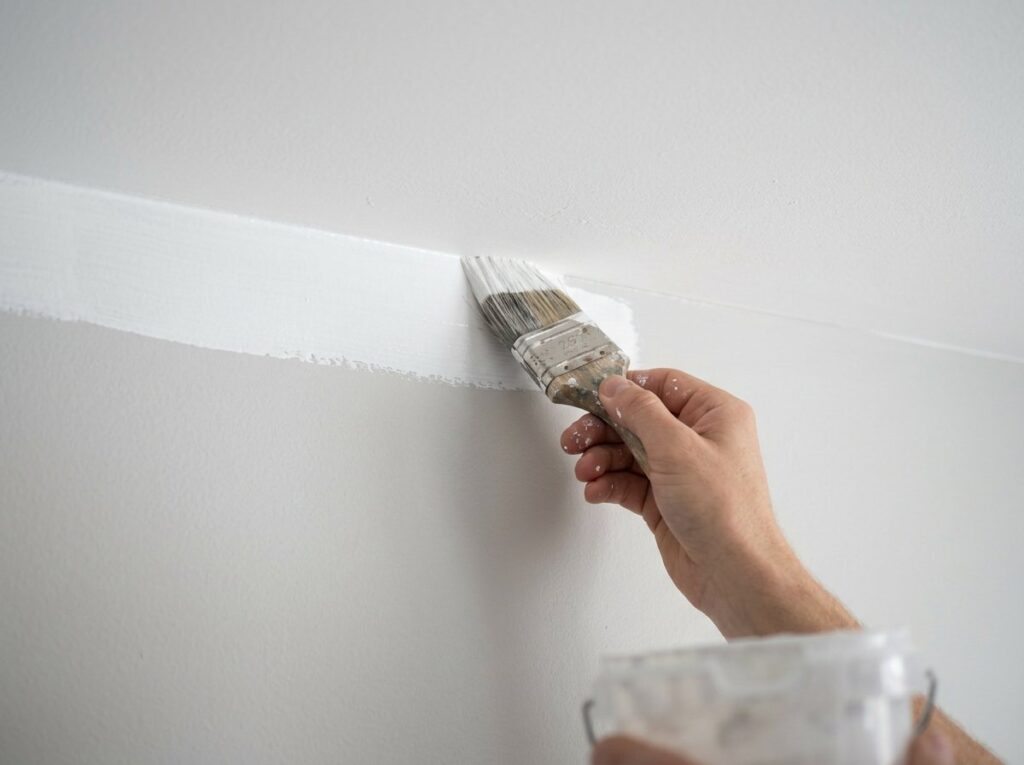
Cutting in means brushing a band along the edges where the roller cannot reach. Do it in stages so the band is still wet when you roll beside it. If you cut in the whole room first, the edges dry and show as a darker frame, a problem painters call picture framing.
- Dip about one-third of the bristles into the paint and tap off the excess.
- Starting a few inches from the corner, brush a band 2 to 3 inches wide along the ceiling edge.
- Drag the brush slowly back toward the corner so the bristles flex and lay a straight line.
- Cut in one wall’s length at a time, then roll that section before moving on.
If the walls are getting painted next, let the ceiling paint lap an inch onto the wall; you will cover it later. For the full room sequence, see our guide on how to paint a room.
Roller and extension pole technique
Choose the right roller cover
Use 3/8 inch nap for smooth drywall and 1/2 to 3/4 inch for textured ceilings. Woven or microfiber covers shed less lint, which matters because loose fibers stand out on a flat white ceiling.
Set up the pole and your stance
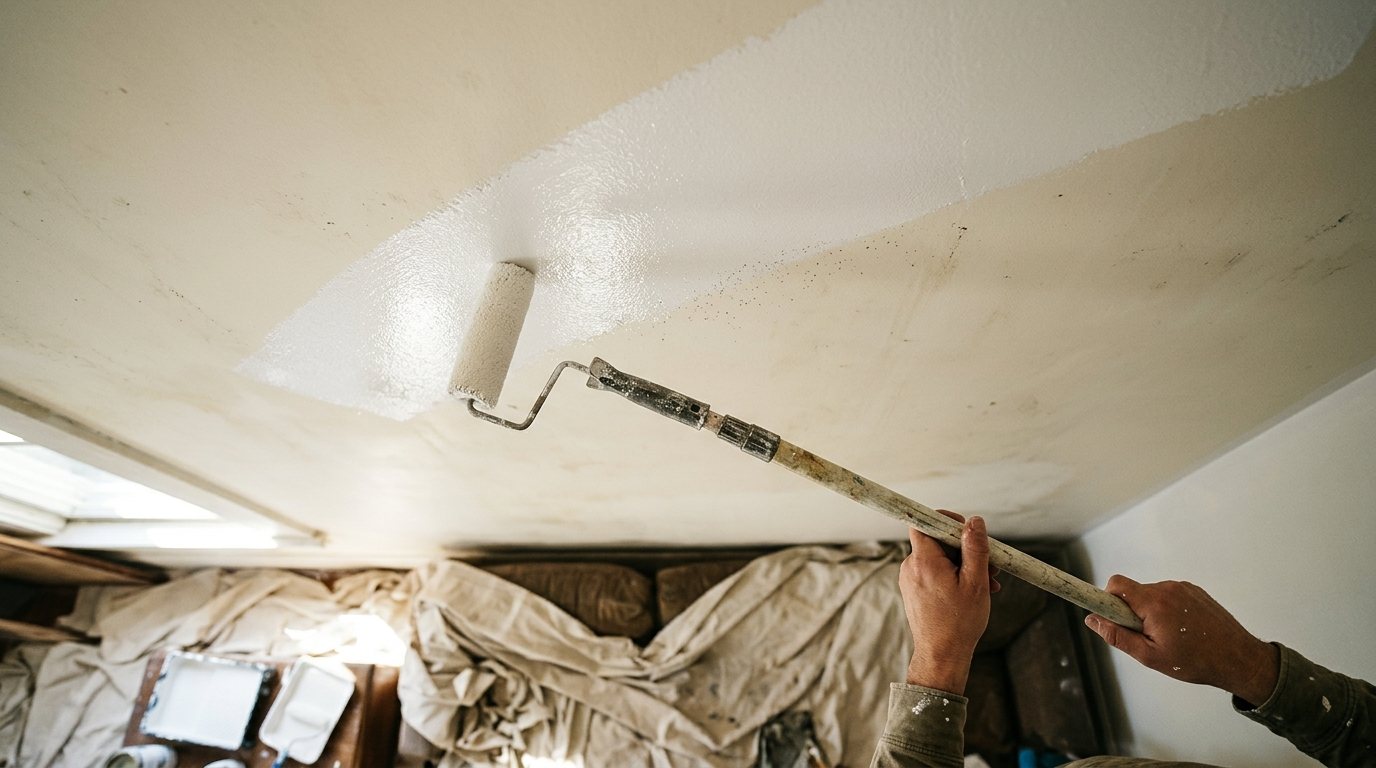
Adjust the pole so you can stand on the floor with your hands between waist and shoulder height. Stand slightly behind and to the side of the roller rather than directly under it, so spatter falls in front of you. A pole is safer and faster than moving a ladder every few feet.
Load lightly and roll in sections
- Roll the cover into the paint, then on the tray ramp until it is evenly loaded but not dripping.
- Start in a corner next to the main window and work away from the light.
- Roll a large W about 3 feet across, then fill it in without lifting the roller.
- Use steady, light pressure. Pressing hard squeezes paint out of the roller ends and leaves ridges.
- Finish with light passes in one direction, parallel to the light from the window, then roll the next section back into the wet edge.
How to avoid lap marks, roller lines and drips
Lap marks appear when you roll fresh paint over paint that has started to dry. Keep a wet edge by working in small sections, never stopping mid-ceiling, and finishing each coat in one session. Turn off ceiling fans and avoid drafts or high heat, which dry the edge too fast.
| Problem | Likely cause | How to fix or prevent it |
|---|---|---|
| Lap marks or stripes | Rolling over partly dried paint | Keep a wet edge; repaint the whole section edge to edge |
| Ridges along roller tracks | Too much pressure or paint | Lighter loading and pressure; lay off with a nearly dry roller |
| Drips and spatter | Overloaded roller, rolling too fast | Load lightly, roll slowly; wipe drips at once with a damp rag |
| Picture framing at edges | Cut-in band dried before rolling | Cut in one wall at a time; roll close to the edge |
| Missed or thin spots | White on white is hard to see | Use color-changing ceiling paint; check with a work light |
| Yellow ring returns | Water stain not sealed | Seal with oil- or shellac-based primer, then repaint |
Pro tip: Aim a bright work light across the ceiling at a low angle, not straight up. It reveals thin areas and ridges while the paint is still wet enough to fix.
Second coat and how much paint you need
One coat may be enough when you refresh a white ceiling with the same white. Plan on two coats if you are changing color, painting over primer or new drywall, or covering stains. Wait the recoat time on the can, then roll the second coat at a right angle to the first.
To estimate paint, multiply the room’s length by its width. A 12 by 14 foot room has a 168 square foot ceiling, so two coats cover about 336 square feet. Angi puts a gallon’s coverage at about 350 to 400 square feet, so one gallon usually handles that room, while textured ceilings soak up more. Our free paint calculator does the math for you.
Pull tape back slowly at a sharp angle. If dried paint bridges the tape, score the edge lightly with a utility knife first.
When to call a pro
Most flat 8 or 9 foot ceilings are a reasonable DIY project. Call a professional if you see any of these red flags:
- A stain that is still damp, growing or sagging, which points to an active leak or failing drywall
- Popcorn texture that has not been tested for asbestos, or texture that falls off when rolled
- Peeling paint in a home built before 1978, which may contain lead
- Vaulted or two-story ceilings that need scaffolding
- Widespread cracking, mold growth or water damage that needs repair first
According to Angi’s ceiling painting cost guide, homeowners typically pay $150 to $400 to have a ceiling painted, with an average around $250, or about $0.50 to $5 per square foot. Smooth ceilings run about $1 to $3 per square foot, painters charge roughly $25 to $75 per hour, and ceiling repairs typically add $440 to $1,500. Doing it yourself usually costs about $100 to $200 in paint and supplies.
Frequently asked questions
Should you paint the ceiling or walls first?
Paint the ceiling first. Drips and spatter land on the walls, and any ceiling paint that laps onto the wall gets covered when you cut in the walls later.
Can you use wall paint on a ceiling?
Yes, if it is flat or matte. It may spatter a little more because it is thinner, so load the roller lightly and wear eye protection. Avoid higher sheens, which highlight every flaw overhead.
Which direction should you roll a ceiling?
Start next to the main window and work away from it, finishing each section with passes parallel to the incoming light. Roll a second coat at a right angle to the first to hide roller lines.
Do you need to prime a ceiling before painting?
Not always. A clean, previously painted ceiling in good shape can go straight to paint. Prime new drywall, patches, water or smoke stains, and old glossy finishes.
How many coats of paint does a ceiling need?
Most ceilings look best with two coats, especially over new drywall, primer or a color change. A same-color refresh over a sound ceiling can sometimes get by with one careful coat.
The bottom line
A smooth ceiling comes down to preparation and pacing. Fix leaks and seal stains with the right primer, use flat ceiling paint and a quality roller on an extension pole, cut in one section at a time, and always roll into a wet edge. Check your work in low-angle light and the finish will look professional.