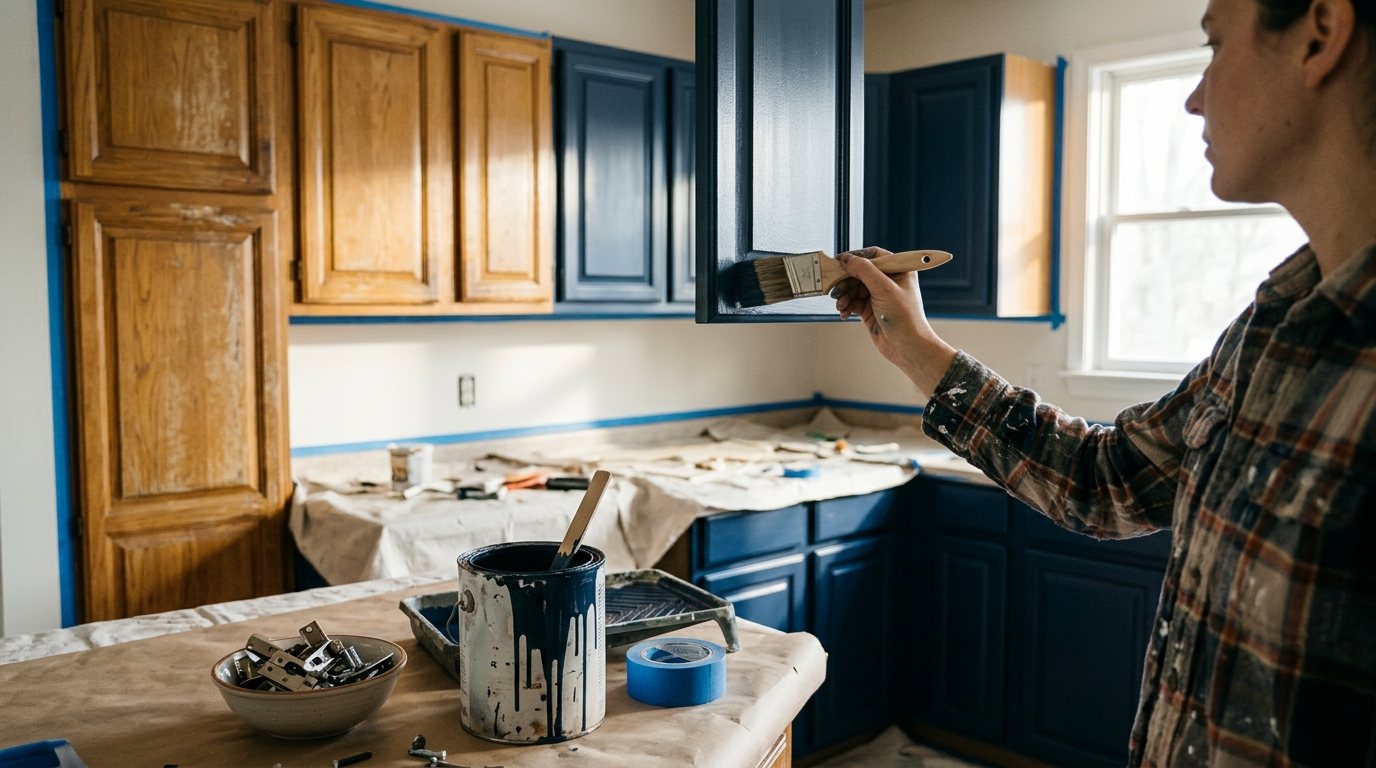
Your cabinet boxes are solid, but the dated oak, yellowed white or scuffed finish makes the whole kitchen look tired. Painting them is one of the biggest visual upgrades you can do yourself, yet it’s also a project where shortcuts show fast: chipped edges around handles, brush marks across the doors and paint that peels off with a fingernail.
This guide covers how to paint kitchen cabinets so the finish actually lasts. You’ll learn how to degrease and sand, which bonding primer to use, how urethane-modified alkyd enamels compare with other paints, whether to brush, roll or spray, how long to wait before you rehang the doors, and what DIY costs compared with hiring a pro.
Quick answer: Remove the doors and hardware, degrease every surface, scuff-sand and wipe off the dust. Apply a bonding primer, then two thin coats of a cabinet-grade enamel such as a urethane-modified or waterborne alkyd, letting each coat dry overnight. Wait several days before rehanging doors and treat the finish gently for about three weeks while it cures.
Before you start: is painting right for your cabinets?
Solid wood, wood veneer and already-painted cabinets are the best candidates. Plastic laminate can be painted, but it needs careful sanding and a strong bonding primer, and the result is less durable. Thermofoil or vinyl-wrapped MDF is a poor candidate, because paint struggles to stay on the slick plastic and peeling wrap can’t be fixed with paint.
Also check the boxes themselves. If doors are delaminating, hinges are stripped or there’s water damage under the sink, fix those first or consider replacement. Paint changes the color, not the condition.
Safety note: Cabinets in homes built before 1978 may have been painted with lead-based paint. Test any old painted finish before you sand it, and follow the EPA’s lead-safe renovation guidance if the result is positive. Ventilate well when using degreasers, oil or shellac primers, and wear a respirator rated for dust when sanding.
Choosing the right paint
Cabinet doors take far more abuse than walls: wet hands, cooking grease, kicks and constant opening. Regular wall paint stays relatively soft and tends to stick to itself where doors meet the frame, so choose an enamel made for cabinets, doors and trim, the same type used in our guide on how to paint trim and baseboards. A satin or semi-gloss sheen is easiest to clean; see paint finishes explained for how sheen affects durability and how flaws show.
| Paint type | Pros | Cons | Best for |
|---|---|---|---|
| Urethane-modified alkyd enamel (water-based) | Hard, smooth finish; levels out brush marks; soap and water cleanup | Longer recoat time; costs more | Most DIY cabinet jobs |
| Waterborne alkyd (hybrid enamel) | Oil-like leveling and hardness, low odor | Slow to dry and cure; color can look different until dry | Brushed or rolled doors |
| 100% acrylic cabinet or trim enamel | Fast drying, low odor, non-yellowing | Softer at first; can feel tacky for days | Quick projects, white cabinets |
| Oil-based (solvent alkyd) enamel | Very hard and smooth | Strong fumes, mineral spirits cleanup, whites can yellow | Experienced painters, well-ventilated spaces |
| Standard wall latex | Cheap, easy to find | Stays soft, chips and sticks | Not recommended |
Tools and materials
- Screwdriver or drill, painter’s tape and a marker for labeling, zip bags for hardware
- Kitchen degreaser or a TSP substitute, scrub pads, buckets and lint-free rags
- Wood filler and a flexible putty knife
- Sanding sponges and sandpaper: 120 to 150 grit for scuffing, 220 grit between coats
- Shop vacuum with a brush attachment and tack cloths
- Bonding primer (shellac-based, oil-based or water-based bonding primer)
- Cabinet-grade enamel, usually 1 to 2 gallons for an average kitchen
- 2 to 2.5 inch angled synthetic brush, 4 to 6 inch mini roller with foam or fine 3/16 to 1/4 inch microfiber covers
- Painter’s pyramids or a drying rack, drop cloths and plastic sheeting
- Optional: HVLP or airless sprayer, respirator and masking film
How to paint kitchen cabinets, step by step
Step 1: Empty the cabinets and remove doors and hardware
Clear the counters and cabinets, then take off every door, drawer front and piece of hardware. Number each door with tape on the hinge side and put a matching piece of tape inside its opening so everything goes back in the same spot. Bag the hinges and screws for each door separately. Set up a work area in a garage or spare room where doors can lie flat and dry undisturbed.
Step 2: Degrease thoroughly
This is the step that decides whether paint sticks. Kitchen cabinets carry a film of cooking grease you often can’t see, especially near the stove and around handles. Scrub every surface with a dedicated degreaser or TSP substitute, rinse with clean water using a damp, not dripping, rag, and let everything dry completely. Regular dish soap often isn’t enough.
Step 3: Repair and fill
Fill dents, gouges and scratches with wood filler, slightly overfilled. If you’re changing to hardware with different spacing, fill the old holes now and drill new ones after painting. Let filler dry fully before sanding.
Step 4: Scuff-sand and remove every bit of dust
You don’t need to sand down to bare wood. The goal is to dull the existing sheen so primer can grip. Sand painted or varnished surfaces with 120 to 150 grit until they look evenly matte, and sand laminate just enough to dull it without cutting through. Vacuum the doors and boxes, then wipe with a tack cloth or a barely damp microfiber cloth.
Step 5: Apply a bonding primer
Bonding primer is the bridge between a slick old finish and your new enamel. Shellac-based primer grips laminate and hardwood and blocks wood tannins and knots from bleeding through. Oil-based primer grips well over old paint and varnish, and water-based bonding primers are easier to use with low odor. Apply one thin, even coat, let it dry as directed, then lightly sand with 220 grit and remove the dust.
Step 6: Paint the boxes and face frames
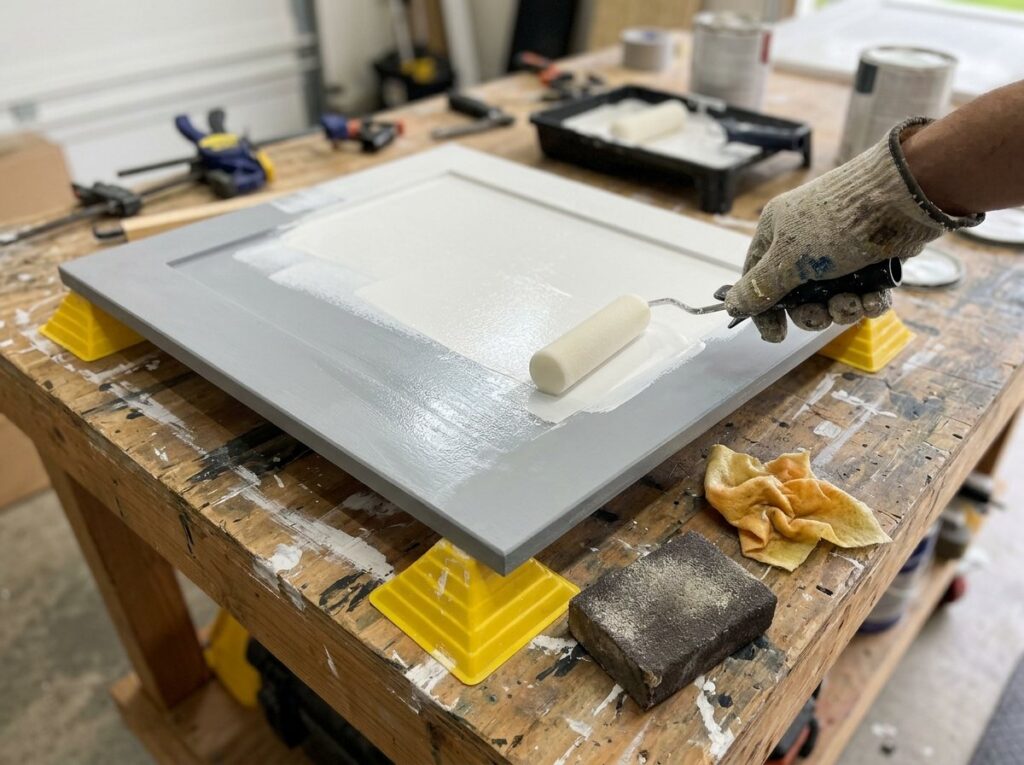
Work in a logical order so you don’t drag your arm through wet paint: inside edges of the face frames first, then the cabinet sides, then the face frame fronts. Use the brush to get paint into corners and the mini roller for flat areas, then lightly drag the brush along the wood grain to smooth the surface. Keep coats thin; heavy coats sag and take much longer to harden.
Step 7: Paint the doors and drawer fronts
Paint the backs of the doors first. Once they’re dry to the touch, flip them onto painter’s pyramids and paint the fronts, so the side everyone sees gets the last and cleanest coat. On raised-panel doors, brush the recessed profiles first, then the center panel, then the rails (horizontal pieces) and finally the stiles (vertical pieces). On flat Shaker-style doors, roll and then lightly tip off with the brush.
Step 8: Sand lightly and apply the second coat
Most cabinet enamels need a longer wait than wall paint before recoating, often overnight, so follow the label exactly. Before the second coat, scuff lightly with 220 grit or a fine sanding sponge to knock down dust nibs, wipe clean and apply your final thin coat. Two coats over primer is normal; dark-to-light color changes may need a third.
Step 9: Let it cure before rehanging
Dry and cured are different: paint can feel dry within hours but take weeks to reach full hardness. Wait at least a few days before you reattach hardware and rehang doors, add small felt or rubber bumpers so doors don’t stick to the frames, and treat the finish gently while it hardens. The consumer group Which? notes that professional-grade cabinet paint takes about three weeks to fully cure, so wipe spills promptly and avoid scrubbing during that time.
Brush and roller vs sprayer
A sprayer gives the smoothest, most factory-like finish and is the fastest way to coat many doors, but it requires masking the entire kitchen against overspray, practice to avoid runs, a respirator and often thinned paint. Brush and roller work is slower but far more forgiving, and modern urethane and waterborne alkyd enamels level out most brush marks as they dry.
| Method | Finish | Skill level | Watch out for |
|---|---|---|---|
| Brush only | Good with a self-leveling enamel | Beginner | Brush marks on big flat panels |
| Brush plus foam or microfiber mini roller | Very good, slight texture | Beginner | Overloading the roller, foam bubbles |
| HVLP sprayer | Excellent, smooth | Intermediate | Thinning paint, slow on large jobs |
| Airless sprayer | Excellent, fast | Intermediate to advanced | Overspray, runs, heavy masking |
Common mistakes that cause chipping
- Skipping the degreaser. Paint over invisible grease is the most common reason cabinet paint peels near the stove and handles.
- Skipping primer on glossy or oil-based finishes. Latex paint over unsanded, unprimed oil paint is a recipe for peeling. Our guide to peeling and bubbling paint explains why.
- Using wall paint. It never gets hard enough for doors that are handled daily.
- Thick coats. Heavy paint sags, drips and stays soft underneath.
- Rehanging doors too soon. Fresh enamel sticks to the frame and peels off when the door opens.
DIY vs pro: what it costs
Doing it yourself mainly costs materials and time. According to Bob Vila’s cabinet painting cost guide, which draws on HomeAdvisor data, cabinet paint typically runs $20 to $80 per gallon, primer about $45 per gallon, and a paint sprayer rental $40 to $120 per day. Plan on several days to more than a week of your own time once you count drying between coats.
The same guide puts professional cabinet painting at a national average of about $895, with most homeowners paying $422 to $1,415. Pros typically charge around $100 per door, and large kitchens or jobs that involve stripping old finishes can reach about $7,000.
When to call a pro
- Your cabinets are thermofoil, peeling laminate or have water-damaged bottoms.
- You want a sprayed, factory-smooth finish but don’t have a space to set up spraying safely.
- The kitchen is large, with many doors, glass fronts or detailed profiles.
- Old paint tests positive for lead, which calls for a lead-safe certified contractor.
- You can’t be without a working kitchen for a week or more.
For an average kitchen, expect professional quotes in the typical $422 to $1,415 range noted above, with more for large kitchens, glass doors or full stripping. Get at least two written quotes that spell out the prep, primer, paint product and number of coats.
Frequently asked questions
Do I have to sand cabinets before painting?
Yes, at least a light scuff-sand. Deglossers and no-sand primers help, but sanding is what gives primer a surface to grip. You don’t need to reach bare wood; just dull the sheen evenly.
What is the best paint for kitchen cabinets?
A cabinet-grade enamel such as a water-based urethane-modified alkyd or waterborne alkyd is the best fit for most DIYers. These level out brush marks, dry hard and clean up with water. Avoid standard wall paint.
Should I paint the inside of the cabinets?
Usually not. Painting the inside adds a lot of work and the shelves get scuffed by dishes. Most people paint the door backs, the face frames and the visible exterior sides.
How long does cabinet paint take to cure?
Most cabinet enamels feel dry within hours but take around three weeks to cure fully. Wait several days before rehanging doors, and avoid scrubbing or heavy use until the finish has hardened.
Can you paint laminate kitchen cabinets?
You can, as long as the laminate isn’t peeling or bubbling. Sand it to a dull matte finish, apply a shellac-based or strong bonding primer, and use a cabinet enamel. Expect it to need more care than painted wood.
How many coats of paint do kitchen cabinets need?
Plan on one coat of bonding primer and two thin coats of enamel. A third coat may be needed for big color changes or when covering dark wood with white.
The bottom line
Painted cabinets last when the prep is right: degrease, scuff-sand, prime with a bonding primer and use a cabinet-grade enamel in thin coats. Give each coat time to dry, wait before rehanging doors and baby the finish while it cures. If you’re also refreshing the walls, use our paint calculator to estimate how much wall paint the kitchen needs.