The milk feels lukewarm, the butter is soft, and the fridge is humming away as if nothing is wrong. Maybe the freezer is still frozen solid while the fresh food section creeps up toward room temperature, or maybe both sides are warm.
This guide helps you protect your food first, then work through every common cause in a sensible order: settings, airflow, door seals, dirty condenser coils, failed fans, frost buildup and the defrost system. You will also find typical repair costs and a simple rule for deciding whether to repair or replace.
Quick answer: Check that the fridge has power and the control has not been bumped to a warmer setting or demo mode. Next, clear any blocked vents inside, make sure the doors seal, and vacuum the condenser coils. If the freezer is cold but the fridge is warm, look for heavy frost on the freezer’s back panel or an evaporator fan that is not spinning, which usually points to a defrost or fan failure that may need a technician.
First, protect your food
Put an appliance thermometer in the middle of the fridge and another in the freezer. The FDA recommends keeping your refrigerator at or below 40°F (4°C) and your freezer at 0°F (-18°C). The dial numbers on many fridges are not actual temperatures, so a thermometer is the only way to know where you stand.
If the fridge has stopped cooling completely, treat it like a power outage. According to FoodSafety.gov, a closed refrigerator keeps food safe for up to about 4 hours, a full freezer holds a safe temperature for about 48 hours, and a half-full freezer for about 24 hours. Perishables such as meat, dairy, eggs and leftovers that sit at 40°F or above for more than 2 hours should be thrown out.
- Keep the doors closed while you troubleshoot.
- Move milk, meat and leftovers into a cooler packed with ice or into the freezer if it is still cold.
- Never taste food to decide whether it is safe.
Troubleshooting table
| What you notice | Likely cause | DIY or pro? |
|---|---|---|
| No light, no sound | No power, tripped breaker or GFCI | DIY |
| Light works, temperatures slowly rising | Setting changed, demo mode, blocked vents | DIY |
| Runs constantly, slightly warm, warm air at the base | Dirty condenser coils or poor clearance | DIY |
| Condensation or frost near the door | Worn or dirty door gasket | DIY |
| Freezer cold, fridge warm, quiet inside freezer | Evaporator fan failed | DIY or pro |
| Thick, even frost on the freezer back panel | Defrost system failure | Pro, or DIY with experience |
| Clicks on and off every few minutes, no cooling | Start relay or compressor problem | Pro |
| Both sections warm, compressor runs nonstop | Refrigerant leak or failing compressor | Pro |
Quick checks you can do in minutes
Power and the outlet
If the interior light is off and you hear nothing, check the plug, then the breaker panel. Some kitchens and garages have fridges on GFCI-protected outlets, so look for a tripped GFCI nearby. Our guides to an outlet that is not working and a GFCI outlet that keeps tripping walk through those checks safely.
Temperature settings and demo mode
Controls get bumped by groceries, kids or cleaning. Set the fridge to around 37°F so normal swings stay below 40°F, and the freezer to 0°F. Many digital models also have a showroom or demo mode that runs the lights and display without cooling. If the display shows “OFF,” “Demo” or a similar indicator, check your manual for the button combination that turns it off.
After any change, give the fridge up to 24 hours to stabilize. A brand-new fridge, or one that has just been unplugged, also needs most of a day to reach temperature.
Blocked vents and overpacking
In most frost-free fridges, cold air is made in the freezer and blown into the fresh food section through vents. A tightly packed freezer or a box pushed against the vent can starve the fridge of cold air. Leave space around the vents and avoid overfilling either compartment.
Clearance and room temperature
Your fridge sheds heat from the back and bottom. Pushed tight against a wall or boxed into cabinetry, it struggles. Check the installation section of your manual for clearances, which often call for about an inch behind and above the cabinet. Fridges in hot garages or very cold spaces can also struggle, since many models are only designed for indoor temperatures.
Door gaskets and level
Close the door on a dollar bill at several points around the seal. If the bill slides out with no resistance, cold air is escaping. Clean the gasket with warm soapy water, since sticky residue can stop it from sealing. If it is torn, flattened or brittle, replace it with the part for your model.
A fridge that leans forward can stop the doors from closing fully. Adjust the front leveling legs so the cabinet tilts very slightly back and the doors swing shut on their own.
Tools and materials
- Two appliance thermometers
- Refrigerator condenser coil brush (long and narrow) and a vacuum with a crevice tool
- Nut driver or screwdriver set for panels
- Flashlight and old towels
- Multimeter for testing fans and sensors
- Cooler and ice for food while you work

Deeper fixes: coils, fans and frost
Safety note: Unplug the refrigerator before removing any panel or touching fans. Never chip frost off the evaporator with a knife, screwdriver or ice pick, since puncturing the coil releases refrigerant and usually ends the fridge’s life. Only an EPA 608 certified technician should open the sealed refrigerant system.
Clean the condenser coils
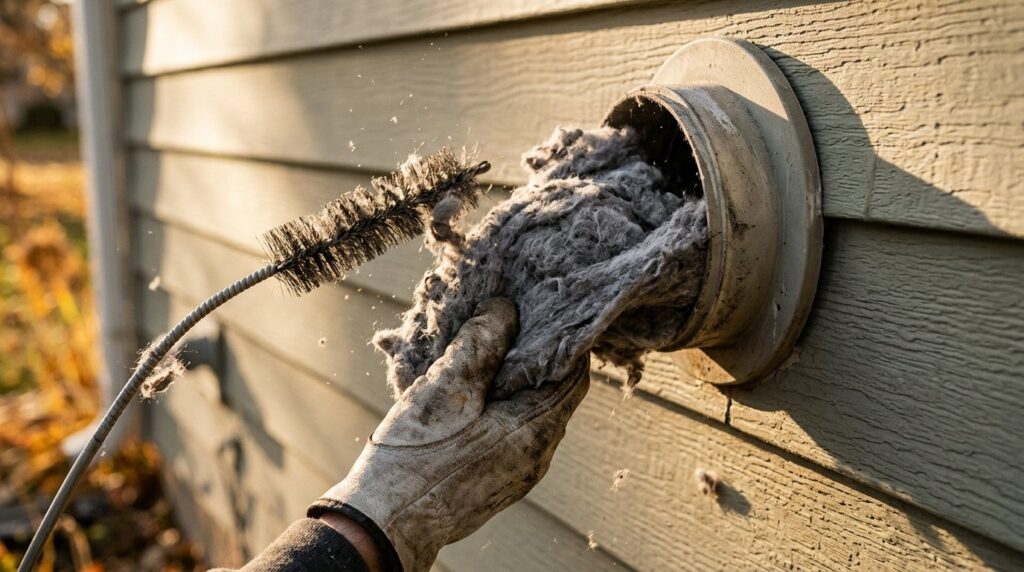
The condenser coils release the heat pulled out of your food. When they are blanketed in dust and pet hair, the fridge runs longer, gets warmer and wears out faster. Depending on the model, the coils sit behind a grille at the bottom front or on the back of the fridge.
- Unplug the fridge and pull it out carefully if the coils are at the back. Protect the floor and watch the water line.
- Remove the kick plate at the bottom front, or the rear access panel.
- Slide a coil brush between the coils and loosen the dust, working gently so you do not bend the tubes.
- Vacuum the loosened debris and the floor beneath.
- Replace the panel, plug the fridge in and give it several hours to recover.
Clean them once or twice a year, and more often if you have shedding pets.
Check the condenser fan
Fridges with coils underneath use a small fan near the compressor to push air across them. With the fridge running, look or listen at the back bottom area. If the compressor is running but the fan is not, unplug the fridge, check for debris, and spin the blade by hand. A blade that turns freely but does not run when powered usually means a failed fan motor, which is an inexpensive part on many models.
Check the evaporator fan
The evaporator fan sits behind the freezer’s back panel and moves cold air into both compartments. Open the freezer and press the door switch. On most models you should hear or feel the fan running. If it is silent, squealing or rattling, it may be failed or blocked by ice. A failed evaporator fan is one of the most common reasons a freezer stays cold while the fridge warms up. Test the motor with a multimeter before buying a part; our guide on how to use a multimeter explains continuity tests.
Frost buildup and the defrost system
Frost-free fridges melt the frost off the evaporator coil several times a day using a defrost heater, a defrost thermostat or sensor, and a timer or control board. If any of those fail, frost keeps building until it chokes the coil and blocks airflow. Remove the freezer’s back panel and look. A thick, even layer of white frost covering the whole coil points to a defrost failure.
A manual defrost buys you time and confirms the diagnosis:
- Move food to coolers.
- Unplug the fridge, prop the doors open and put towels on the floor.
- Let the ice melt naturally. A heavily frosted coil can take 24 hours or more. A hair dryer on low, held well away from plastic parts, can speed it up.
- Dry everything, plug the fridge in and monitor temperatures.
If cooling returns and then fades again within days or weeks, a defrost part has failed. Testing the heater, thermostat and sensor is doable with a multimeter and a model-specific wiring diagram, but many homeowners hand this one to a technician.
Start relay, compressor and refrigerant
If the compressor (the black tank at the back bottom) clicks on, then off again every few minutes without cooling, the start relay or overload may be failing. These are plug-on parts on many models, but diagnosing them safely takes some electrical experience. A compressor that runs nonstop while both sections stay warm, or frost on only part of the evaporator coil, can indicate a refrigerant leak or a failing compressor. Both are sealed system repairs for a licensed pro.
Common mistakes to avoid
- Turning the dial colder and waiting. If a fan or defrost part has failed, a colder setting will not help and may freeze food in the freezer.
- Chipping ice off the coil. One slip can puncture the evaporator.
- Calling it fixed after a defrost. If frost returns, the defrost system still needs repair.
- Ignoring the coils. Dirty coils are cheap to fix and expensive to ignore.
- Keeping risky food. When in doubt about how long food sat above 40°F, throw it out.
When to call a pro
Call an appliance technician if you notice any of these:
- A burning smell, scorch marks or a tripping breaker when the fridge starts.
- The compressor clicks repeatedly, hums without starting, or runs nonstop with no cooling.
- An oily residue near the tubing at the back, or patchy frost on the coil, which can indicate a refrigerant leak.
- Frost comes back after a manual defrost.
- Both compartments are warm and the quick checks did not help.
According to HomeAdvisor’s refrigerator repair cost guide, most repairs typically cost $300 to $1,000, and diagnostic fees typically run $60 to $100, often credited toward the repair.
| Repair | Typical cost range |
|---|---|
| Diagnostic fee | $60 to $100 |
| Door gasket | $50 to $440 |
| Thermostat | $100 to $440 |
| Control board | $80 to $800 |
| Compressor | $200 to $450 |
Repair or replace?
The same guide notes most refrigerators last about 10 to 15 years. A common rule is to repair if the quote is no more than half the cost of a comparable new fridge. If your fridge is near the end of that range and needs a compressor or sealed system repair, replacement usually makes more sense.
Frequently asked questions
Why is my freezer cold but my fridge is warm?
In most frost-free fridges, the fresh food section gets its cold air from the freezer. A failed evaporator fan, a frosted-over coil from a defrost failure, or a stuck air damper can block that airflow while the freezer stays cold. Check the fan and look for heavy frost behind the freezer panel.
Why is my refrigerator running but not cooling?
The most common causes are dirty condenser coils, a failed condenser or evaporator fan, and frost buildup on the evaporator coil. If those check out, the start relay, compressor or refrigerant charge may be the problem, which calls for a technician.
Will unplugging my refrigerator reset it?
Unplugging for a few minutes can clear a glitch in an electronic control. Unplugging with the doors open for 24 hours or more melts frost from the evaporator, which often restores cooling temporarily if the defrost system has failed.
How long does a refrigerator take to get cold?
Plan on up to 24 hours after setup, a long unplug or a manual defrost. Check with a thermometer before you restock perishables, and add food gradually so the fridge is not fighting a full load of warm items.
Is it worth fixing a refrigerator that is not cooling?
Often yes for fans, gaskets, coils and defrost parts, which are moderate repairs. For a sealed system or compressor repair on a fridge more than about 10 years old, replacing it is usually the better value.
The bottom line
Protect your food first with a thermometer and the 40°F and 0°F targets, then work from simple to complex: power, settings, vents, door seals, condenser coils, fans and frost. Most warm fridges are fixed with cleaning or an inexpensive fan or defrost part, but a clicking compressor or suspected refrigerant leak is a job for a certified technician.