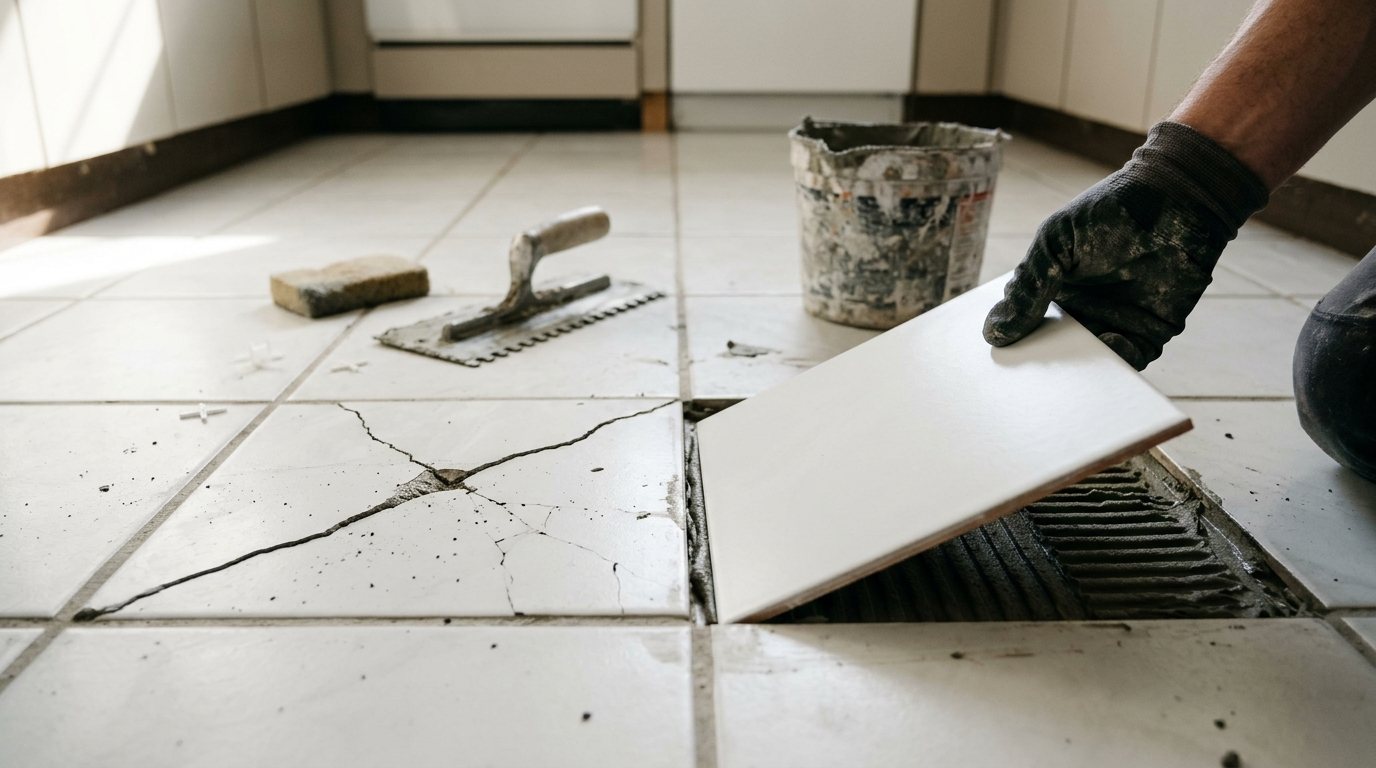
A dropped pan, a heavy toolbox or just years of foot traffic, and now one tile in your kitchen or bathroom floor has a crack running across it. It catches socks, collects dirt and, if it is loose, can let water reach the floor underneath. The good news is that you do not need to retile the room: one tile can be removed and replaced in an afternoon, plus a day for the mortar to cure.
This guide shows you how to decide between repairing and replacing, how to find a matching tile, and how to remove the grout, break out the damaged tile without harming its neighbors, prep the base, set the new tile in thinset and regrout. It also covers the warning signs that the crack is a symptom of a bigger problem.
Quick answer: Cut out the grout around the cracked tile, break the tile from the center outward with a hammer and chisel, and scrape the old mortar flat. Set a matching tile in fresh thinset so it sits level with its neighbors, let it cure (often about 24 hours), then regrout and seal. If several tiles are cracked in a line or sound hollow, fix the cause under the floor first.
Repair or replace? Start with the cause
A single tile with a hairline crack from an impact can sometimes be repaired with clear two-part epoxy and touch-up color, a fix Bob Vila estimates at about $10 to $40 in materials. Replace the tile if it is loose, shattered, missing pieces or has a crack wide enough to catch dirt, because those will keep getting worse.
Before you do either, figure out why it cracked. Tap the tiles around it with a screwdriver handle or coin. A solid click means good bonding; a hollow sound means the tile has lost its bond. Cracks that run through several tiles in a line usually point to subfloor movement or a crack in a concrete slab, and a new tile set over that will crack again.
| What you see | Likely cause | What to do |
|---|---|---|
| One tile cracked, solid sound, near where something was dropped | Impact | Replace the tile (or epoxy a hairline crack) |
| Cracked tile sounds hollow, neighbors also hollow | Poor mortar coverage or lost bond | Replace tile and check neighbors; reset any loose ones |
| Crack continues across several tiles in a line | Slab crack or subfloor joint moving | Pro assessment; may need a crack isolation membrane |
| Cracks in the middle of the room, floor feels bouncy | Subfloor too flexible | Stiffen the floor framing or subfloor before retiling |
| Cracked tile near a tub, toilet or sink with soft spots | Water damage underneath | Find the leak and repair the subfloor first |
How to find a matching tile
Check the garage, basement and attic for leftover tile from the original job; many builders and installers leave a partial box behind. If there is none, take a large piece of the broken tile to a tile store and compare color, size and, just as important, thickness. A thinner or thicker tile will sit high or low unless you adjust the mortar bed.
If the tile is discontinued, consider borrowing one from a hidden spot, such as under the refrigerator, inside a closet or under a vanity toe kick, and putting a close match there instead. You can also turn the problem into a design feature with a deliberate accent tile. Match the grout too: bring a grout chip to the store or use a color card.
Tools and materials
- Replacement tile of the same size and thickness
- Grout saw or oscillating multi-tool with a carbide grout blade
- Painter’s tape to protect neighboring tiles
- Hammer and a cold chisel or carbide-tipped chisel
- Drill with a masonry or tile bit (optional, to weaken the tile first)
- Stiff putty knife or margin trowel to scrape old mortar
- Thinset mortar suited to your tile, plus a bucket and mixing paddle
- Notched trowel sized for the tile
- Tile spacers and a short straightedge or level
- Grout, rubber grout float, sponge and bucket
- Grout sealer (for cement grout)
- Safety glasses, work gloves, knee pads and an N95 or better respirator
- Shop vacuum
Safety note: Breaking tile throws sharp shards, so wear safety glasses and gloves the whole time. Cement-based mortar and grout contain crystalline silica, and NIOSH notes that cutting, grinding and drilling these materials can release dust that damages the lungs, so use hand tools or wet methods where you can, wear a respirator and vacuum with a fine filter rather than sweeping. Before chiseling in a bathroom, check whether the floor has electric radiant heat, since the heating wires sit just under the tile. In older homes, if the tile sits on black adhesive, have it tested for asbestos before disturbing it.
How to replace a cracked floor tile step by step
Step 1: Remove the grout
Run painter’s tape along the edges of the surrounding tiles to protect them. Cut out the grout on all four sides with a grout saw or an oscillating tool, working slowly and keeping the blade centered in the joint. Go as deep as you can; removing the grout fully is what stops the cracking tile from pushing against its neighbors when you break it out.
Step 2: Break out the damaged tile
- If the tile is hard porcelain, drill a few holes through its center with a tile bit to weaken it.
- Place the chisel near the center of the tile and tap with the hammer to break it into pieces.
- Work outward, holding the chisel at a low angle and always pointing it toward the middle of the tile, never toward a neighbor.
- Lift out the pieces. Near the edges, slide the chisel under fragments and pry gently toward the center.
Step 3: Clean and prepare the base
Scrape off the old thinset with a chisel or margin trowel until the surface is flat and there is room for the new tile plus a fresh layer of mortar. Dry fit the new tile: it should sit slightly below its neighbors before mortar goes in. Vacuum all dust. If the backer board or underlayment is cracked, soft or wet, repair it before going further.
Step 4: Mix and apply thinset
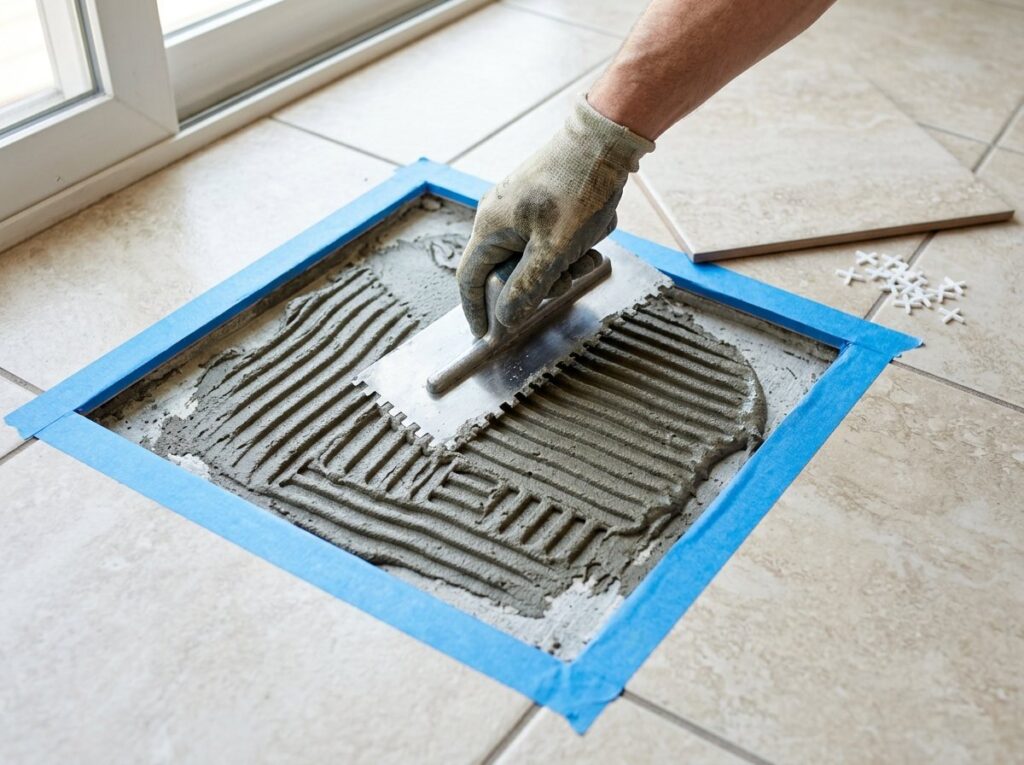
Use a thinset rated for your tile and location; dense porcelain usually calls for a polymer-modified mortar. Mix it to a smooth, peanut-butter consistency, let it rest for the time on the bag and remix. Spread it on the floor with the notched side of the trowel, combing in one direction, and back-butter the tile with a thin flat coat so the whole underside is supported. Many premixed tile adhesives are not rated for floors, so check the label before using one.
Step 5: Set and level the tile
Press the tile into place with a slight back-and-forth motion to collapse the trowel ridges. Center it with spacers so the joints match, then lay a straightedge across it and its neighbors and press or lift until it is flush. Clean any thinset out of the grout joints with a toothpick or margin trowel before it hardens. Keep off it until the mortar has cured; many standard thinsets call for about 24 hours, but follow the bag.
Step 6: Regrout and seal
Mix a small batch of matching grout: sanded grout for joints about 1/8 inch and wider, unsanded for narrower joints. Pack it into the joints with a rubber float held at an angle, working diagonally across the joints. After it firms up slightly, wipe the haze off with a barely damp sponge, then buff with a dry cloth.
Once the grout has cured as the label directs, seal cement grout to help it resist stains. Our guide on how to clean grout can help the surrounding joints match the new grout.
Common mistakes to avoid
- Prying against neighboring tiles. Always angle the chisel toward the center of the damaged tile.
- Leaving grout in the joints. Any grout left behind transfers force to the next tile when you break out the old one.
- Skimping on mortar coverage. Hollow spots under a new tile are a common reason replacements crack again.
- Ignoring a pattern of cracks. If cracks line up, the floor underneath is moving.
- Grouting too soon. Grouting before the thinset cures can shift the tile or trap moisture.
When to call a pro
Call a tile setter if:
- Several tiles are cracked, loose or hollow, especially in a line
- The floor feels bouncy or there are signs of water damage or a soft subfloor
- The floor has radiant heat, natural stone or large-format tiles
- You cannot find a match and want help blending or relocating tiles
Replacing a single tile is usually a short job, but it often needs two visits because the mortar must cure before grouting. HomeAdvisor’s flooring installation guide puts flooring installer rates at about $60 to $120 per hour, and Bob Vila’s tile cost guide lists floor tile labor at roughly $5 to $14 per square foot for larger areas. If you are retiling a wet room anyway, compare options in our guide to the best waterproof flooring for kitchens and bathrooms.
Frequently asked questions
Can you replace one floor tile without removing others?
Yes. Removing the grout around the damaged tile isolates it, so you can break it out and replace it without disturbing the rest of the floor. The key is to work from the center outward and protect the neighboring edges.
Can I just fill a cracked tile instead of replacing it?
For a fine hairline crack in a tile that is still solidly bonded, a clear two-part epoxy and matching touch-up color can hide it. It will not fix a loose or hollow tile, and the repair is usually visible up close. Replacement is the long-term fix.
How long after replacing a tile can you walk on it?
Stay off the tile until the thinset cures, often about 24 hours for standard mortar, then grout it. After grouting, most products ask for light traffic only for another day or so, and longer before wet cleaning or sealing. Check both product labels.
Why do floor tiles crack for no reason?
Tiles that crack without an impact usually have a problem underneath: poor mortar coverage, a flexible subfloor or a moving crack in the concrete. Tap the area for hollow sounds and look for cracks that line up across tiles.
What if I cannot find a matching tile?
Borrow a tile from a hidden area such as under an appliance and put a close match there, or use a deliberate contrasting accent. Some tile stores can also help you track down discontinued lines.
The bottom line
Replacing a cracked floor tile is a manageable DIY job if you take your time: remove all the grout, break the tile from the center, scrape the base flat, set a matching tile in fresh thinset so it is flush, then regrout and seal. Protect your eyes and lungs, check for radiant heat first, and call a pro when cracks line up or the floor underneath feels soft, because the tile is only as good as what supports it.